Terrain Template and Tutorial - Bunker
Posted on Monday May 08, 2017 at 05:00pm in Tutorials
![]() - by Iain Wilson
- by Iain Wilson
A couple of weeks ago, I shared a template for building a small minehead structure from foamcore, cardboard and the Maelstrom's Edge terrain sprue. For something a little larger and more impressive-looking, I have put together a new template for a bunker. This builds on the basic design of the minehead to keep some design consistency on the table.

 You will need some 5mm or 6mm foamcore (either will work, although the roof piece will overhang the sides slightly with the thinner foamcore), some thin cardboard - around .5mm thick, PVA glue, and the Maelstrom's Edge terrain sprue. A sharp pencil, a steel ruler and a sharp craft knife will get you by for tools.
You will also need the building template, which can be downloaded from here: Bunker.pdf
From the terrain sprue, the following components are used: one of the small doors (either will do), three shutter windows*, two corner braces, the square hatch, and six of the long support struts.
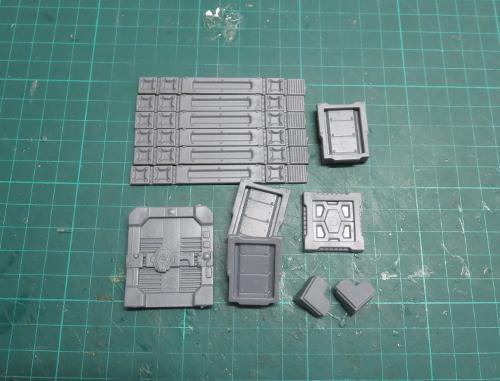
*There are only two shutter windows on a sprue, so you'll need to grab one of the windows from a second sprue. Alternatively, you can build the bunker without the rear window in order to stick to just a single sprue.
Print out the building template, and cut out the panels using steel ruler and knife.
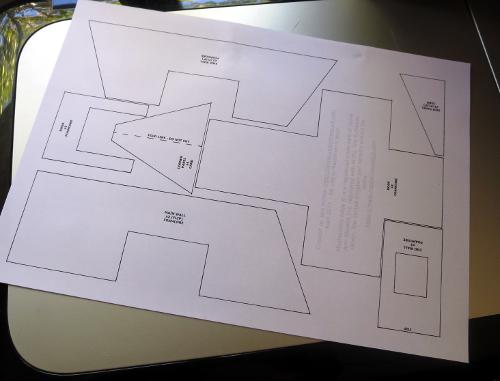
You can then lay the panels on top of the foamcore and card (the parts are labelled for which material they need) and draw around them with the pencil to transfer the outlines. The solid lines on the parts show where you need to cut.
You need multiples of some parts - the quantity required of each is listed on the part. Some parts also say '(flip)' after the quantity. For these, trace the panel once and then flip it over to trace the second. When cutting foamcore with a knife, the back of the piece can wind up a little rougher than the front, so flipping the template makes sure that you have two 'clean' surfaces for the outside of the building.
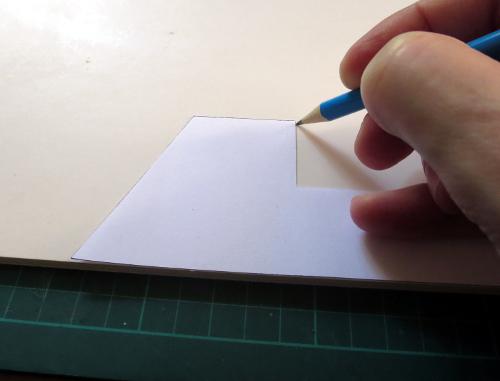
Once you have traced all of the parts onto the appropriate material, use the ruler and knife to cut them all out. If you have never cut foamcore before, don't try to cut through in one go. Lay the ruler along the line you want to cut, and then make several passes with the knife, working deeper as you go and being careful to keep the knife blade vertical so you don't wind up with a bevelled edge. If you're building the single-sprue version mentioned above, don't cut the rectangle out of the middle of one of the end wall pieces.
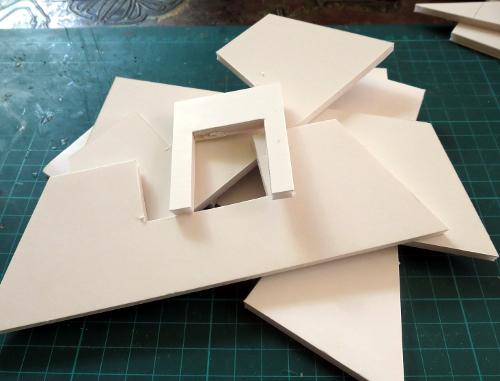
The end wall pieces lean inwards, so need to be bevelled at the bottom. Use a knife to cut an angled strip out of the back of the bottom of each of the wall parts.

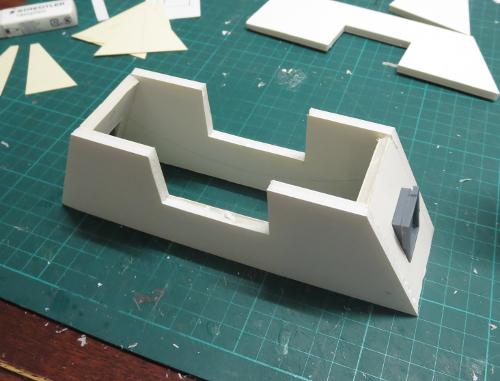
There is a protrusion on the bottom of the shutter window that needs to be removed. Trim off with a knife or file it down on each of the windows so that the bottoms of the windows are flat. You can then glue the windows into the end walls. They sit angled out at the top, as below. The outer edge of the window frame sits flush with the wall at the bottom, while the back edge of the window should sit against the outside edge of the hole at the top.

Take the two side wall pieces and two of the end walls and glue then together. The end walls sit inside the side walls, as shown below:
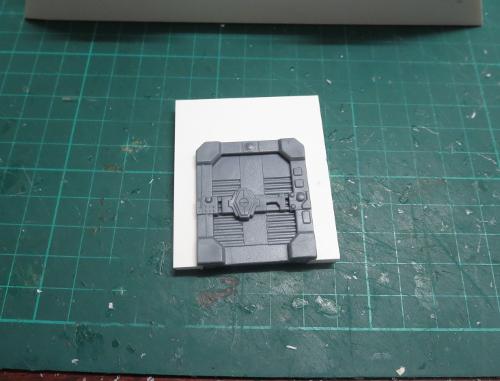
Glue the door into the door section.
Then take the door section, the third end wall and the two main walls and glue them together. The end wall sits inside the main wall sections, while the door goes across the other end, outside the main wall as below:
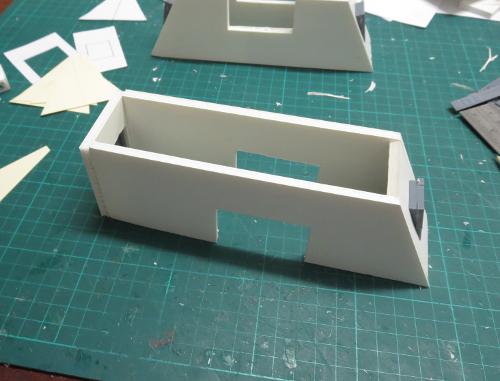
The two sections then slot together, and can be glued in place to form a t-shape.

Glue on the side panels. These sit flush with the front of the door panel, to cover over the cut edge of the foamcore and to reinforce the joint.
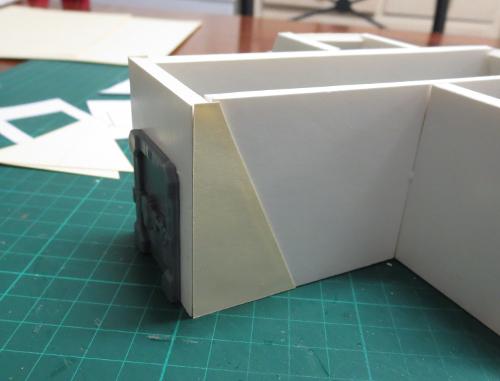
Fold the corner panels along the middle fold line, so that they form a 90-degree angle. These can then be glued in place into each of the inner corners of the 't'. You can use superglue for this step to speed things up a little, as there is no exposed foam to worry about. This helps to give the structure some rigidity while the PVA glue sets, and also covers over any messiness or gaps where the walls join.
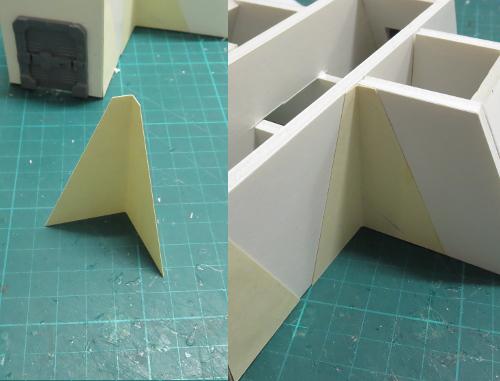
The roof can now be glued in place.
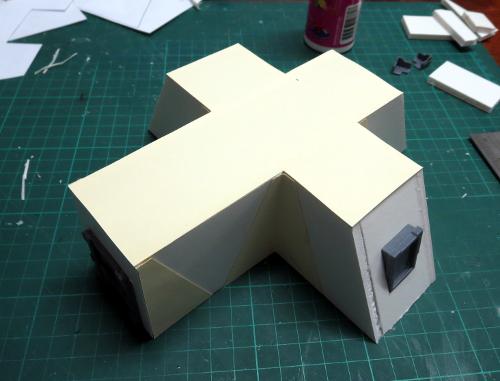
Glue the two corner braces in place on the roof corners above the door.

Take the support struts and cut off the vent and rivet strip from the end with a knife.
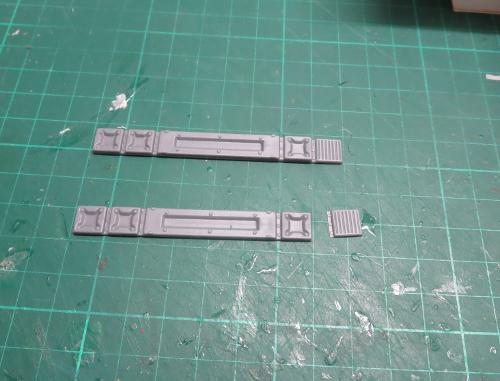
These are then glued onto the end walls, covering over the cut ends of the foamcore. The vent piece goes on the roof, with the rivet strip butting up against the top of the support strut.

Finally, glue the square hatch onto the roof, in the middle of the 't', and your bunker is complete.

Let the glue set, and it's ready for painting.

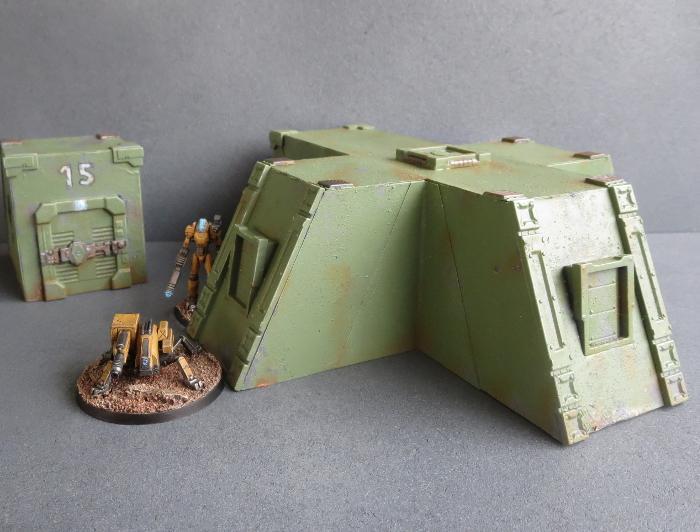
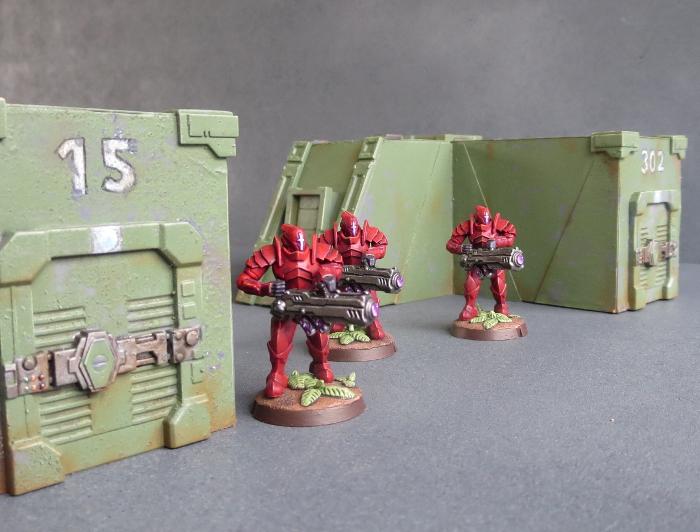
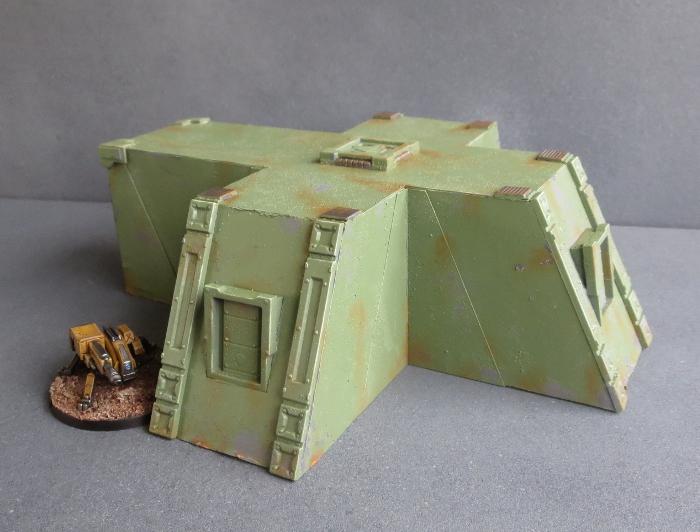
For variation, you could replace the door section with another angled end wall, leaving access through the roof or underground, for more of a fortified pillbox. Or you could stack the small minehead building on top, making a balcony above the door section for troops to stand on.
If you want to try it for yourself, you can grab the template from here and the Maelstrom's Edge terrain sprue from the webstore here. I'd love to see what others can come up with to do with the design, so as always please feel free to share your creations on the Comm Guild Facebook page!
For other Maelstrom's Edge modeling articles, including tutorials and walkthroughs of a wide range of different building and miniature projects, check out the article roundup here.
