Epirian Sentinel Bot Conversion Tutorial & Unit Card
Posted on Monday Apr 09, 2018 at 05:00pm in Tutorials
- by Iain Wilson
The Epirian faction in Maelstrom's Edge includes a number of fantastic robot options, and with some careful planning it's even possible to field an all-robot force. I went for an almost all-robot force with my starter force, including a lone Journeyman to lead them. I thought it might be fun to add some robot 'not-contractors' to the army for some extra firepower, and so turned to a conversion that I put together for a spotlight on the Scarecrow kit some time ago, which I dubbed a Sentinel bot.
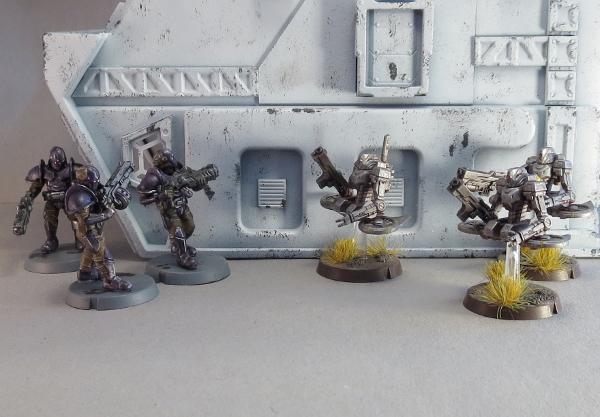
The Sentinel uses parts from the Scarecrow, Drone and Contractor kits.
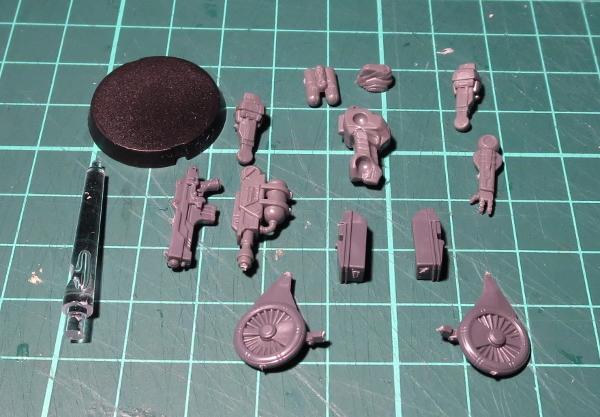
From the Scarecrow:
- Head
- Torso
- Left Arm
- Left Shoulder
- Right Shoulder
- Fuel Tanks
- Chemtech Sprayer
- Base
From the Drone kit:
- Turbines
- Turbine-mount side pieces
- Flight Stem
From the Contractor kit:
- Maglock Assault Rifle
Start by gluing the two Drone side pieces together and attaching the turbines, as below. There is a small ridge of plastic on the inside faces of the side pieces that needs to be shaved or filed down so that they sit flat against each other. A couple of pieces of spare sprue serve nicely to hold the turbines in place while the glue sets.

Take the Scarecrow torso and cut through it just below the top of the hips.
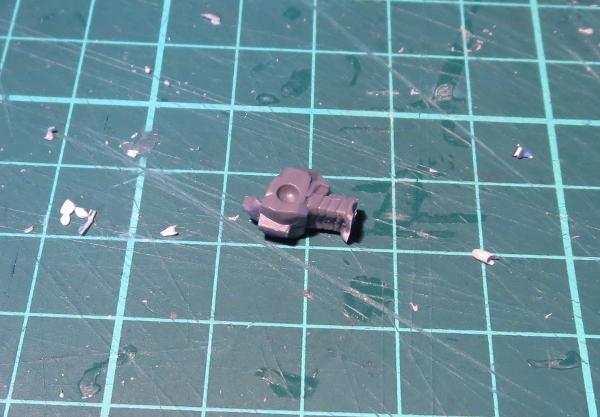
The torso then glues neatly into the middle cavity created by the two side pieces.
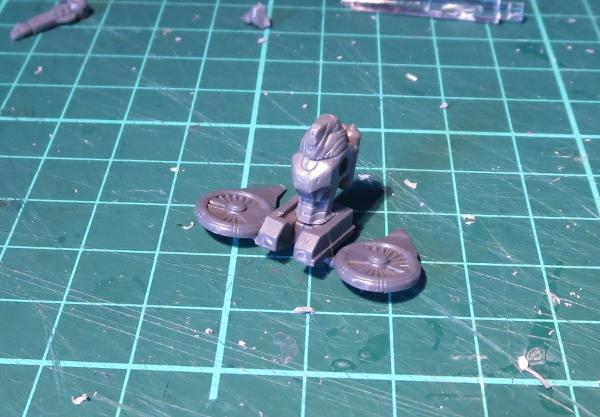
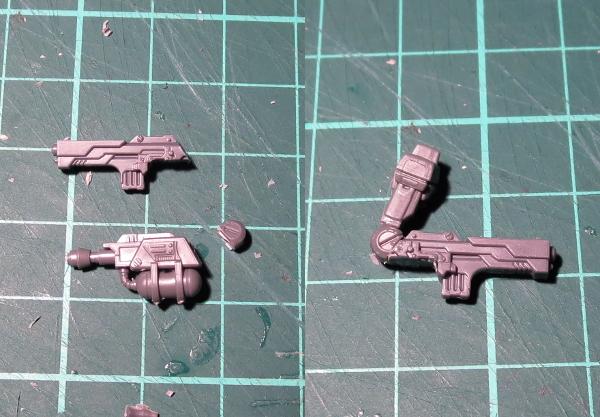
The left arm is assembled as normal. For the right, cut the pistol grip off the maglock rifle, and also cut the back of the rifle at an angle matching the ridge along the top, as shown below. The take the chemtech sprayer and cut the elbow joint off the back. This is glued onto the back of the maglock rifle, and then the weapon be glued to the upper arm.
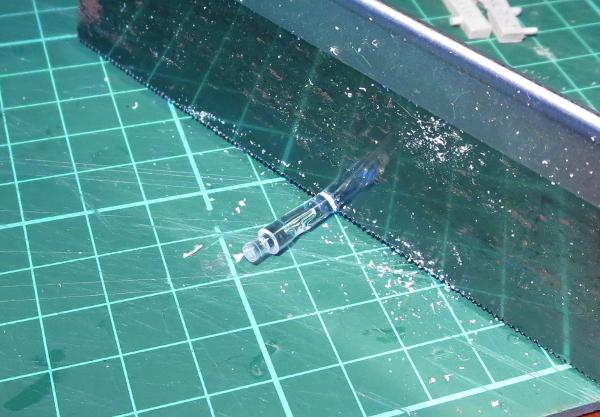
To keep the unit with a similar silhouette to the contractors they are replacing, take the flight stem and cut it a little above halfway up.
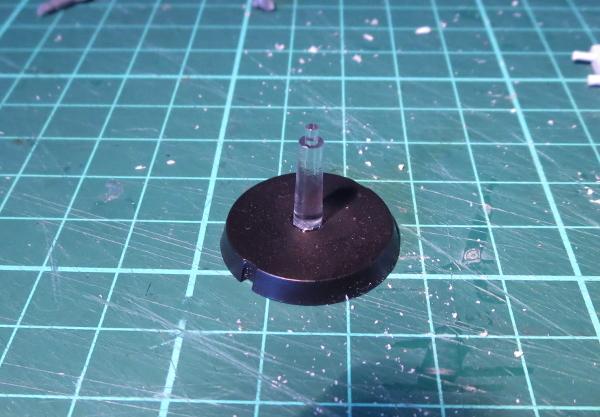
This is then glued to the middle of the base. You will need to drill a corresponding hole in the bottom of the turbine assembly for the peg on the top of the flight stem.
With head, tanks and arms glued in place, the bot can be glued onto the flight stem (or left separate if you're planning on spraying a basecoat, or just if you're a messy painter!) ready for paint.

Scale shot with a Contractor:
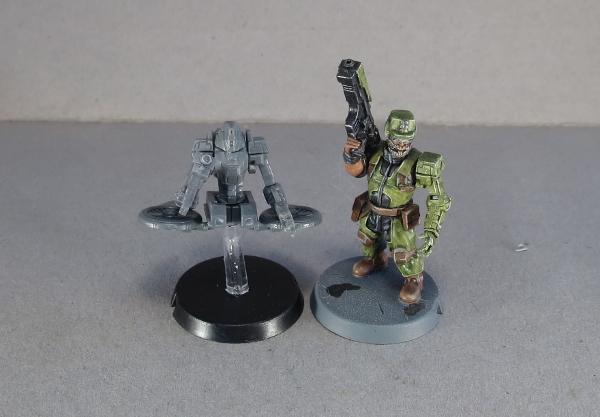
Painted up, the Sentinels are ready to take to the field. I have added a command unit to one model to create a unit leader, and equipped the third with the auxilliary grenade launcher version of the Maglock Rifle.
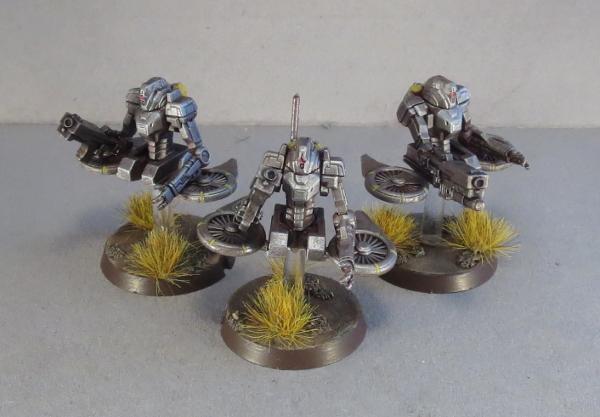
You can find an (unofficial) rules card for fielding Sentinel units in the Force Builder section of the Maelstrom's Edge website here. Alternatively, you could just field them as Contractors.
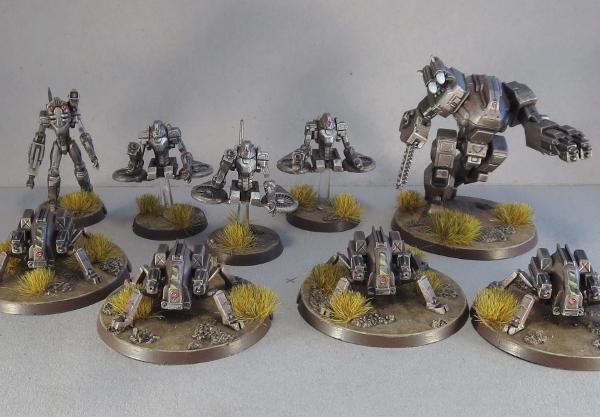
To pick up kits you'll need to create your own Sentinel unit, visit the Maelstrom's Edge webstore here.
We love to see what people are doing with their models, so be sure to also visit the Comm Guild Facebook page!
For other Maelstrom's Edge modeling articles, including tutorials and walkthroughs of a wide range of different building and miniature projects, check out the article roundup here.
