Modeling Spotlight: The Angel Hellblaster (or 'Fun with Resin!')
Posted on Monday Nov 13, 2017 at 05:00pm in Tutorials
- by Iain Wilson
The Karist Hellblaster is the first of a range of resin models for Maelstrom's Edge, to help flesh out the factions with some more fun and freaky options. This week, I'm having a look at some modeling options with this great little kit.
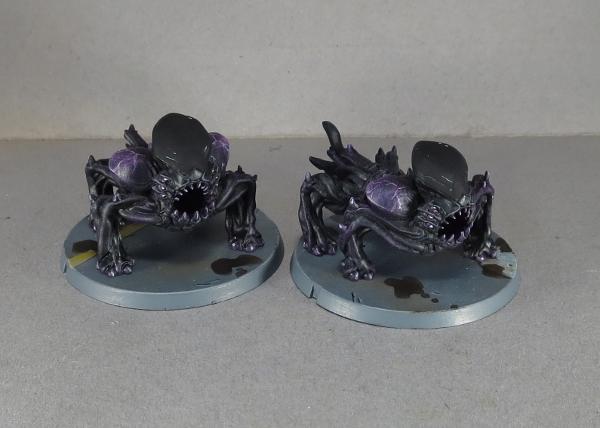
The Hellblaster comes in a pack of two variants, with slightly different posing and tail tentacles.
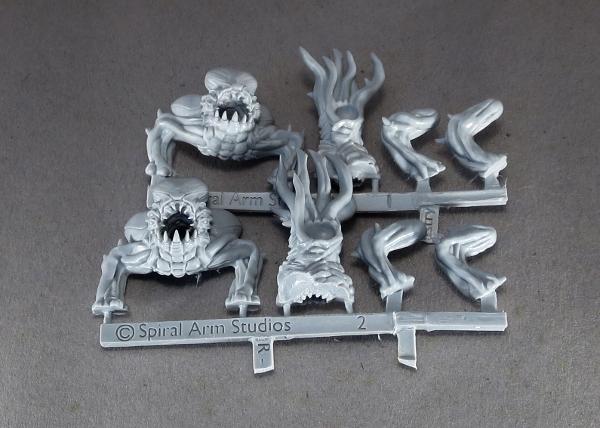
Assembly is really easy - It's always a good idea to wash resin models in warm, soapy water before assembly, to clean off any mould release residue (this may affect paint adhesion, otherwise), then cut off the sprue and trim off any mould lines, glue the head piece to the front of the torso, and the rear legs into their sockets. There's a little posability in the rear legs, as the sockets allow for some movement.
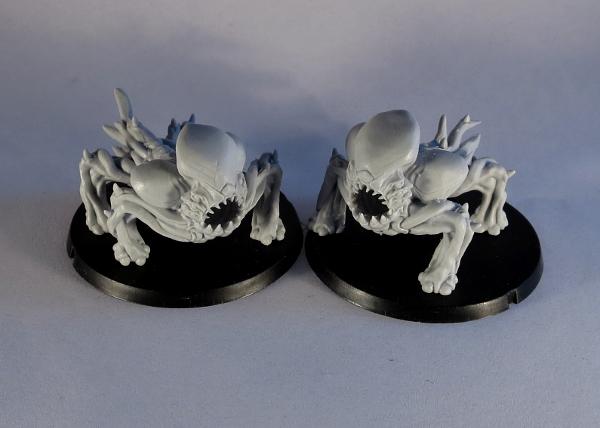
If you want to branch out a little from stock poses, one of the really fun aspects of resin models is that they can be easily reshaped. Drop the part you want to reshape into some hot water for a minute or so. When the part has had time to warm through, fish it out and quickly bend it into the shape you want. Then pop it into some cold water to set it in that shape.
Obligitary safety warning: It's always a good idea to avoid breathing in fumes from heated resin or plastic, so boil your miniatures somewhere with good ventilation. And use an appropriate tool (tweezers, long-nose pliers, etc) to fish the resin pieces out of the hot water and handle hot parts with care.
Using this method, you can add a bit of a bend to the Hellblaster's torso, to give it more of a sinuous, in-motion appearance.
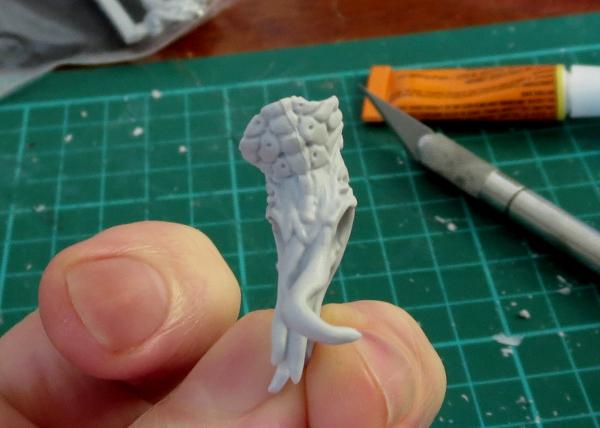
You can also reposition legs and tentacles to suit. It helps that angels don't have a fixed skeletal structure - tentacles are fairly forgiving when it comes to finding appropriate poses!
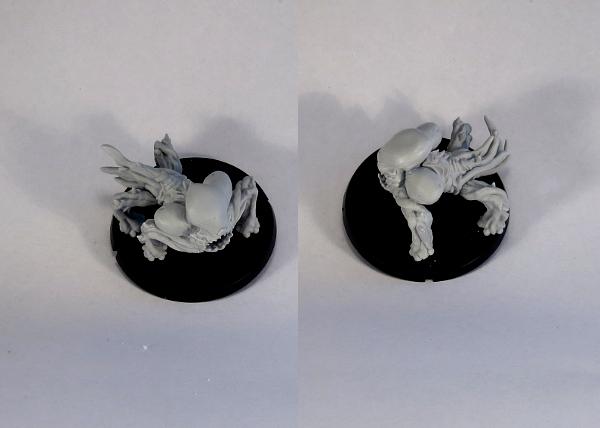
Note that as an alternative to the hot water technique above, you can achieve a similar result using a hair dryer to heat smaller parts. As above, through, handle with care to avoid damage to both the parts and yourself.
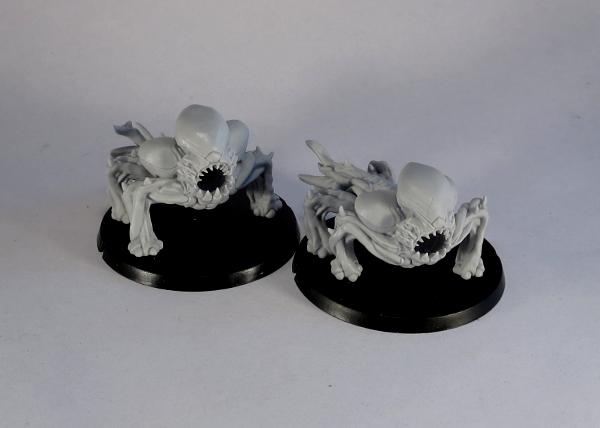
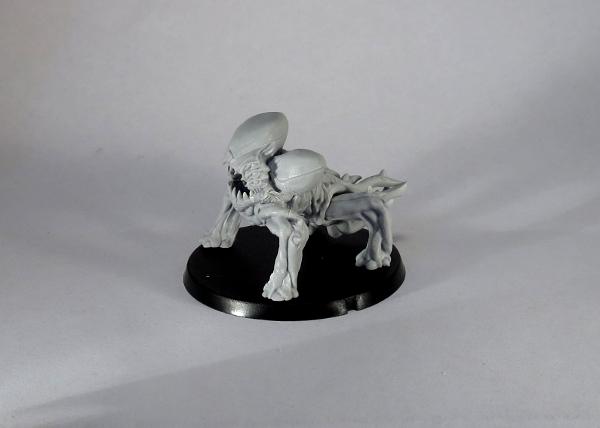
With a little more work, you can carefuly cut through in between the cheek sacs and the tops of the forelimbs, to allow for more movement. In the below example, I have stretched the legs out to raise the head and shoulders up higher, and added a slight forwards arch to the angel's back.
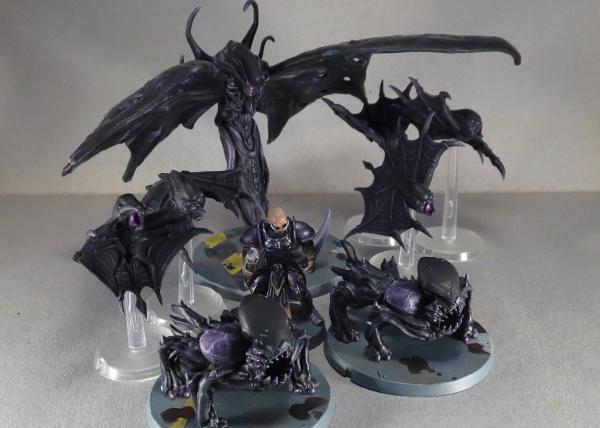
Painted up in an appropriate colour scheme, the Hellblaster fits in nicely with the Mature Angels and Minnows to add a bit more variation to an angel force.
But where to from here?
There's no reason to stop with basic reposing! Angels love nothing more than experimenting with different forms, and while the Hellblaster is a form forced on them by Karist Keepers, it also makes a good base for some different angel types, like the (very work-in-progress) examples below:
Snake-angel, converted using the front of a Hellblaster, the wings from a Minnow and a wire armature covered in 'green stuff' putty.
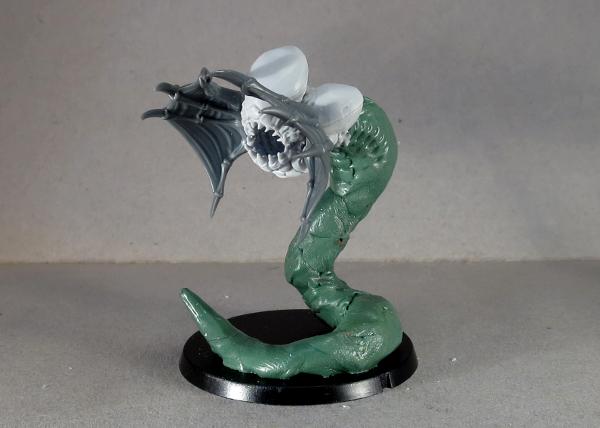
The snake body will be smoothed out with another layer of putty, and some exterior tentacles added for some detail.
Shrike-angel, converted using a Hellblaster body with the forelimbs and energy sacs cut off, and the wings from a Minnow.
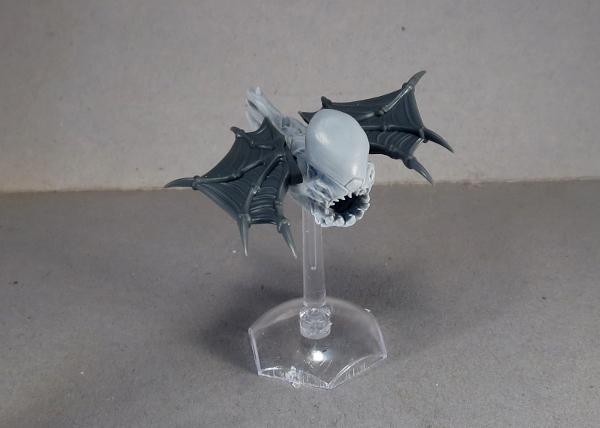
The body of the Hellblaster is considerably bigger than a Minnow's, so this guy has a much smaller wing to body ratio, but I think it's still close enough to work, particularly given angels fly using gravitic manipulation and the wings are largely just for show anyway. As with the snake, this model still needs some putty work to join the wings properly to the torso and fill in the flat spots where the legs and sacs were removed. I may also trim down the crest a little, to something more closely resembling the head of the Minnow.
Or, for something completely different, how about angel cavalry?
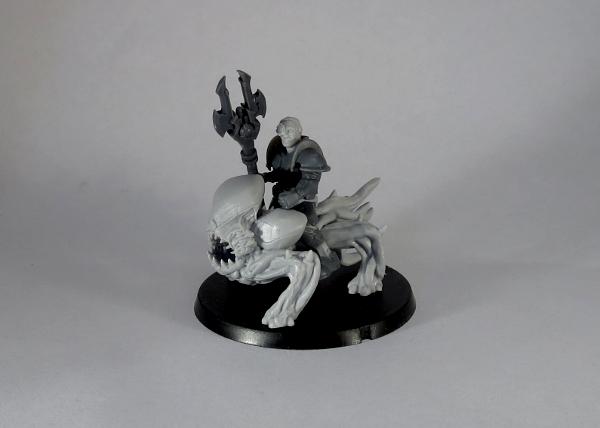
(Ok, this one's stretching the background a little - chances are that anyone trying to ride an angel wouldn't be riding it for very long... But it was too fun an idea to not have a play with it!)
To build your own shape-changing army of alien doom, you can pick up the Hellblaster along with the rest of the Maelstrom's Edge range from the webstore here. As always, feel free to share your creations on the Comm Guild Facebook page!
For other Maelstrom's Edge modeling articles, including tutorials and walkthroughs of a wide range of different building and miniature projects, check out the article roundup here.
Tags: angel conversion converting hellblaster modeling spotlight tutorial walkthrough
