Terrain Spotlight: Tissue Box Building
Posted on Friday Jun 19, 2020 at 05:00pm in Tutorials
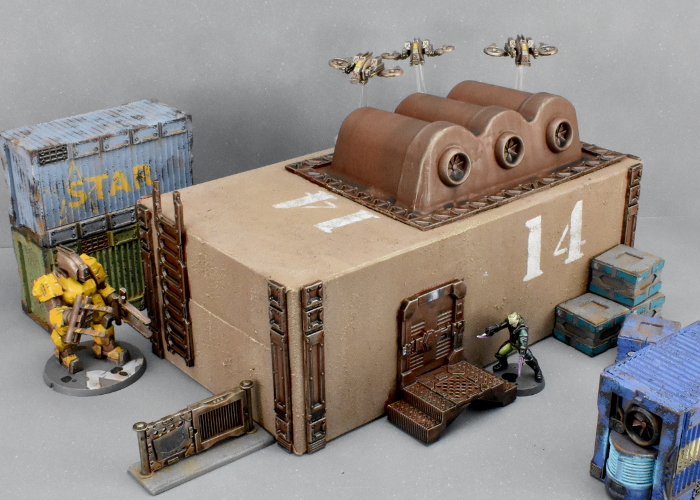
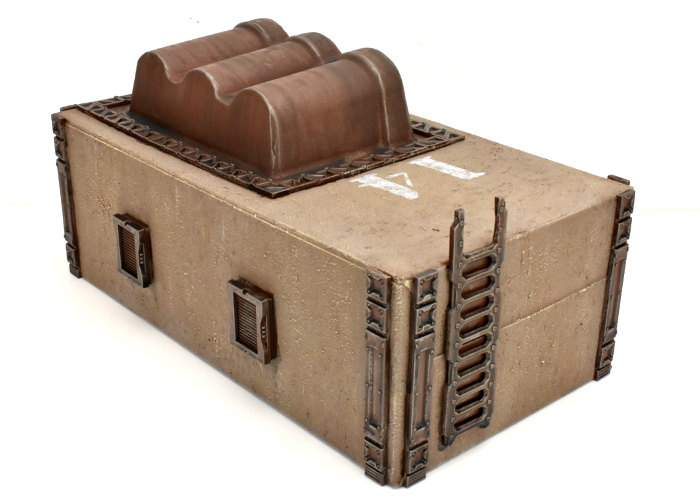
The big joy of the Maelstrom's Edge terrain sprue, for me, is that wandering around the house turns up an endless wealth of items just waiting to be turned into wargaming scenery by slapping some bits on it and painting it up. This week, I turned my attention to the recycling bin, where a humble tissue box was just calling out to be saved from the weekly rubbish collection. With a little cutting and gluing, and a lick of paint, I had Atmospheric Modification Plant #14 ready for the table!
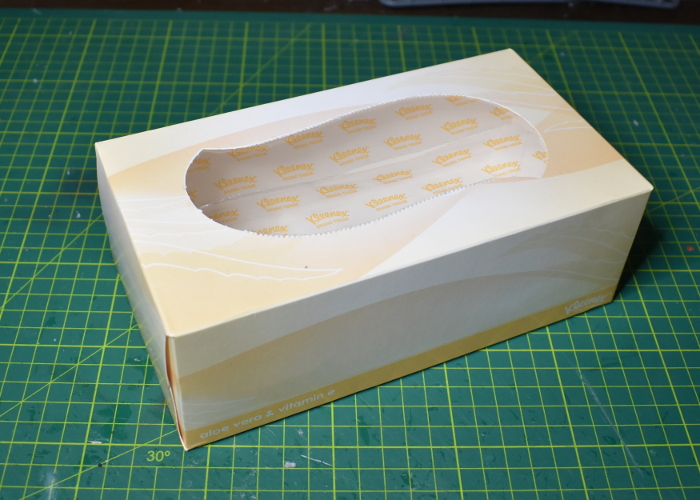
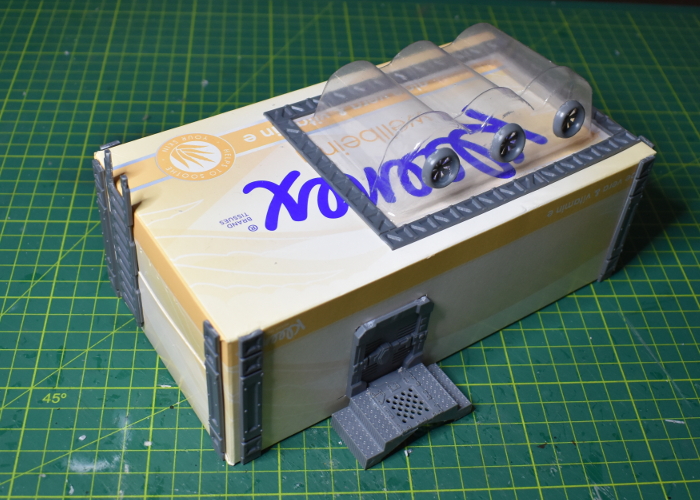
The base for this building, as mentioned above, was an empty tissue box. This isn't as robust a structure as some of my builds, but it does have the benefit of being inexpensive and with two small children in the house we have an endless supply of these to hand!
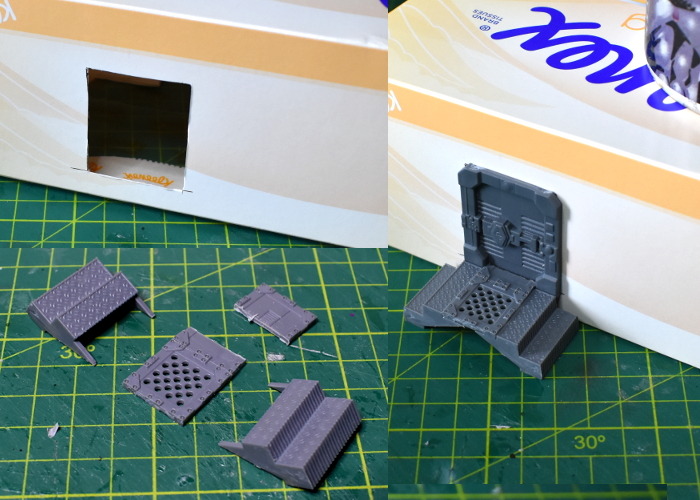
As I just intended this to be a quick and easy build, I didn't get too carried away with detailing. To be a functional building, however, it obviously needed a door. I used a door from Terrain Sprue #1 for this one, as the height of the doors on that sprue fit the box sides better than those on the newer sprue. I cut a hole for the door frame using an exacto knife, and also built a small landing using a couple of stair pieces and floor grates from Terrain Sprue #2, with a little trimming to make the solid floor piece fit neatly into the bottom of the doorway.
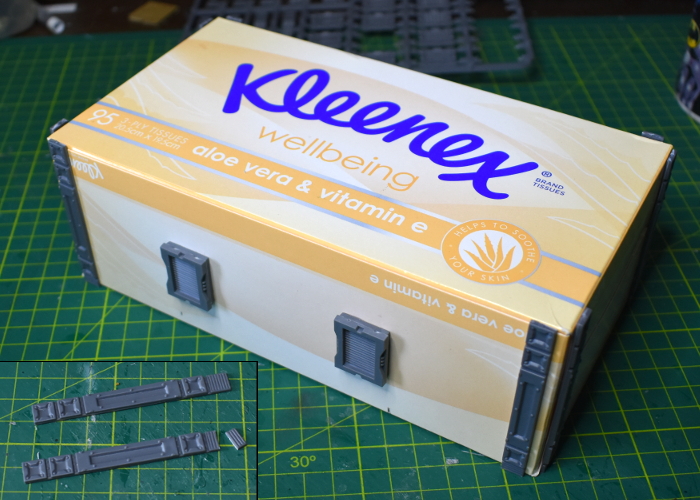
I added some reinforcing struts from Terrain Sprue #1 on the walls of the building, setting them in slightly from the corners. As well as adding some visual detail, this served to conceal the sides of the box flaps on the ends. The original sprue's struts were perfect for this as the vent pieces on the end could be easily trimmed down to make the strut the right height.
Spaced along the rear wall, I also added a pair of vent windows from Terrain Sprue #2. To avoid weakening the box structure any more than absolutely necessary, I just glued the windows directly onto the wall, rather than cutting holes and insetting the frames.
Plain box-shaped buildings are easy to build, but can be a little boring on the table, so I decided to add some raised detail on the roof to break it up a bit. Rummaging on my desk, I found a blister packet from some tubs of glitter that I picked up for a different project, that seemed like it would be an interesing shape with some paint on. So I glued it to the roof, added some industrial reinforcing struts from Terrain Sprue #1 around it to conceal the edges of the plastic, and also glued on some exhaust fans from Terrain Sprue #2.
Having cover on the roof is obviously not much use if models can't get up there, so I also added a ladder from sprue #1 on the end wall. I trimmed top couple of rungs off to make an extended handrail above the roof surface, to make that clamber onto the roof a little easier.
I could have also added some corrugated cardboard or textured plasticard to the remaining roof surface, but chose not to for this build. Instead, I painted the cardboard parts with some textured brown paint, drybrushing with a little bone. The metal parts were painted dark brown, drybrushed with Citadel Boltgun metal and then washed with Army Painter Strong Tone. With a little final detail work, the building looked like this:
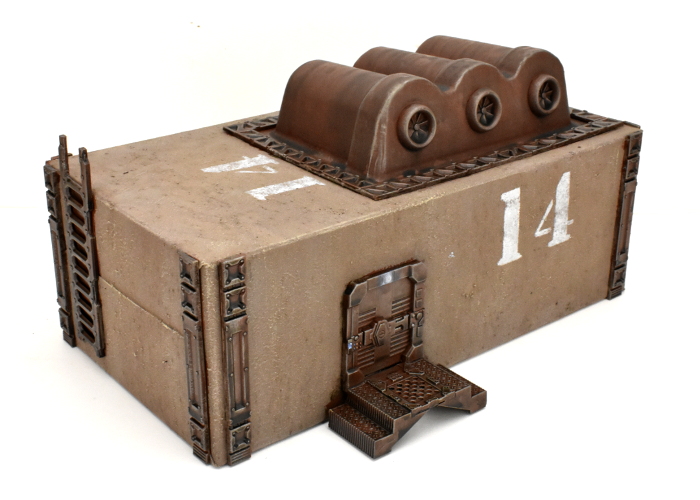
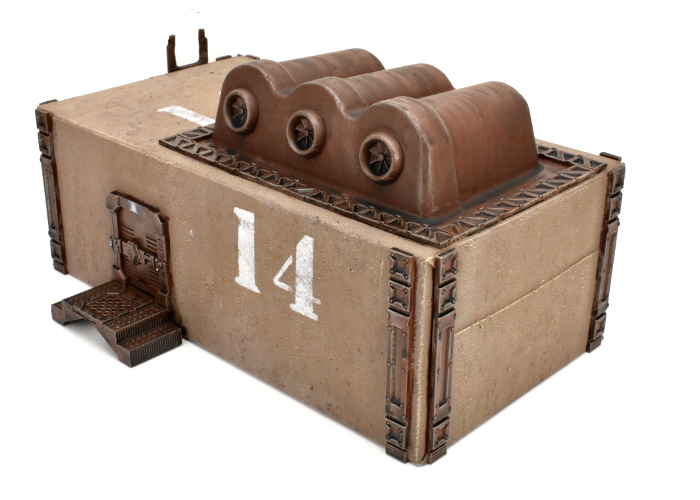
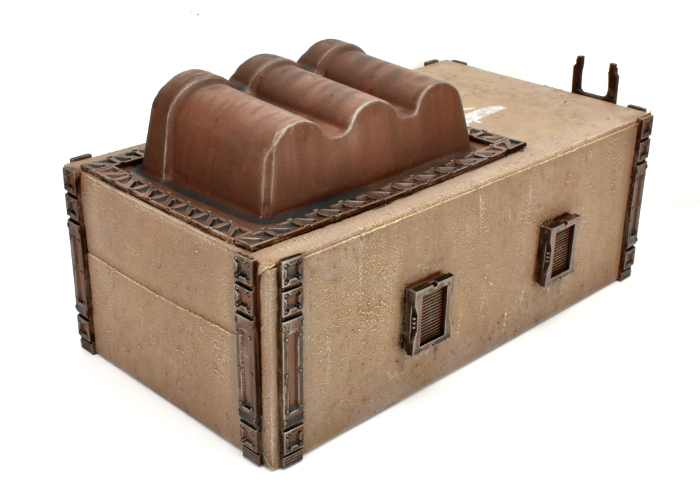
To build your own tissuebox building, you can pick up the terrain sprues along with the rest of the Maelstrom's Edge model range from the webstore here.
For other building ideas, modeling tutorials, army spotlights and conversion walkthroughs, check out the Hobby section of the Maelstrom's Edge website here.
What are you working on? We would love to see what your models and terrain in the Comm Guild Facebook group!
Tags: buildings modeling spotlight terrain terrainsprue walkthrough
Like this? Like us on facebook to see more...
