Entries tagged [bases]
Modeling Tutorial: Simple Marble Bases
Posted on Thursday Mar 05, 2020 at 05:00pm in Tutorials
While painted sand is quick and easy for finishing off your miniature bases, sometimes it's nice to go with something a little more unusual to set your force apart. This week, I'm sharing a handy tutorial for creating super-simple marble bases, with no painting required!
The marble texture comes from adhesive vinyl. This can be bought by the roll in a huge range of different patterns and colours, so you can find something to suit whatever colours you are painting your army.
The vinyl is made to stick to a wide range of different surfaces, and so you can just peel off the backing and stick it directly to the base. Over time, however, the adhesive around the edges can sometimes dry out, causing the edges of the vinyl to peel up. To avoid this, apply a thin circle of superglue around the perimeter of the base top.
Cut a piece of vinyl slightly larger then the base, and then peel off the backing paper from the vinyl, and press the base into place on the sticky side.
Remove the excess vinyl by cutting carefully around the edge of the base with a sharp knife.
If the cut vinyl winds up a little rough, you can smooth it out by sanding lightly around the edge with a fine grade sandpaper.
Finally, attach your model using superglue.
The final model, ready for the table. If you prefer a less clean look, you can also glue some gravel or other rubble on top of the vinyl, or drybrush on some brown to dirty things up a bit.
That's it for this week. Tune in next week for more modeling-related shenanigans!
You can pick up the Maelstrom's Edge model range from the webstore here.
As always, feel free to share your models and terrain, or ask any Maelstrom's Edge- or hobby-related questions on the Comm Guild Facebook page!
For other Maelstrom's Edge modeling articles, including tutorials and walkthroughs of a wide range of different building and miniature projects, check out the Hobby section of the Maelstrom's Edge website here.
Tags: bases modeling painting tutorial walkthrough
All Your Base, Tutorial Part 2
Posted on Wednesday Dec 07, 2016 at 05:00pm in Tutorials
![]() - by Iain Wilson
- by Iain Wilson
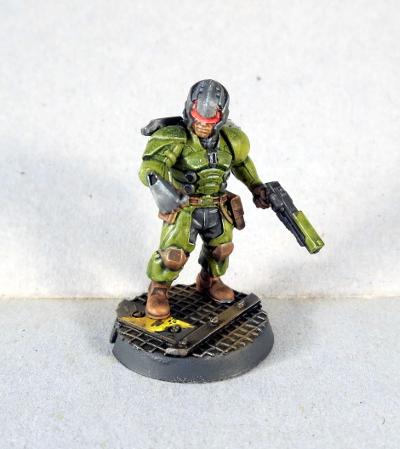
Last week, we looked at a few different ways to pretty up your bases, with industrial, rocky and snowy themes. This time around, I want to share a couple of my favourites - metal decking and ferns.
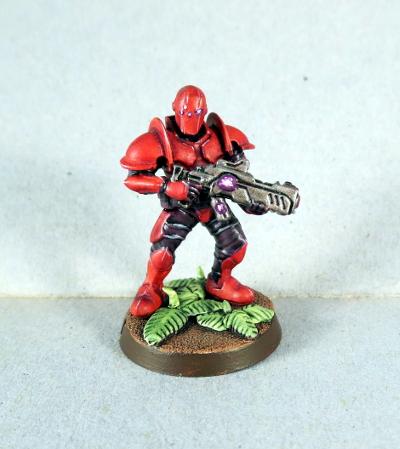
Ferns
I start these off by building up some texture on the base, partly to look pretty and partly because the putty ferns that you're about to make will stick better to the layer of green stuff than to the plastic base.
Mix up some green stuff*, and press a 1-2mm thick layer all across the top of the base. Don't worry about fingerprints at this stage - they'll go away at the next step.
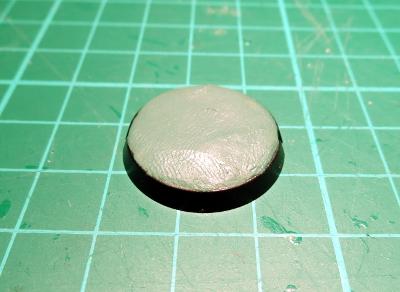
*For the uninitiated, 'green stuff' is the common name for a product called 'Kneadatite', which is a 2-part epoxy putty used for sculpting. I'll be putting together some basic green stuff tutorials in the near future.
Next up, take an old toothbrush and press the bristles into the green stuff to create a rough, pebbly texture all over the putty.
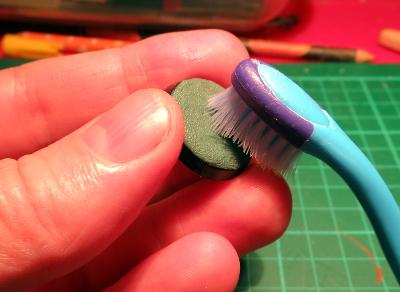
When you're done, it should look something like this:
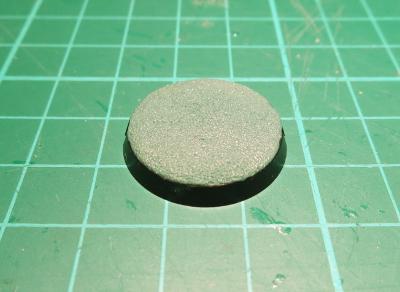
Once the putty is set, mix up a small amount and break off a 2-3mm ball. Roll this between your fingers into a teardrop shape, and press it onto the base just enough for it to stick there.
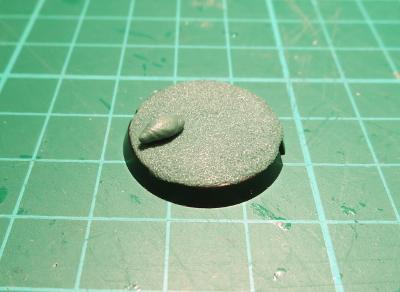
Using a round clay shaper, the back end of a hobby knife, or some other smooth, round tool, roll the teardrop out until it is mostly flat. For best effect, it should be flatter and thinner at each end than in the middle - this helps give the leaf some shape and make it look less like it's just laying flat on the ground.
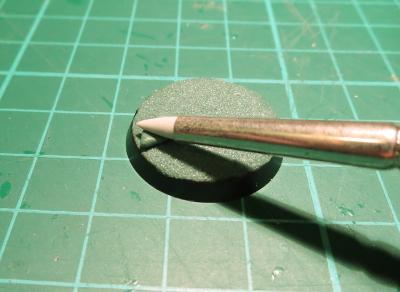
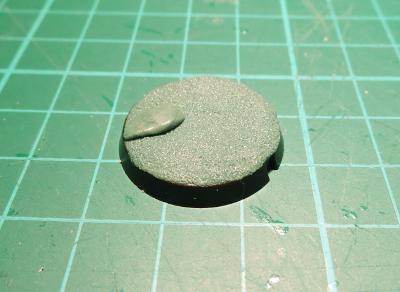
Now take a hobby knife and score a series of parallel lines down each side of the leaf, running from about half a millimetre out from the centre line and angling slightly forwards out to the edges of the leaf.
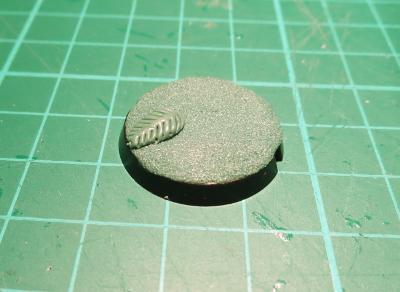
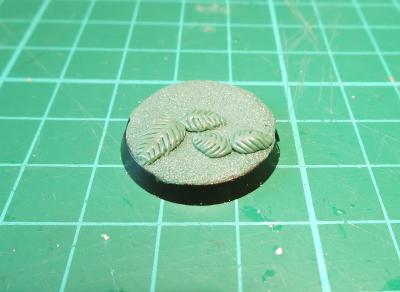
Repeat for a second leaf, butting the back end of the leaf up against the first and running it off in a different direction. Create other plants around the base using the same technique, remembering to leave room for the model's feet.
Note: If you're a little unsure about getting the placement right to fit a model on there, one easy way to give yourself a guide is to press the model's feet into the ground layer of putty before it sets.
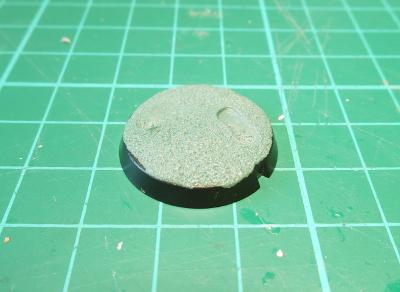
Alternatively, you can draw around the model's feet with a micro pen, or dot with paint wherever the model's feet will go.
Once your first layer of leaves have set, you can build up your plants by adding extra layers on top, leaving each layer to set before moving on to the next.
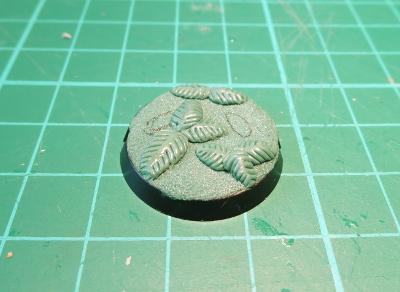
When you're happy with the buld-up of your ferns, roll out some small spikes of green stuff and press them in upright in the middle of each plant to represent a new, furled, leaf growth.
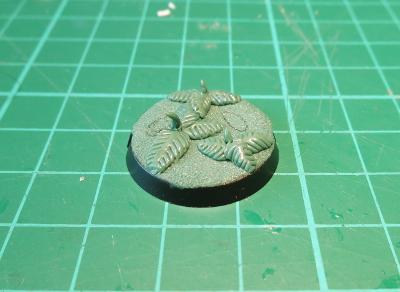
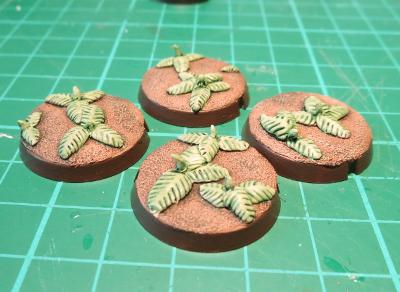
Leave to set, and then paint in appropriate colours. For the below, I've used Citadel Tallarn Flesh with a layer of Army Painter Strong Tone for the dirt, and Coat D'Arms Putrid Green with a wash of Army Painter Green Tone for the plants.
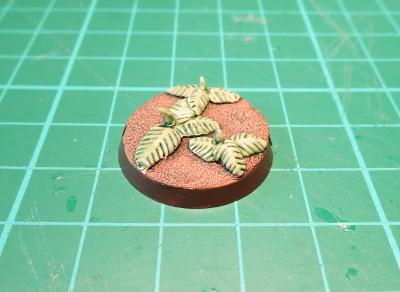
If you want a little more realism in the plants, add some tinges of brown to the lower leaves, as these are older leaves that will be starting to die off, and scatter some brown, discarded leaves around the base.
Metal Decking
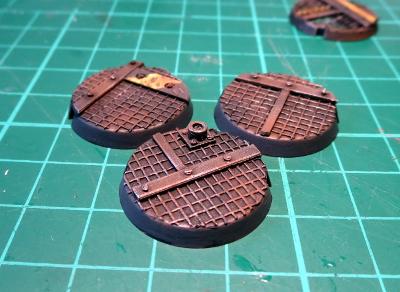
There are all sorts of options out there for buying textured plastic sheeting which can be cut to size and glued to your bases, but this can get expensive. For a cheaper option that still looks effective, I use plastic flyscreen.
Start by applying a thin coat of superglue all over the top of the base, and then glue down a small square of flyscreen.
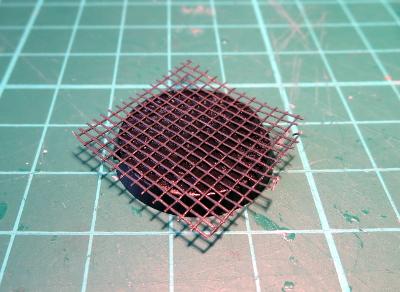
Once the glue has set, cut around the edge of the base with a sharp knife.
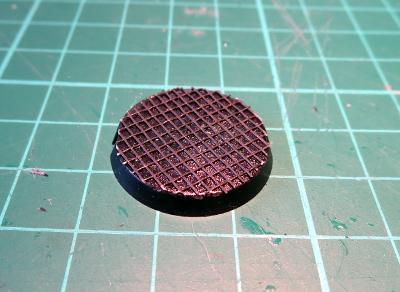
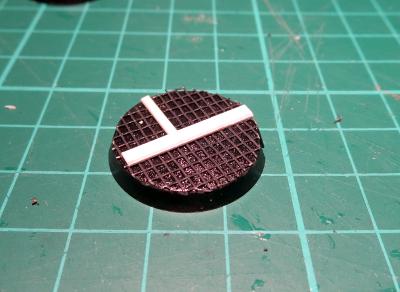
Now we can add some detail. Glue on small strips of plastic sheet or thin card to create panel reinforcing.
You can add rivets by drilling holes in the stripping with a 1mm drill bit (I recommend using a pin vice rather than a motorised tool for this, as it's really easy to gouge the holes out sideways with a motorised drill) and gluing in pieces of 1mm plastic rod, as below - I've shown the undercoated pic here, as it shows the detail better.
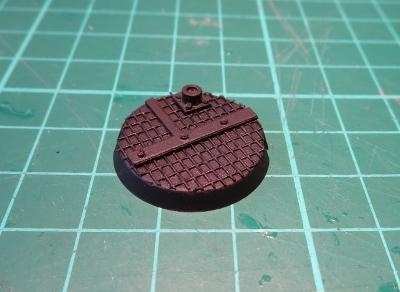
You can add whatever other detail seems appropriate. In the above pic, you can see a small pipe fitting or connection port made with a small square of plastic with a short length of tubing glued to it, with rivets added on the corners to hold it down.
Once you're happy with the level of detail on the base (and you generally don't need much) it's time to paint. For the below, I've just used a black spray undercoat, followed by a heavy drybrush of Citadel Boltgun Metal followed by a wash of Army Painter Strong Tone. Once the wash is dry, I finished up with a light drybrush of Coat D'Arms Hairy Brown to dirty things up here and there, and a light highlight of Citadel Mithril Silver on the edges.
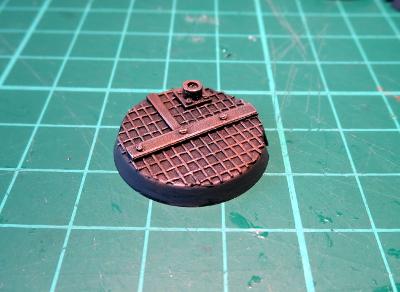
You can also add sections of hazard striping, coloured lines or deck numbers for some more colour.
As an alternative, if you're feeling brave, you can go for more of a mesh catwalk look by cutting the top off the base before applying the flyscreen and other detailing.
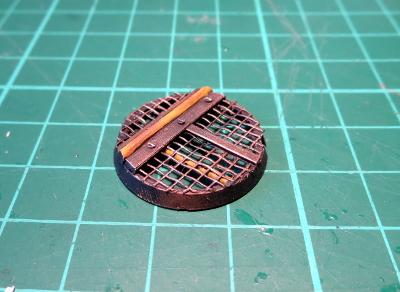
All of the ideas presented here and in the previous article are, of course, just starting points. You can add to or combine these different effects to create your own style, or look to real-world or movie set inspiration for something completely different.
Feeling inspired? Want to share how you have based your models? Jump into the Comm Guild Facebook page and show us what you have come up with!
All Your Base, Tutorial Part 1
Posted on Tuesday Nov 29, 2016 at 05:00pm in Tutorials
![]() - by Iain Wilson
- by Iain Wilson
Once upon a time, there was an more-or-less universally accepted standard that gaming miniatures' bases would be either covered in flock (shudder) or covered in sand and painted light green. We've come a long way since then, with the common standard now to have sand painted brown with a couple of tufts of static grass to brighten things up a little.
If that's leaving you less than inspired, then this article might be for you! Over a couple of weeks, I'm going to run through a few different ways to pretty up your bases, ranging from easy to 'might need a little practice' in complexity.
First off the blocks: Industrial Grey
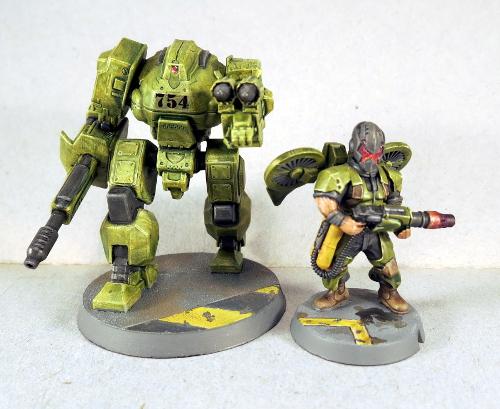
This style is intended to represent industrial or urban cement-paved areas, and can be as simple or as complex as you want it to be (or as your painting skills will allow!)
Start with a medium grey - I've used Vallejo Basalt Grey.
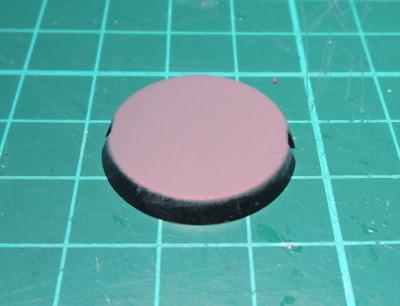
Then drybrush with a lighter grey - in this case, Vallejo Light Grey.
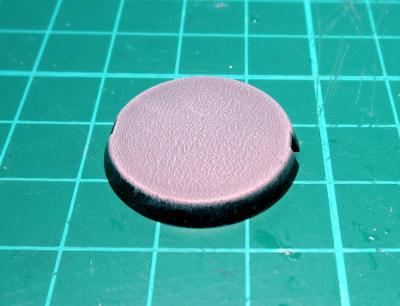
You could leave it there, but where's the fun in that?
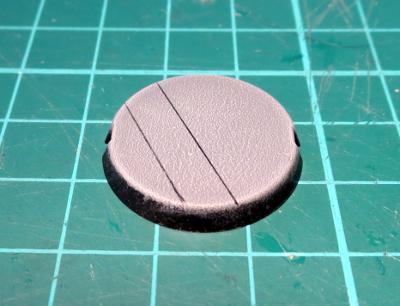
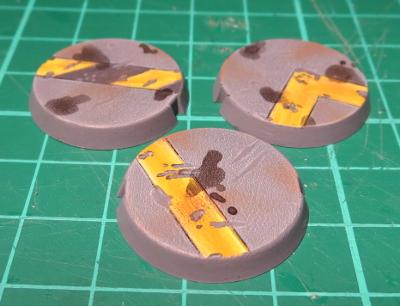
You can use a ruler or a cast off piece of sprue to mark out lines on the cement, to represent part of the sorts of markings you might find on cement floors - hazard lines, lane markings, etc.
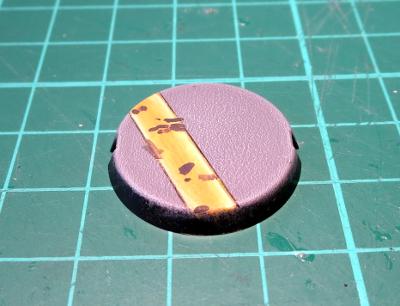
Paint in between the lines with an appropriate colour. Yellow is a great contrast against the grey, or white is good for a more subdued look.
Then you can add weathering, dirt and stains to your heart's content. For the chips, paint small splotches of your original medium grey and highlight around the edges with the light grey. Dirty things up by drybrushing with a little brown, and add drops of ink for oil or chemical stains.
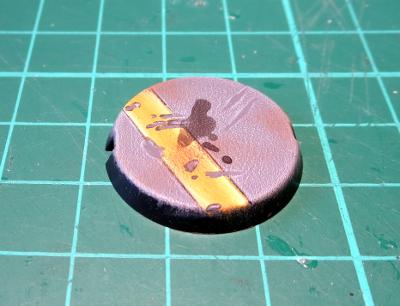
Finally, paint around your base edges.
There are several schools of thought on base edges. Some painters like to go with a colour that complements whatever is on top of the base. Some prefer a contrasting colour, or different colours to denote different units, or even just good old black. There's no right or wrong - just go with whatever you think looks best.
Next: Let it snow!
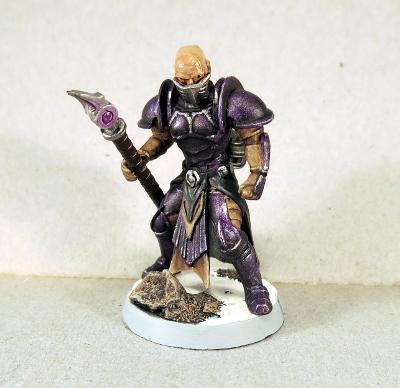
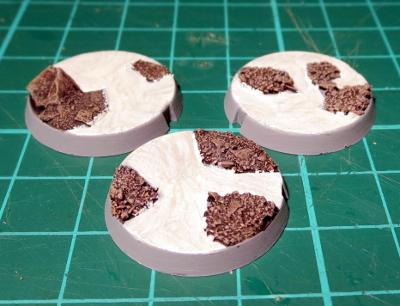
There are various hobby 'snow' products on the market for creating wintery bases or terrain, but to me they never look quite right, as they're too grainy. Instead, I like to go with something like this:
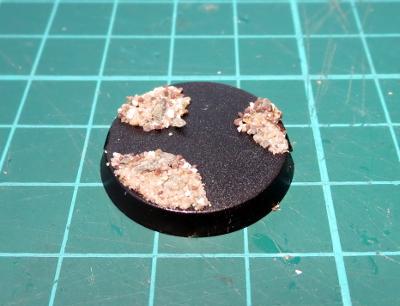
Start by gluing a few small lumps of sand or fine gravel to your bases for a little texture. If you're doing this with the bases separate to the models, make sure you leave space in between the rocky clumps for the model's feet.
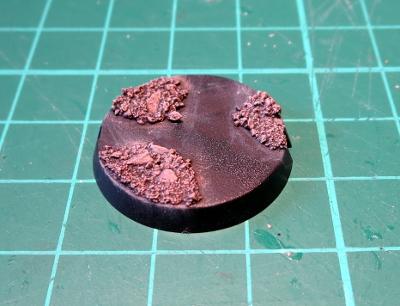
Once your glue has set, paint the rocks up. I've opted for a black wash to start out. This is followed by a heavy drybrush of brown (I used Citadel Tallarn Flesh here) and then a light drybrush of light grey (the Vallejo again). That's not a hard and fast formula - rocks come in all sorts of colours and textures, so use whatever colours will make for the nicest contrast with your miniatures.
Once that's done, the flat space in between becomes snow. If you want to (and I would recommend it on larger bases), you can break up the flatness by adding smooth bumps with Green Stuff or Milliput, or just leave them flat. Paint with white.
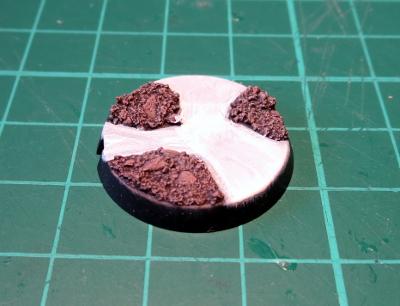
The last step is a little hard to photograph, so you'll have to take my word for it that it looks better in person. To get a nice, shiny snow look, I use a pearlescent paint. You can find a few variations on a similar theme in most craft shops - either a pearl white paint, a pearly gloss sealer, or a pearl medium which you add to your paint. Whichever you wind up with, paint a coat or two over your white, and then finish by painting the base edges.
Moving on: Rocky Wasteland
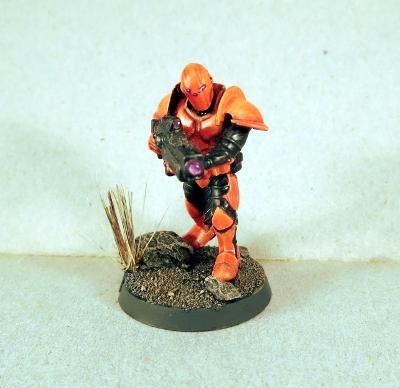
OK, so this one isn't actually too far removed from the standard sand-and-static-grass option, but without the static grass. Start by gluing some fine gravel mix - Mine is a mix of silver sand, regular sand and some crushed up slate. I like to add some bigger pieces of stone scattered around these bases as well to create a little bit of a feature.
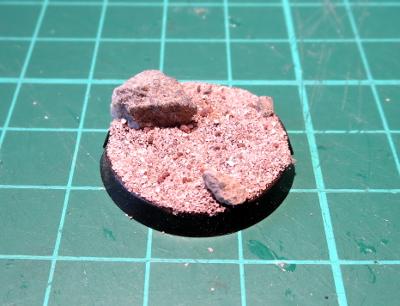
Paint: start with a black or brown wash to get into all the crevices.
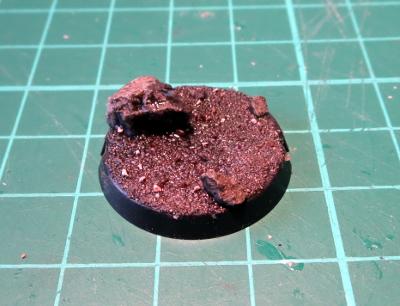
The drybrush with browns and/or greys (or whatever other colours you want your wasteland to be). I've used light grey and Coat D'Arms Hairy Brown here.
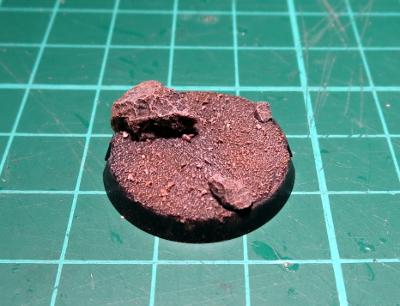
That's the boring part. Now to add some zing! Find yourself an old toothbrush, and pull out one of the clumps of bristles - use pointy pliers if they're reluctant to come out. There will sometimes be a small piece of metal in the fold at the bottom of the bristle that helps hold them in the toothbrush. If there is, discard that.
Before you let go, add a little superglue into the folded bottom of the bristle clump to hold it all together.
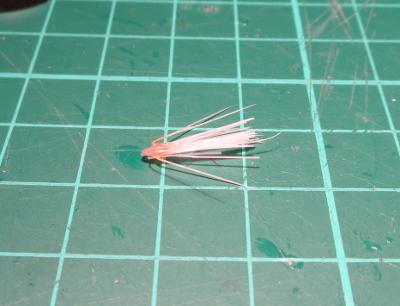
Then apply a small dollop of clear craft glue or superglue to the bottom of the bristles and press them into place on your base.
If you have a nice hollow to glue the bristles into, superglue will work fine. If they're sitting more on top of the gravel, the craft glue is better as it is thicker and will pool around the base of the bristles to give them a little stability.
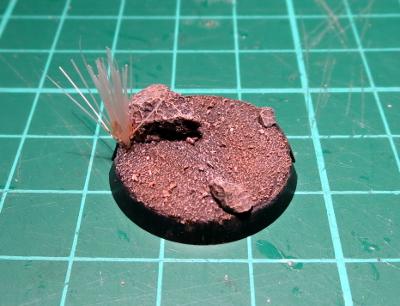
Once your glue is set, paint by washing with brown ink, and then drybrush a little bone or light green over the top to pick out the individual bristles again. Then paint your base edge.
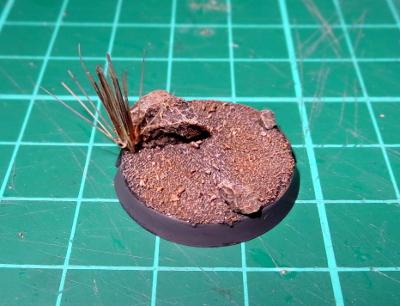
As a final note on this one - If you're making up your base separately to the model, it's a good idea to either leave a couple of spots with no gravel for the model's feet to glue into, or pin the model to the base, as model feet don't tend to glue well to sand or gravel due to the lack of flat surface to grab onto.
In part two, we try to make your bases more riveting, and wander off in search of a shrubbery. Stay tuned!
Feeling inspired? Want to share how you have based your models? Jump into the Comm Guild Facebook page (https://www.facebook.com/groups/MaelstromsEdge)!
Forward Guidance: Individual Bases Now on Sale!
Posted on Sunday Oct 30, 2016 at 05:00pm in Models
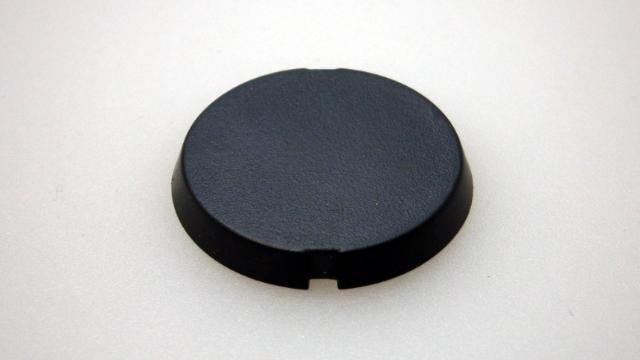
We are now selling bases individually for $0.50/£0.50 each, in packs of 5. Head over to the Maelstrom's Edge store to check them out. Please pass on the word to our friends in the Warmahordes community who might be interested in them too!
Forward Guidance: Individual Bases on Sale Soon!
Posted on Sunday Oct 16, 2016 at 05:00pm in Models

Starting in November, we'll be offering bases for sale in packs of 5, so you'll be able to purchase standard, medium or huge bases on their own with those lovely arc marker notches in the side. Suitable for any game with forward/rear arc requirements, we hope it will open up some nice conversion and hobby options for you!