Entries tagged [chieftain]
Tactics: Broken Forsaken Chieftains
Posted on Thursday Aug 02, 2018 at 04:42am in Gaming
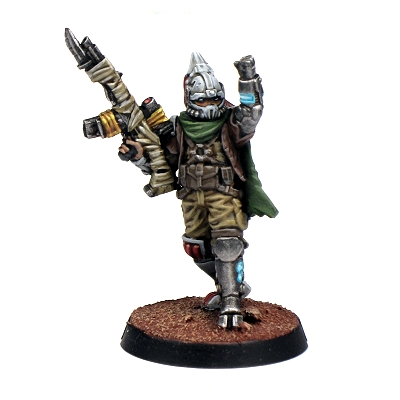
With the release of our second Broken Chieftain model, we've also updated its unit card in our online Force Builder rules here, finally unveiling the full suite of equipment options that Broken Chieftains have available to them. This article will look to update your Chieftain knowledge, focusing on their two new upgrade options: Customized Weapons and Enhanced Cybernetics.
CUSTOMIZED WEAPONS
Though Broken Weaponsmiths work tirelessly to keep the weapons of their fighting force repaired and functioning properly, they are also constantly prodded by their Chieftain to find new avenues for how Broken weaponry can be made ever more deadly. In other words, Weaponsmiths, and Broken society in general, are obsessed with making their guns as powerful as possible, regardless of how dangerous this makes them to the wielder. While Broken weapons can never match the accuracy or reliability of the more sophisticated enemy factions they face, the Broken instead rely on a near endless supply of desperate bodies clamoring to get their hands on a customized weapon, even when it is prone to lethal malfunctions.
Anytime Broken forces manage to steal, capture or purchase weapons off the black market, a portion of these are tithed to their Chieftain, who turns them over to their Weaponsmith in the name of 'weapons development'. The disassembling, tinkering, and soldering in a Weaponsmith's shop often continues days at a time. No method used to improve a weapon is off the table: overcharged powerpacks, larger caliber ammunition, oversized magazines, fusing multiple weapons together, etc. If it can be dreamed of, a Weaponsmith has attempted it. The more powerful the conversion, the more rare and coveted the weapon is amongst the Broken, and the more likely it will find its way into the hands of a high-ranking individual like a Chieftain, who views it both as a potent weapon and also as a way of reinforcing their status over those they command.
Rules-wise, customized weapons are an upgrade for a Chieftain that cost 2 points, and gives them the following benefits:
---
Customized Weapons
All weapons this model is equipped with permanently gain +1 PEN, +1 DAM and the Unstable ability (if they don’t already have it). Grenades & CQ Explosives are excluded.
---
As this upgrade affects any weapon a Chieftain takes (excluding grenades & CQ Explosives, of course), it gives you tremendous versatility towards deciding how you want to improve your Chieftain's shooting. For example, with weapons that provide a lot of shots but are only DAM 1, like a Slug Rifle or Chem Pistol, the Customized Weapon upgrade suddenly turns them into DAM 2 weapons. This means that every successful penetration is going to kill a standard MAS 2 infantry model outright, making these weapons now capable of mowing down enemy rank and file models. On the other hand, weapons that are already DAM 2, like a Beam Pistol or Beam Blastgun, now become DAM 3, allowing the Chieftain to become a big game hunter and seriously wound large models like Hunter Warmechs or Mature Angels. This upgrade also benefits any melee weapons the Chieftain may take, such as a Trophy Melee Weapon, Poisoned Blade and even the melee profile of the Beam Blastgun, turning the Chieftain into a formidable foe at close quarters.
Of course, the negative aspect of using customized weapons is that the weapon also gains the Unstable ability, which means that any '1's the Chieftain rolls to hit end up putting suppression tokens onto his unit equal to the DAM of the attack. While this can certainly be annoying when it happens, it is generally a small price to pay to seriously upgrade the offensive capabilities of your Chieftain.
EXTENSIVE CYBERNETICS
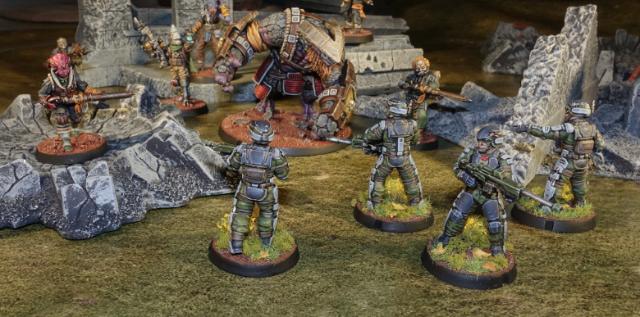
While many Broken soldiers eventually have some part of their anatomy replaced with cyerbnetics (usually due to injuries they've suffered on the battlefield), some Chieftains choose to go a step beyond and command their Weaponsmith to give them extensive cybernetic limb and/or organ replacements as a means to improve their strength and durability. This is represented by the Extensive Cybernetics upgrade, which cost 2 points:
---
Extensive Cybernetics
This model permanently improves its MAS characteristic by +1.
---
Boosting a model's MAS by +1 provides both defensive and offensive benefits. The most obvious improvement is that a MAS 3 model requires doesn't suffer an injury until at least 3 points of damage are allocated to it. For example, when a Chieftain leads a Broken Rabble squad, whenever there are only two DAM 1 penetrations remaining to be allocated (a frequent occurrence), you can now elect to put them onto the MAS 3 Chieftain, which means instead of losing a Rabble model, the unit will suffer no permanent damage! In other words, having a MAS 3 Chieftain not only means that model is more durable, but any unit the Chieftain joins effectively becomes more durable as well.
On the offensive side, a model's MAS characteristic is utilized in close quarters fighting with a melee weapon, both to determine how many shots the melee weapon makes, but also to figure out the PEN characteristic of that weapon. A MAS 3 Chieftain gets to make 5 attacks with a melee weapon (instead of the 4 it makes when it is MAS 2) and all those attacks are made with +1 PEN. For example, a Chieftain with Extensive Cybernetics and a Trophy Melee Weapon gets to attack 5 times in close quarters fighting, with each of those shots being a quite powerful PEN 5 and DAM 2. Even crazier, if the model also has taken the Customized Weapons upgrade, they combo together and those five shots are instead PEN 6 & DAM 3! That's enough potential damage to make any foe quake at the thought of facing a Chieftain in CQ fighting.
With these new upgrade options available, a Chieftain is easily the most customizable command model currently in the game. You can go with a super-cheap 7 point Chieftain that just has a couple of pistols, which allows you to fit more Broken units into your force, or alternatively you can take every upgrade and have a 13 point beast that has all kinds of tactical capabilities...the choice is ultimately yours!
Ready to try out your own cybernetic Chieftain? You can pick up the new resin Chieftain models along with the rest of the Maelstrom's Edge model range, from the webstore here.
If you have any rules queries, tactics suggestions, or modeling progress to share, you can join in on the Comm Guild Facebook Group page here.
Assembly Guide - Broken Forsaken Chieftains & Unit Bosses
Posted on Monday Oct 16, 2017 at 05:00pm in Tutorials
Assembling Broken Forsaken Chieftains & Unit Bosses
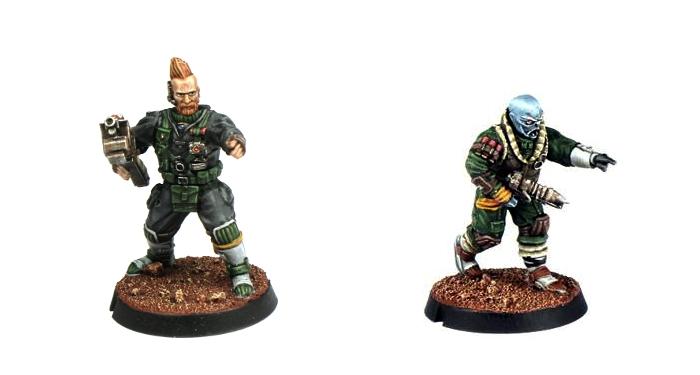
Note: The bulk of this article is the same as for the Broken Rabble Assembly Guide and the Broken Rabble Assault Unit Guide, as the only real difference between the different units model-wise is the choice of weapons. So if you have already worked through those, this guide will look rather familiar and you may want to just skip down to the part with the weapons.
This guide will cover assembling Forsaken Chieftain and Boss models with the various pistol options from the infantry sprue. The two-handed weapon options are all covered in the Rabble and Rabble Assault unit articles linked above. You can also use this guide for assembling standard Assault Unit models with pistols.
General Notes
Polystyrene cement - only use superglue if you want to go insane! All of our models are designed to be assembled with polystyrene cement as it gives some time to re-pose while gluing, fuses the models together and prevents brittle joins like other glues do. Make sure you have polystyrene cement in your toolkit before you begin!
We want you to experiment! We've broken our models up into lots of parts and given a fair few spare parts so that you can push yourself out of your comfort zone, learn new skills and create some really unique models. We've tried to price things so that it won't break the bank if you make a mistake, so please cut stuff up and have some fun. Start simple with a slice here and a re-pose there, and watch your confidence and skills increase until you are a master modeler!
Basing - Always make sure you glue your model to its base with an eye on the arc markers on the sides of the base. The arc marker indents should be at the halfway point between the front and back of the model to show the front and back halves of the model when gaming. See the Maelstrom's Edge rulebook for more detailed notes on this.
Dry fit before gluing! - There are lots of pose options possible, but that means there is also the freedom to screw up and make some bad poses! Sticking the parts together and seeing how things look will usually lead to a model that is fairly static and repetitive. You should consider knee, hip, torso, and arm positions when gluing and ensure that you have a pose in mind before you start gluing things together. If in doubt or insecure about your talents in the posing area, we recommend you try to copy the poses from some of our studio models found here in the gallery.
Broken Forsaken Chieftain & Unit Boss Assembly Notes
Six Broken models can be made from one set of the Broken Infantry sprues:
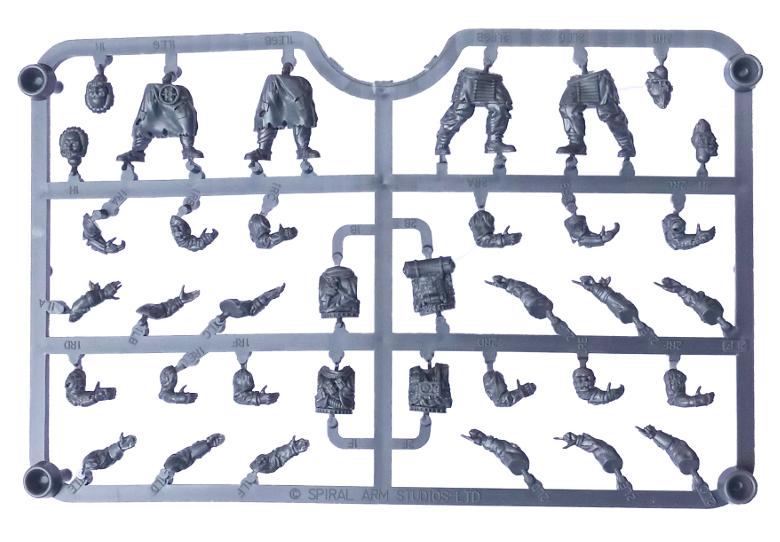
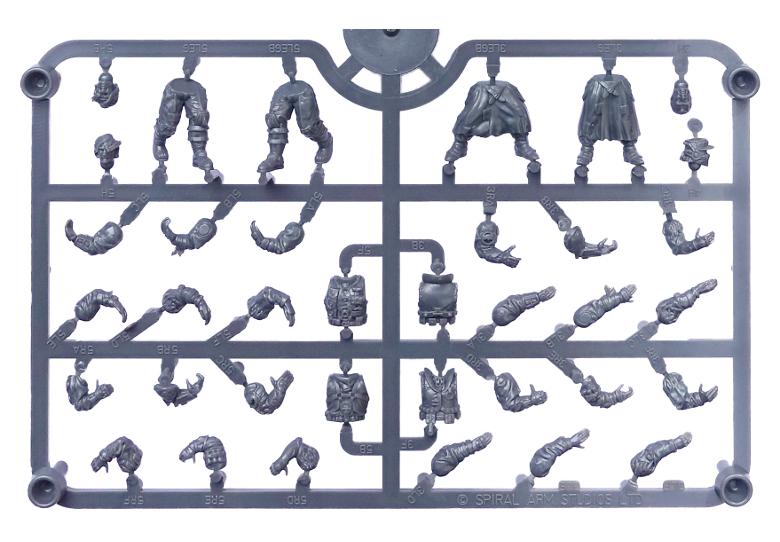
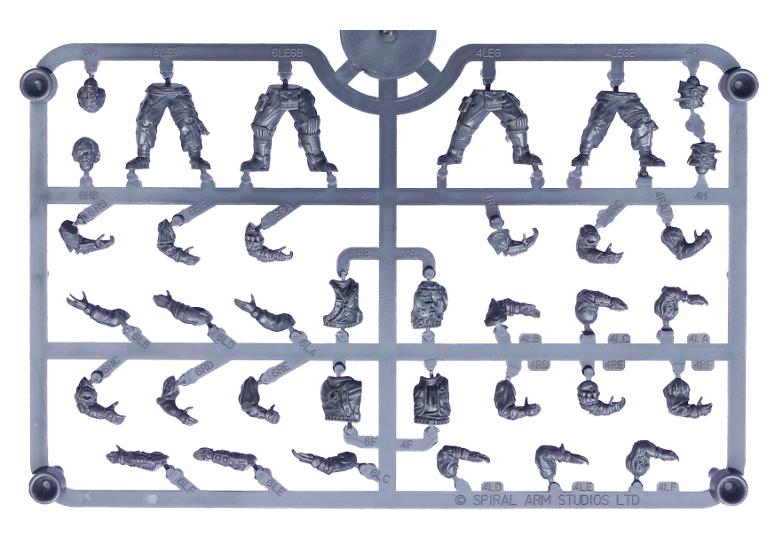
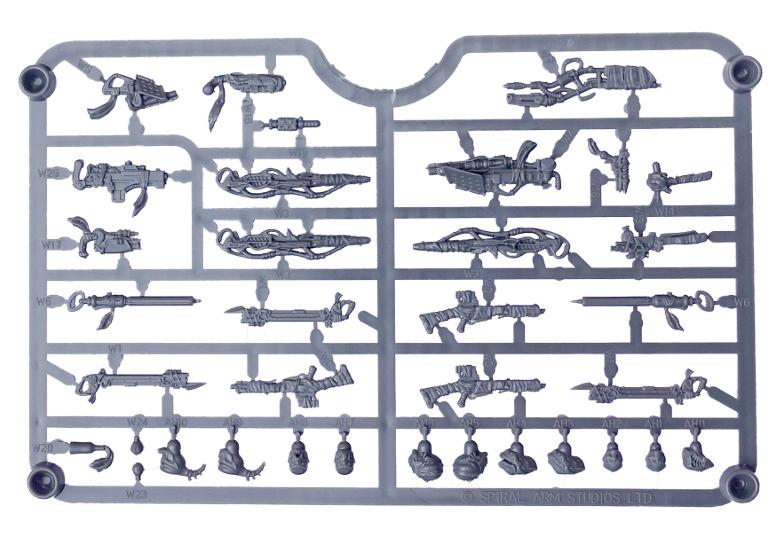
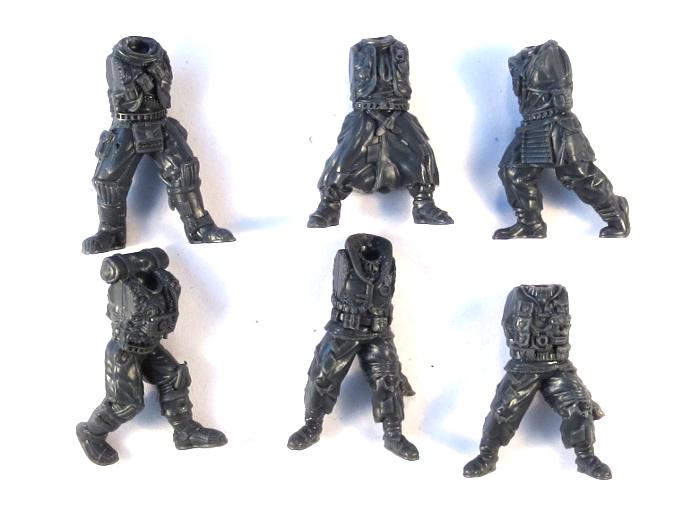
Assembly is fairly straightforward, with everything fitting together where you would expect. There are six different torsos, each with a unique front and back.
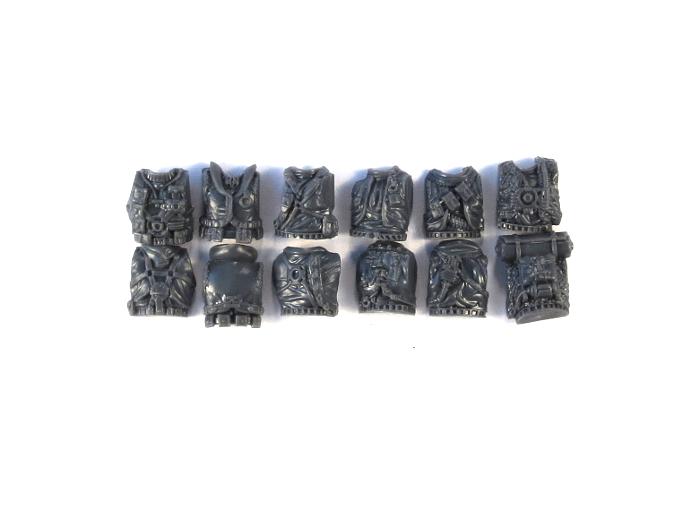
You can save yourself some aggravation if you keep the matching parts together when you cut them off the sprue. If they do get mixed up it will help that the fittings are different on each pair, so each front and back will only go together with its correct partner.
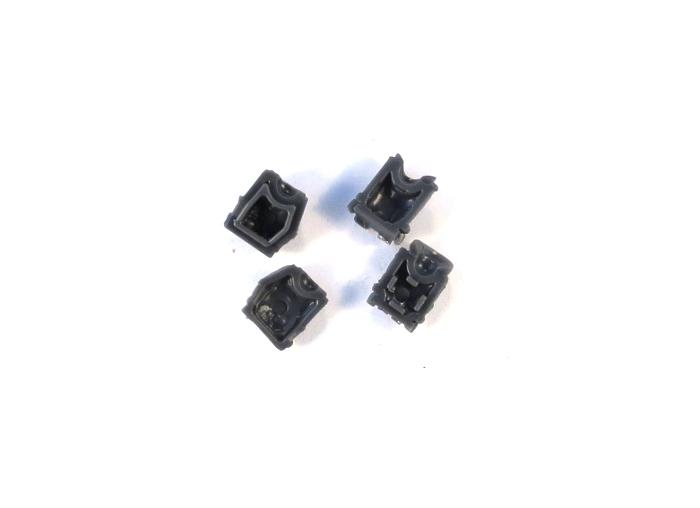
The twelve different sets of legs give you a whole slew of options for posing, as with one exception any of the torsos will work with any of the legs. The exception is torso 3 (parts 3B and 3F) which has pouches hanging from the belt. This torso fits with the legs labelled 3LEG and 6LEG, and slightly less flush with 3LEGB, although the pouches hide any slight gap you wind up with on that last set. You can also make this torso fit with some of the other legs if you trim up the bottom of some of the pouches a little.
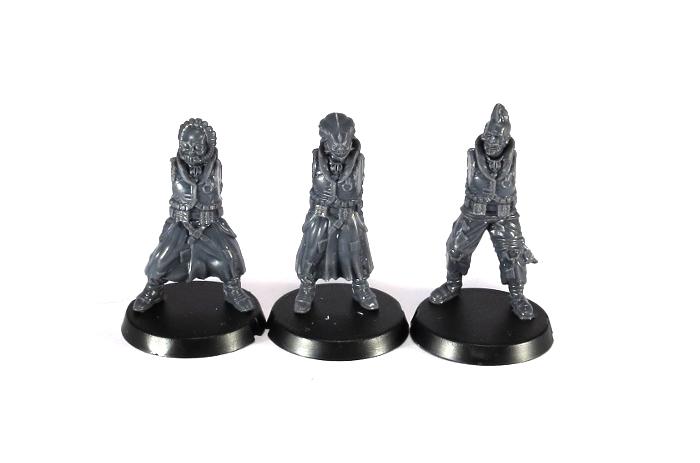
With the torsos glued in place, you might notice that there is a reasonable amount of height variation between the models, which makes for a much more ragtag look to the unit than the usual identically-sized military units.
As with the torso/leg pairing, most of the huge range of heads on the sprues will work with any of the torsos. Torso 2 (2B and 2F) has a rolled cloak across the shoulders and torso 3 (3B and 3F) has a high collar, both of which may get in the way for heads 3H, 4H, 6H, 6HB and AH11.
With the massive range of arms available to choose from, a little experimenting may be required to get just the look you want. Because of the different grips and sizes of the various weapons, some weapon hands have a more open grip and others are more closed, so this needs to be kept in mind when fitting them onto your models. Models with two pistols can have the second pistol hanging from their belt or backpack, or in a resting pose using one of the various open hands. Open left hands can also be used to hold grenades.
The Slug Pistol needs a fairly open grip, as it has a fairly chunky handle on it. It works best with arms 1RC, 3RA, 4RC, 5RB, and 6RC.
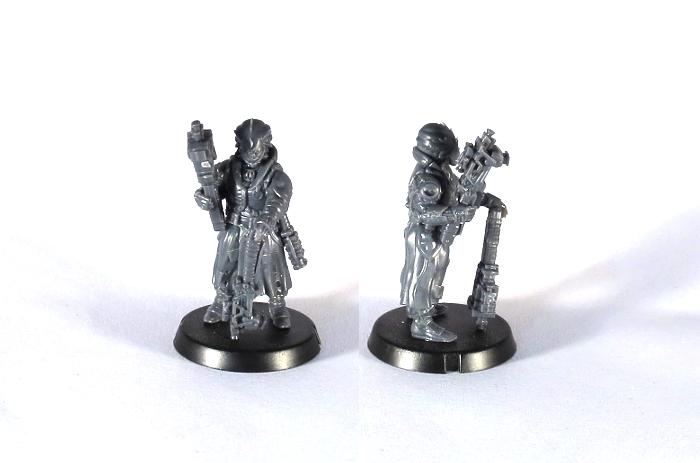
You can also create a resting pose with it using one of the open left hands and balancing the pistol on the model's hip.
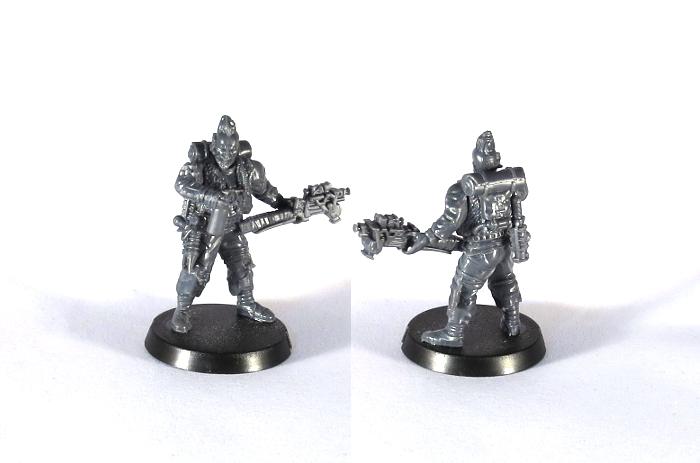
The Chem Pistol works with a more closed right hand, as the handgrip is a little thinner than on the slug pistol.
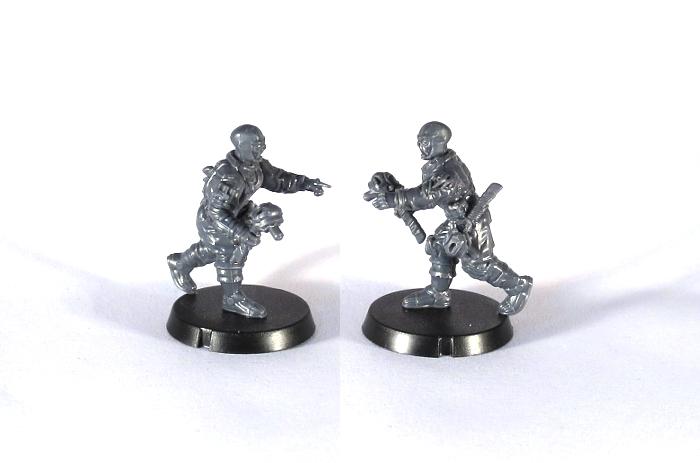
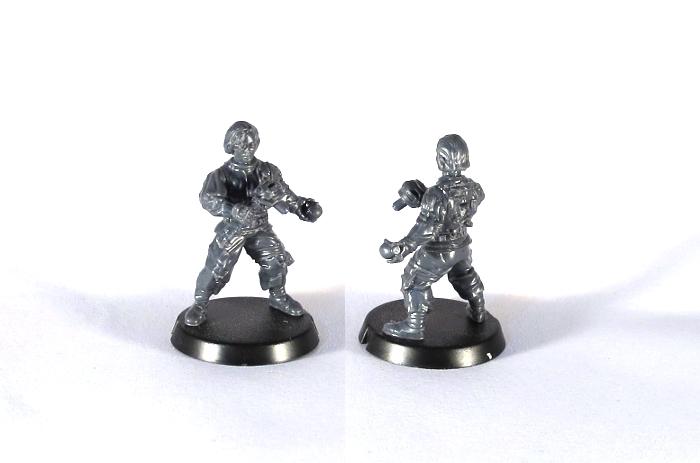
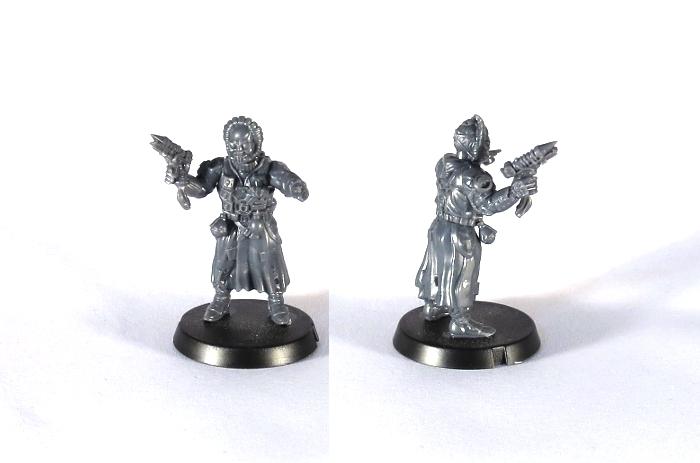
The Beam Pistol also works best with a more closed right hand, but work best with hands 3RA, 4RE, 5RB, 6RA or 6RE.
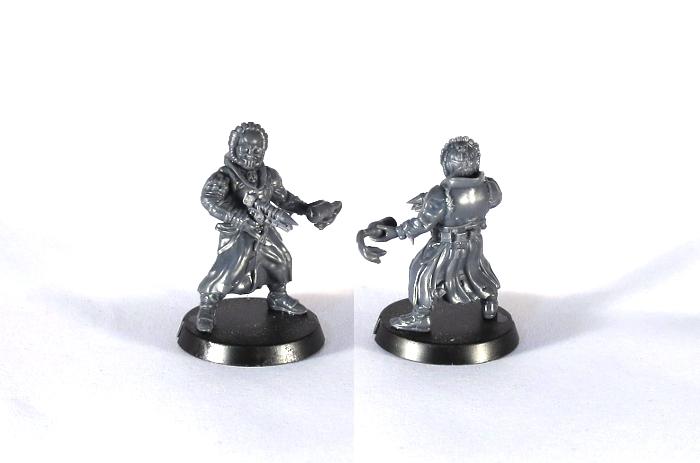
For some more ideas for building your Broken models or to share your own creations, head on over to the Comm Guild Facebook page.
You can pick up the Broken Infantry Pack, and the rest of the Maelstrom's Edge miniature range, from the webstore here.
For other Maelstrom's Edge modeling articles, including tutorials and walkthroughs of a wide range of different building and miniature projects, check out the article roundup here.
Tags: boss broken chieftain forsaken modeling models tutorial