Entries tagged [karists]
New Release: Karist Heavy Troopers - 3D Printable STL Files
Posted on Thursday Oct 06, 2022 at 05:00pm in Models
Originally released in resin, Karist Heavy Troopers are now available to purchase as STL files for 3D printing.
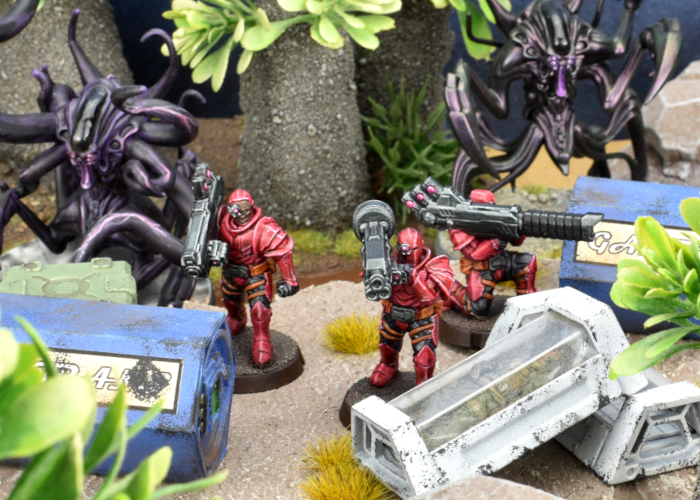
The Heavy Weapon Trooper digital pack includes both a supported and unsupported set of files, with Cybel Lance, Ripper Heavy Grenade Launcher and Ravager Pulse Cannon options to equip your troopers.
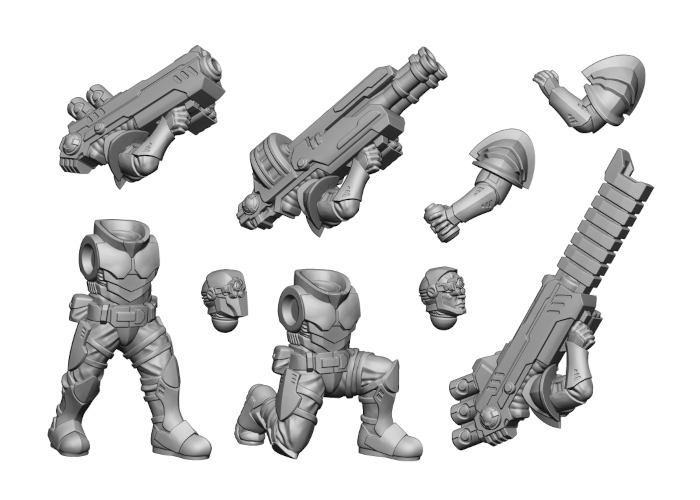
The included parts.
In Maelstrom's Edge games, the Karist Heavy Troopers are fielded on 25mm bases, available here, and can accompany Karist Trooper squads or form Karist Trooper Heavy squads.
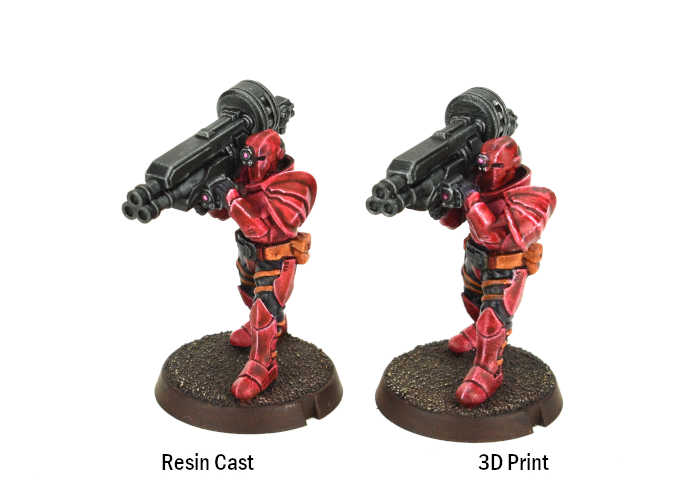
Resin production model and a 3D printed example, painted to a tabletop-ready standard - printed on an Anycubic Photon using Siraya Tech Fast resin at 50μm using Lychee slicer.
Printing results will vary depending on your printer, resin and settings.
Start building your secretive cult of digital doom by grabbing the Karist Heavy Troopers from the Maelstrom's Edge webstore here - or if you would prefer the resin version, you can find it in the store here!
Kitbash Spotlight: Greatcoat Karists!
Posted on Monday Nov 09, 2020 at 05:00pm in Tutorials
A couple of weeks ago, I shared a kitbash of some Trogyl Scouts - alien hunters based on the Wargames Atlantic 'Einherjar' (space dwarves) kit with alien heads from the Maelstrom's Edge Broken plastics. Well, this week I threw together another unholy fusion of Wargames Atlantic and MEdge kits, to create some Karist troopers in greatcoats!
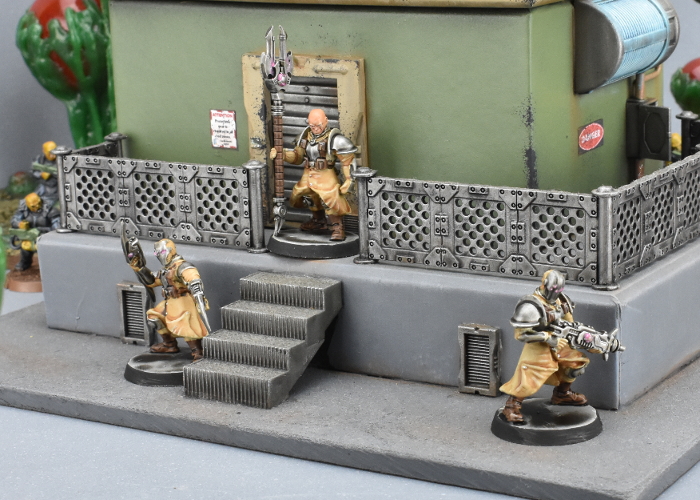
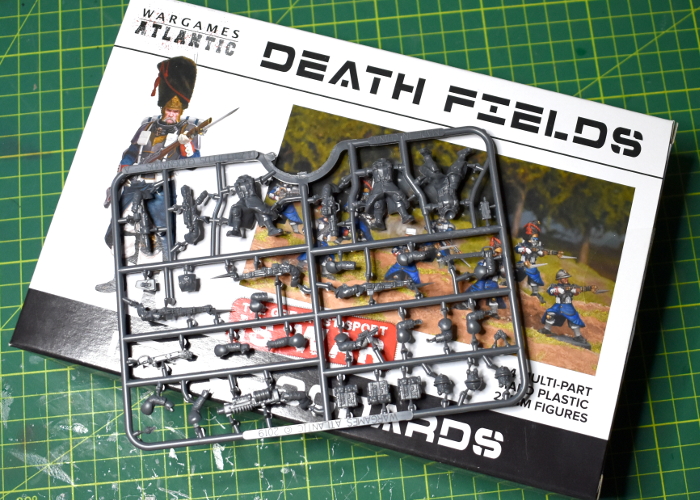
When I bought the Einherjar kit, I couldn't resist also picking up a box of 'Les Grognards'. This is a plastic kit that comes with a slew of different heads to allow you to create a number of different, laser-gun-toting, sci-fi soldier regiments. It also includes the aforementioned laser guns, and a range of heavy weapons, but I wasn't really interested in those here.
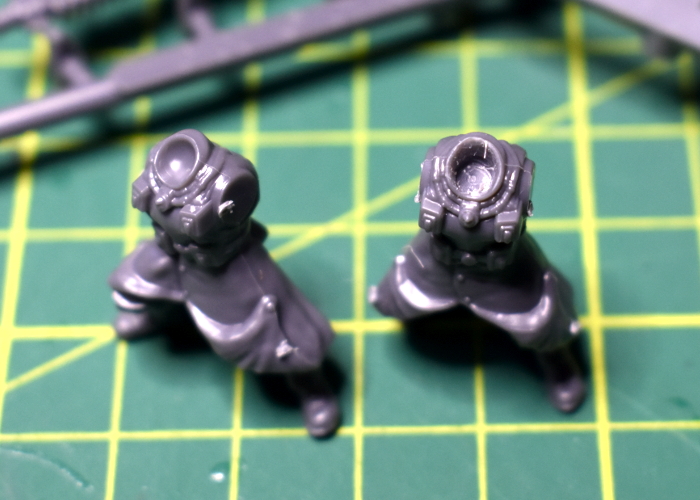
As with the Trogyl, assembly was fairly straightforward, using bodies from Les Grognards, and heads and arms from the Maelstrom's Edge Karist Trooper kit. The heads for the Grognards only have short, stubby neck attachments, so I used a drill to enlarge the neck cavities to accommodate the Karist heads.
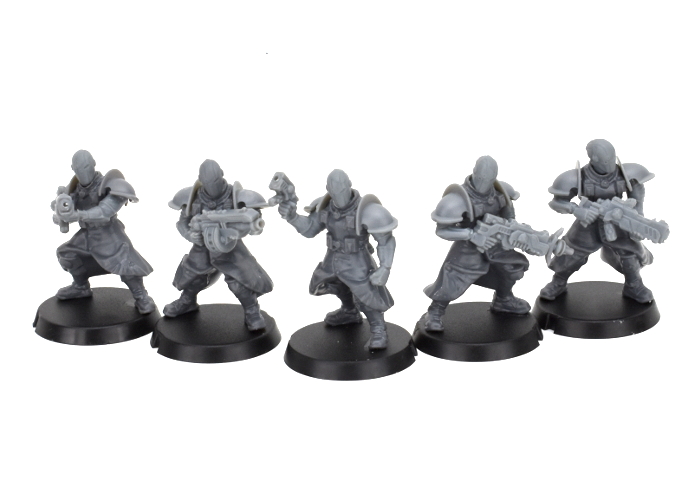
From there, it was just a matter of gluing everything in place. The torsos match Karist Trooper bodies in width, so the arms went on with no argument.
Regular readers of my articles will no doubt have noticed that I tend to use whatever paints I have on hand, but just for something different I thought I'd try sticking to a single brand, and painted these up using Army Painter paints exclusively. I started with a basecoat of Skeleton Bone spray, and then went over the armour plates and weapons with Plate Mail Metal, and the boots, belts and webbing with Leather Brown. Over that, I applied a wash of Light Tone to the bone areas, and Dark Tone everywhere else.
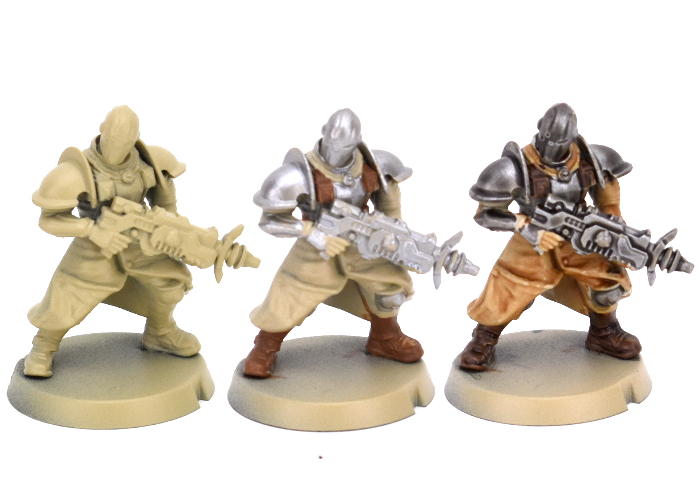
To finish up, I added some highlights to the coat and leather using some more Skeleton Bone, and picked out eye lenses and weapon energy blisters using Warlock Purple and white. The bases were painted with Ash Grey, and then given a generous wash of Dark Tone before I painted the edges with black.
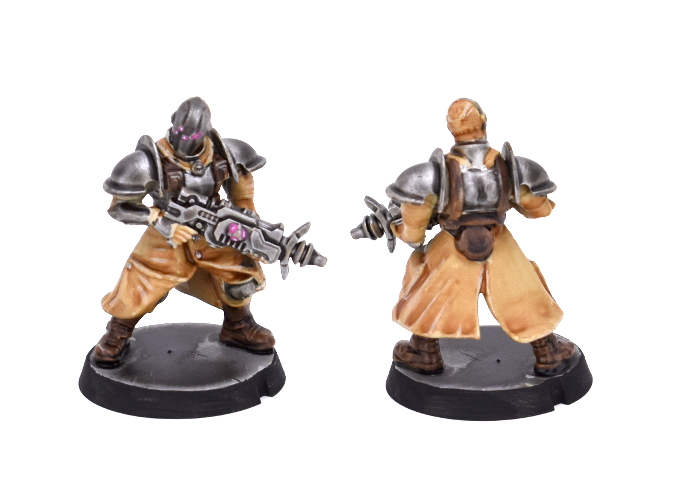
Not content with basic troopers, I also had a tinker with the Faction Expansion sprue to make a greatcoat-clad Praetorian, and also plundered a Shadow Walker sprue to add in some teleporty, assassiny backup!
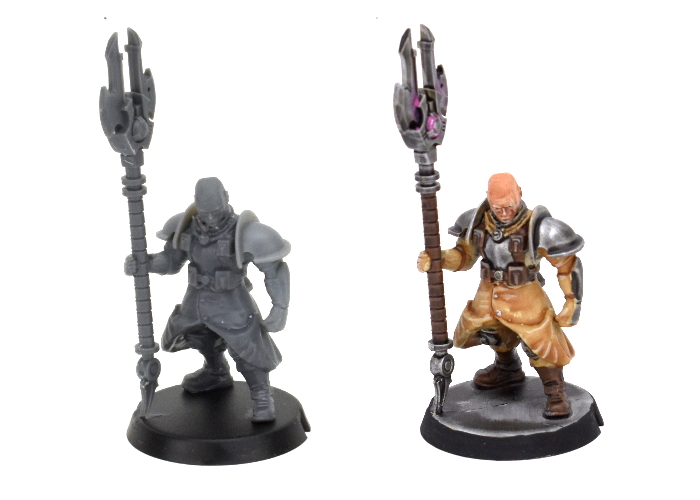
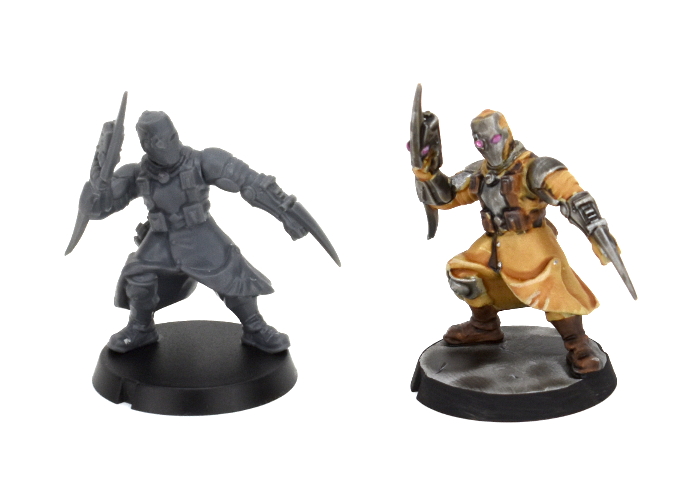
Now I'll have to see about expanding this little starter force into something table-ready!
Put together your own Karist force of zealoty doom by picking up the plastic Trooper kit, along with the rest of the Maelstrom's Edge range from the webstore here.
Then pop on over to the Comm Guild Facebook group to show us what you're working on!
For other building ideas, modeling tutorials, army spotlights and conversion walkthroughs, check out the Hobby section of the Maelstrom's Edge website here.
Tags: conversion karists kitbash modeling painting spotlight walkthrough
Modeling Spotlight: Winged Angel
Posted on Monday May 29, 2017 at 05:00pm in Models
![]() - by Iain Wilson
- by Iain Wilson
‘Nobody knows what the hell they’re even made of, never mind what they’re thinking.’
- - Gladius Belaru, survivor of the Angel attack on Morningstar Station, Thusia system
The fully mature Angel is a truly terrifying creature to encounter in the flesh, and their otherworldly scream is a harbinger of nightmares across the Spiral Arm. Dwarfing even the tallest of humans, the Angel is a tapering mass of writhing tentacles, gelatinous membranes, and bristled claws, smelling of sulphur and ozone.
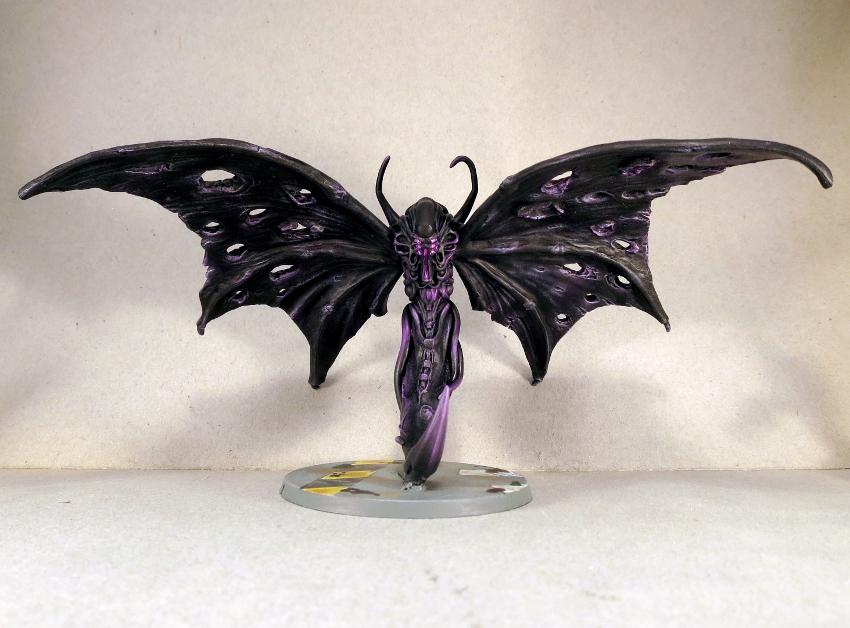
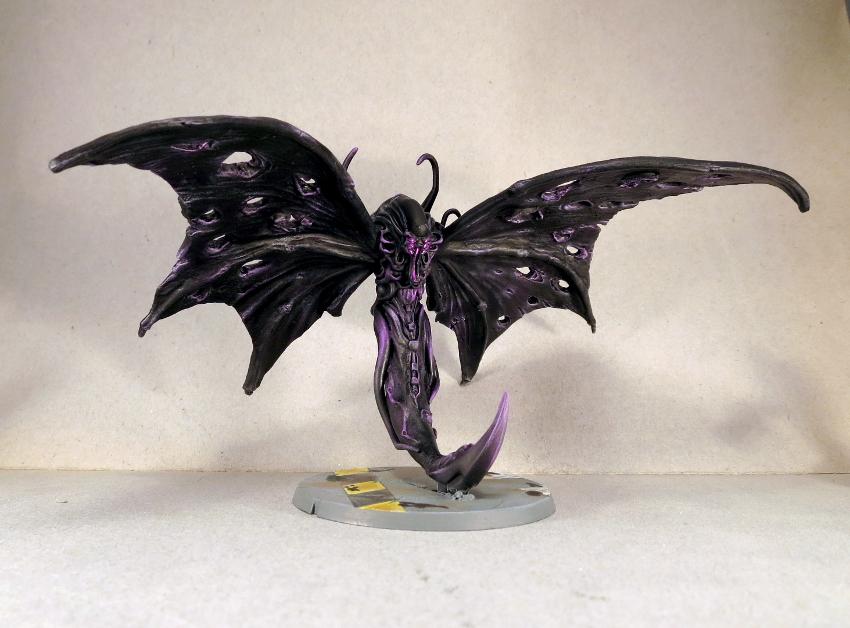
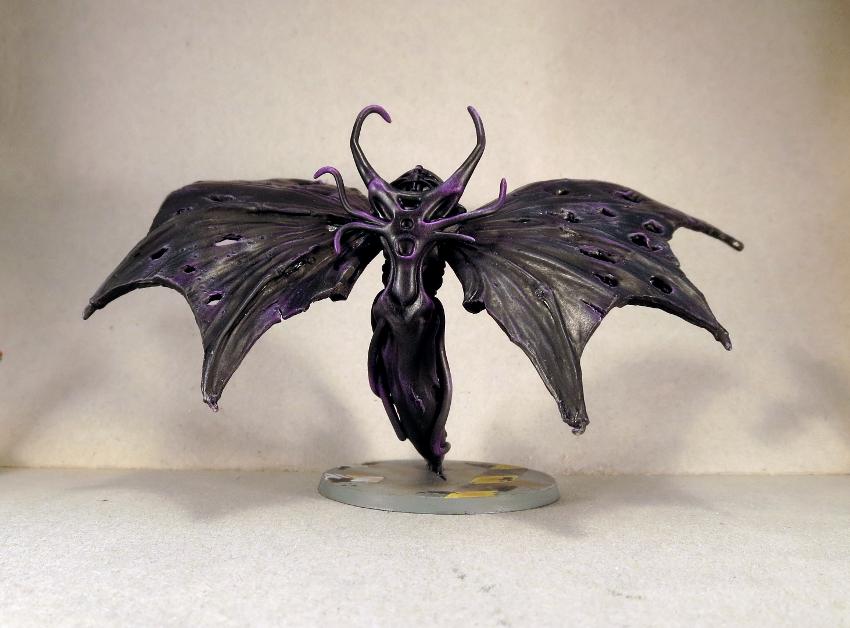
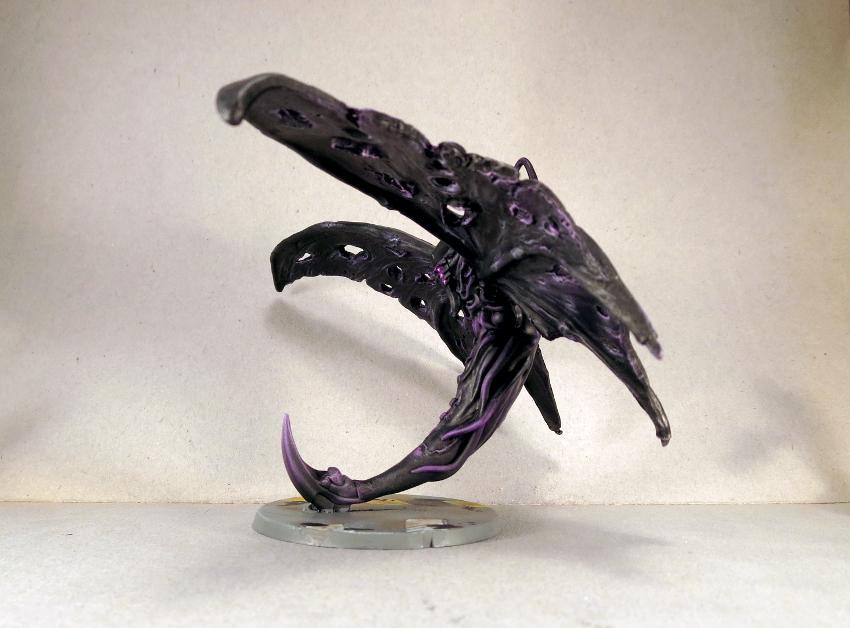
The plastic Mature Angel kit allows players to build angels in their combat form, which is one of the three common forms favoured by these bizarre creatures. While there is no particular need to model the angel's other forms, where would we be if we just went around assembling kits to spec? So this week, I'm building a Mature Angel in its flying form.
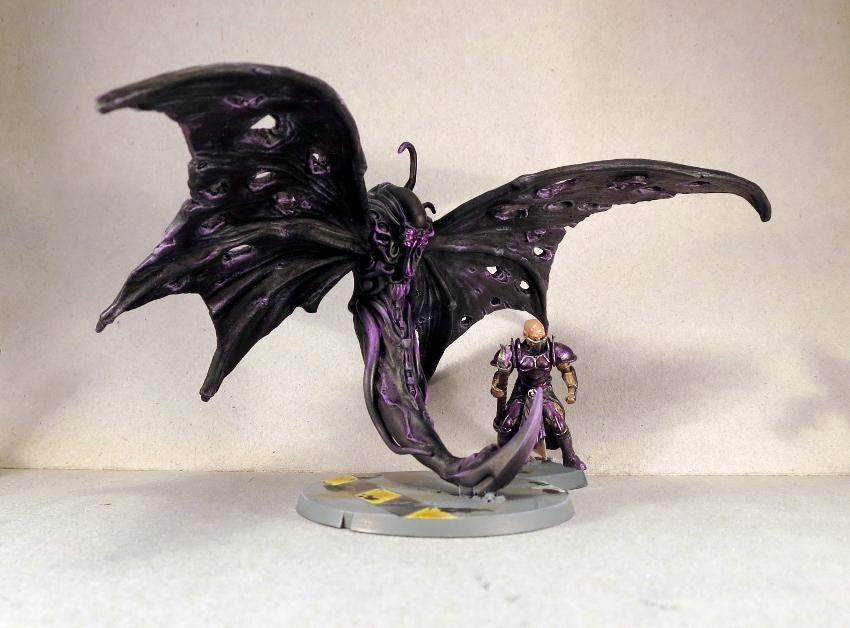
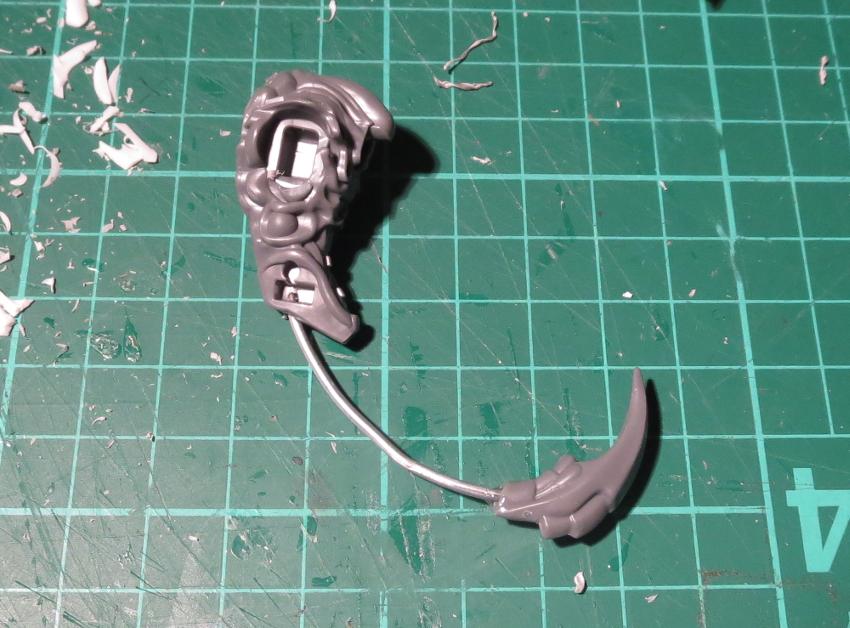
I started out with a length of wire glued into a hole drilled up into the bottom of the angel's torso. This was curved around to the front, with a spike cut from one of the angel's claws glued onto the other end.
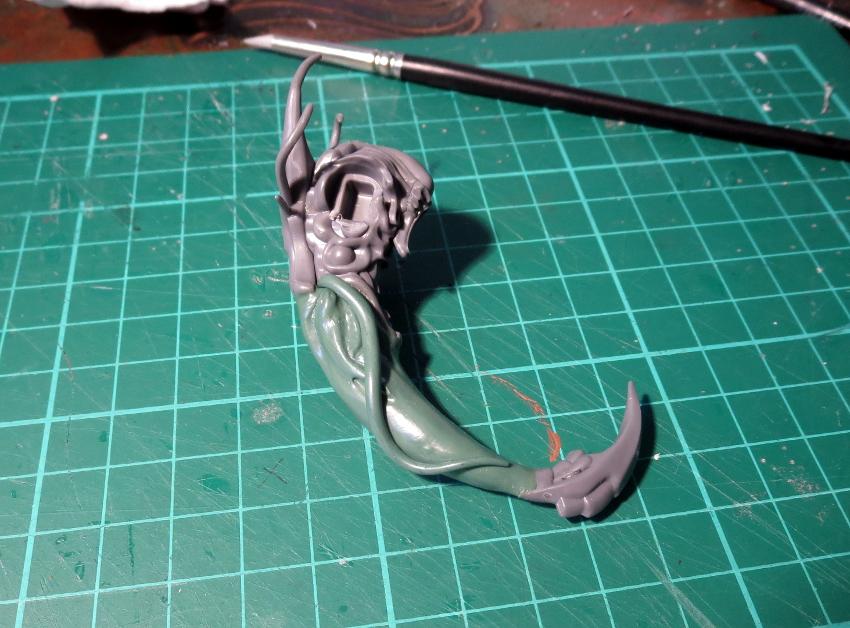
 Over the wire, I sculpted a tail from 'green stuff' putty, and added some tentacles down the side to make it a little more visually striking and to help represent the angel's fluid nature.
Wings can be sculpted over a similar wire armature, but to save a little time and effort here, I decided to purloin some from another model instead. The donor was a fire demon from Reaper's Bones range.
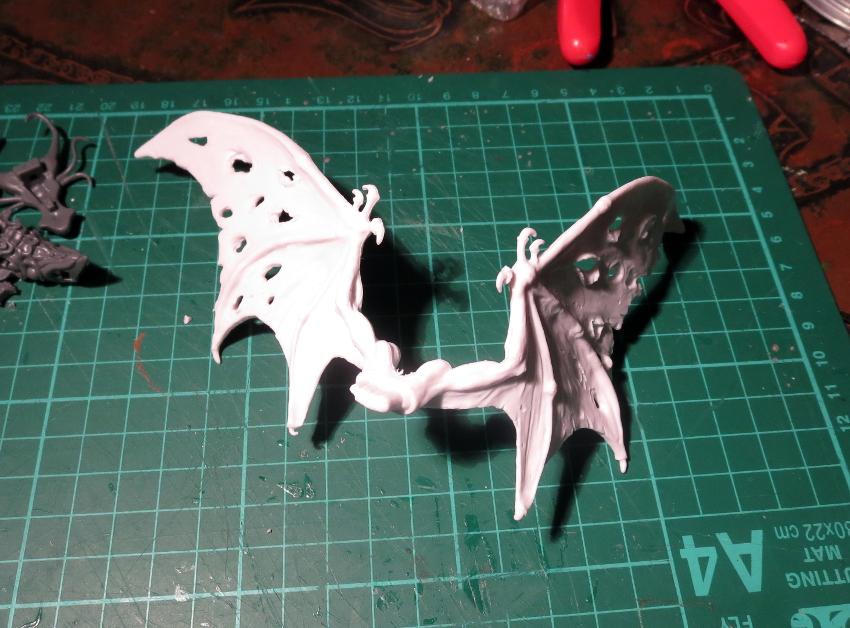
I cut the wings at the elbows, trimmed off the 'fingers' and glued the wings in place in the angel's arm sockets. A little more green stuff filled in the gaps.
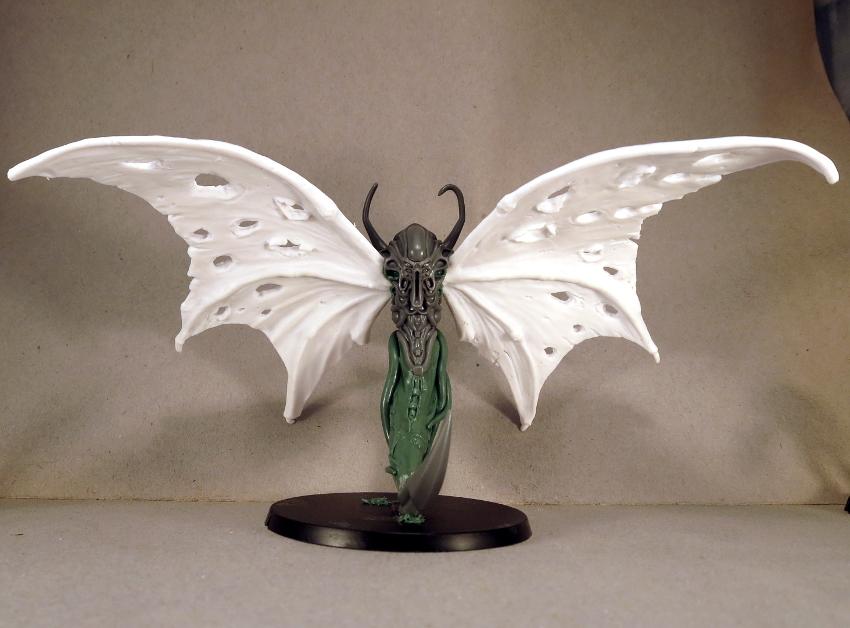
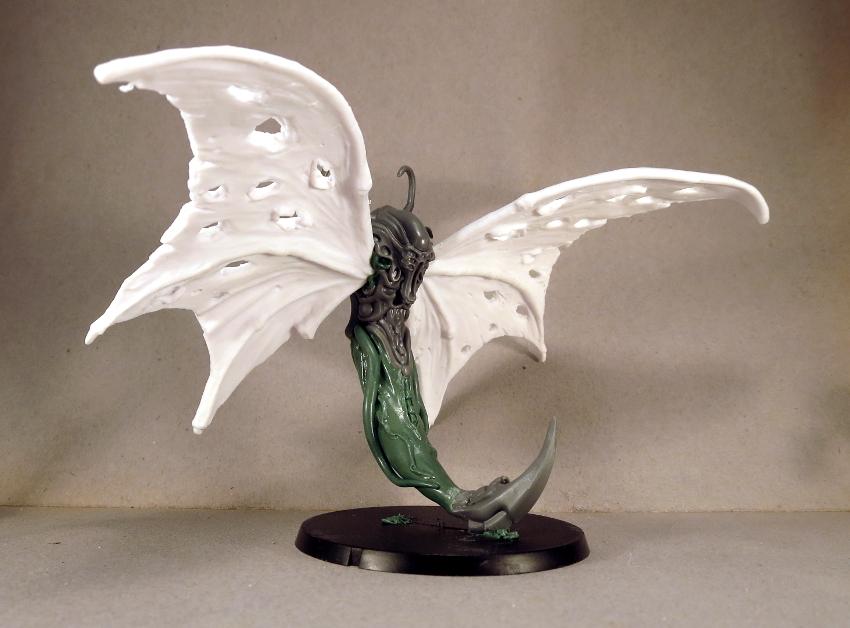
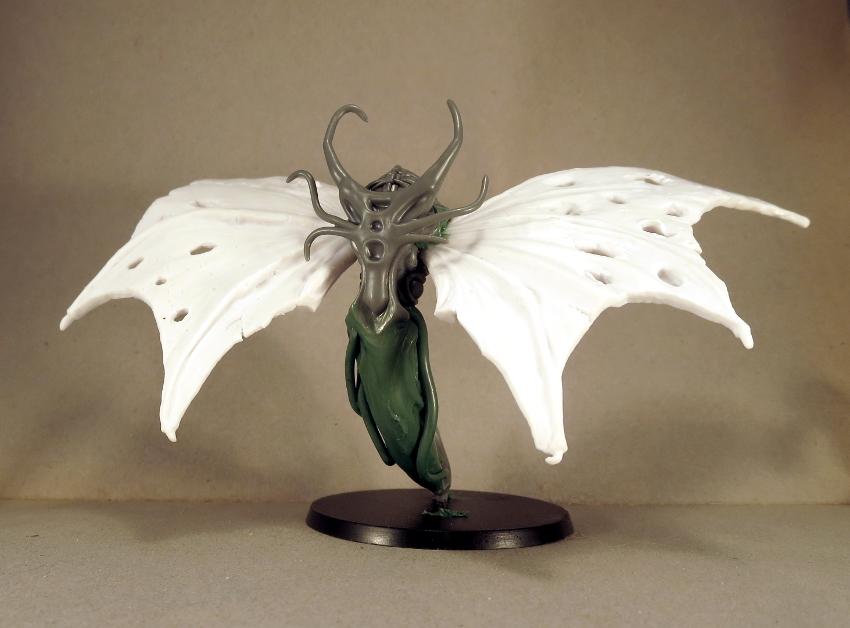
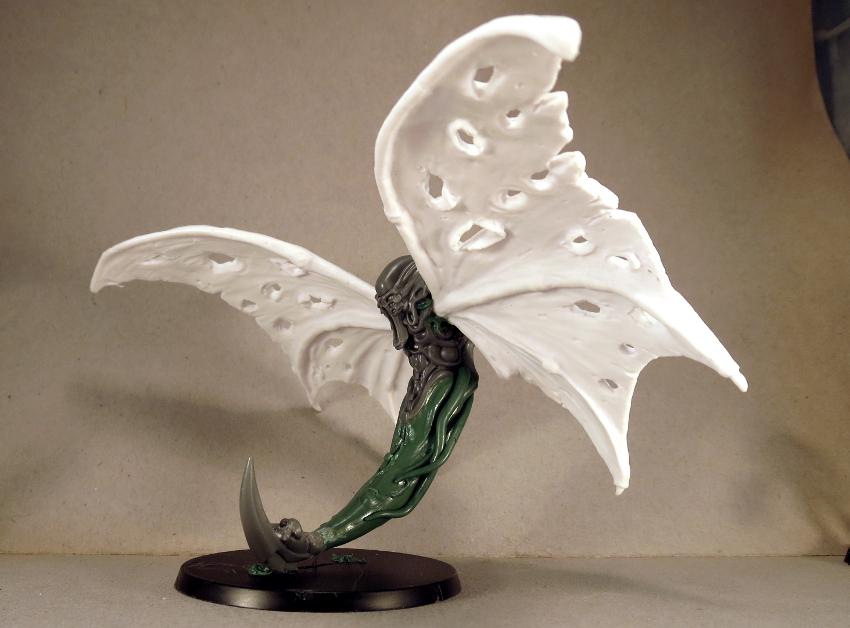
Painting - I kept the colour-scheme fairly simple, as angels are basically just black. Visually, just going with plain black isn't very interesting, though, so I tried to represent the angel's internal cybel energy by adding some purple highlights wherever seemed appropriate. The eyes and mouth were similarly painted purple, but highlighted up closer to white, to help them to stand out.
'Family' shot, with some minnows for company:
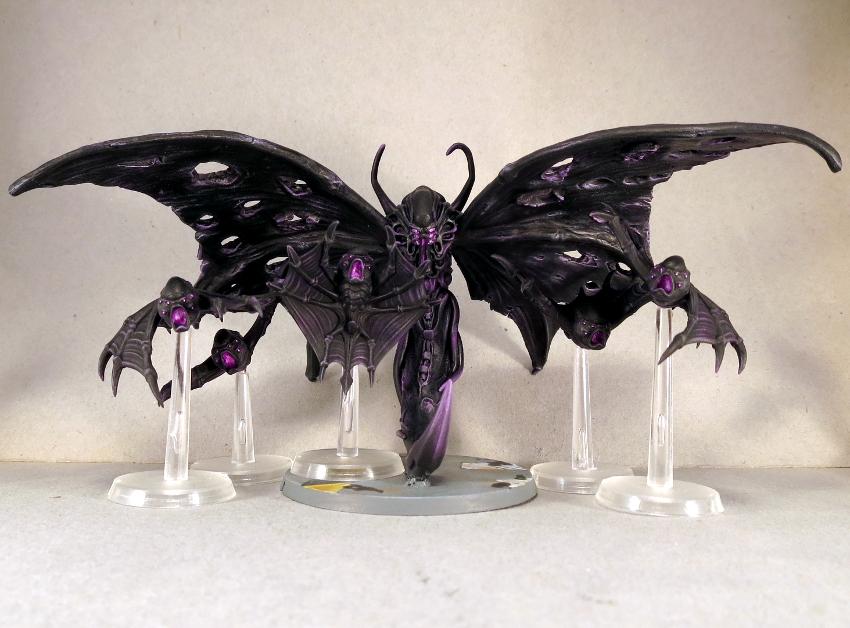
If you would like to build your own hideous flying spectre of doom, you can pick up the Mature Angel kit from the Maelstrom's Edge webstore here. As always, feel free to share your creations on the Comm Guild Facebook page!
For other Maelstrom's Edge modeling articles, including tutorials and walkthroughs of a wide range of different building and miniature projects, check out the article roundup here.
Karist Reaper Cadre - Card Correction
Posted on Tuesday May 16, 2017 at 10:43am in Tutorials
![]() - by Iain Wilson
- by Iain Wilson
It would appear that the unit card for the Karist Reaper Cadre in this week's article contained a couple of errors that needed to be corrected - The card incorrectly listed the unit as Core instead of Vanguard, and (sadly) the Pulse Lances weren't supposed to be free!
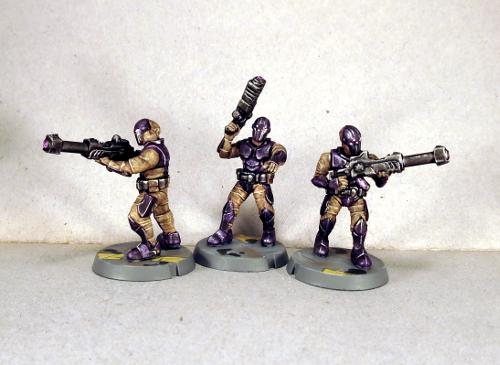
An updated version of the card has now been uploaded, and can be found here.
Those responsible for the error (me) have been severely castigated by, uh, me... and have promised to not do it again.
Karist Reaper Cadre Conversion Tutorial & Unit Card
Posted on Monday May 15, 2017 at 05:00pm in Tutorials
![]() - by Iain Wilson
- by Iain Wilson
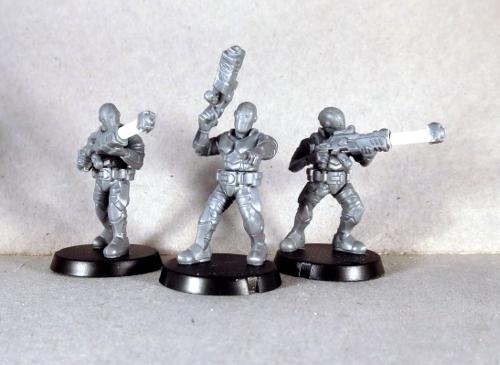
Following on from the conversion article and rules card for the Epirian Scorpion Drone a little while ago, it seemed fitting to show the Karists a little love as well. Sneaky, sneaky love, in the form of the Karist Reaper Cadre. Armed with a sniper variant of the Karist Pulse Carbine, Reapers arrive in advance of the main force and are tasked with removing problematic opponents before the regular troopers have to deal with them.
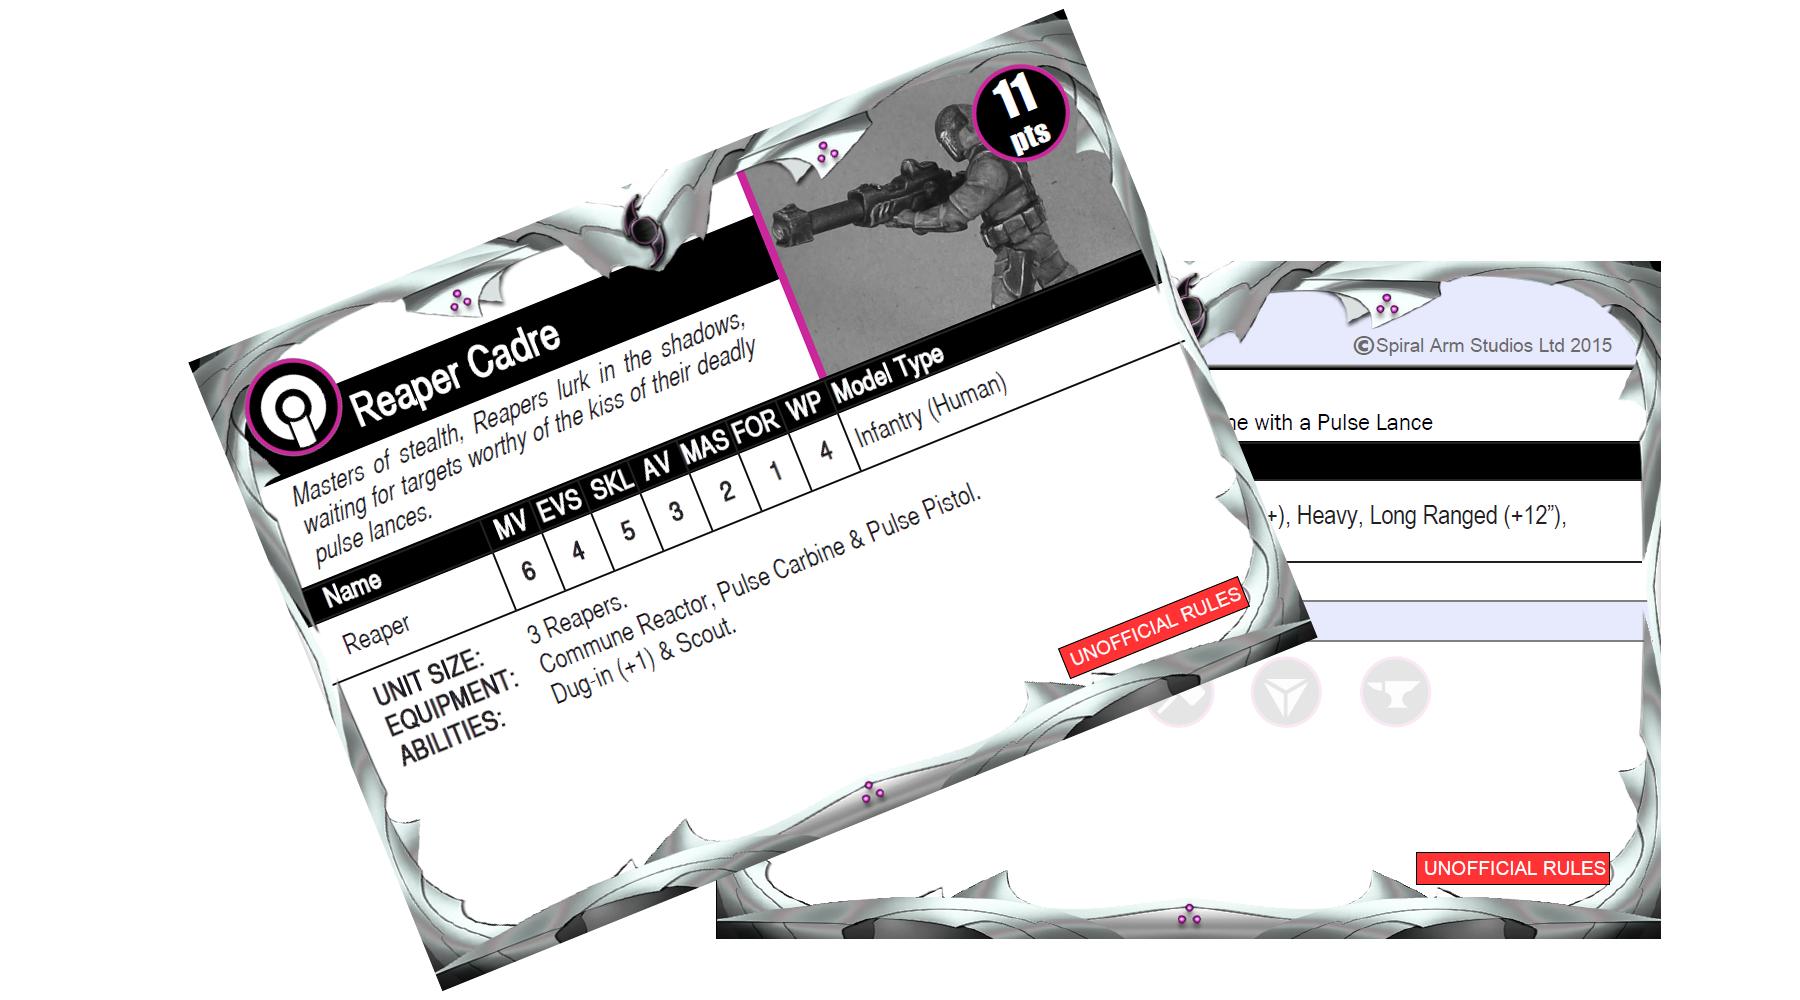
Here, you'll find instructions for building the Reapers' fearsome Pulse Lance, and unofficial rules for running this unit in your games.
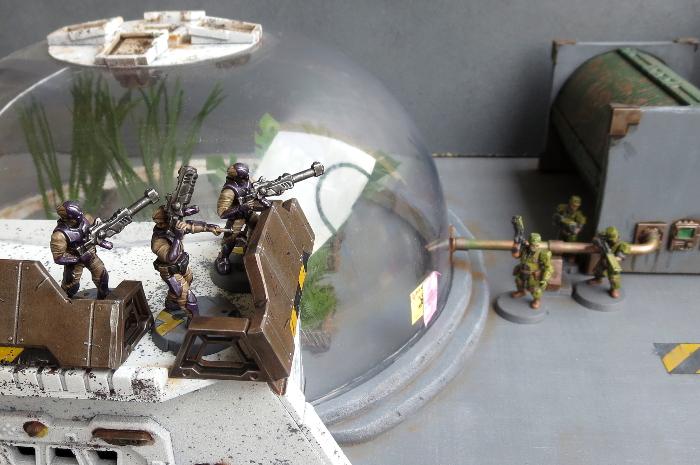
I've based the Reapers on the Karist Trooper, with the shoulder pads left off and the collar trimmed down to represent their lighter armour.

The unit comes with Pulse Carbines by default, but up to two models can be upgraded to have Pulse Lances. To build each lance, you will need two Pulse Carbines. You will also need some 1mm plastic rod (plastruct or similar) and some 2.5mm plastic tube.
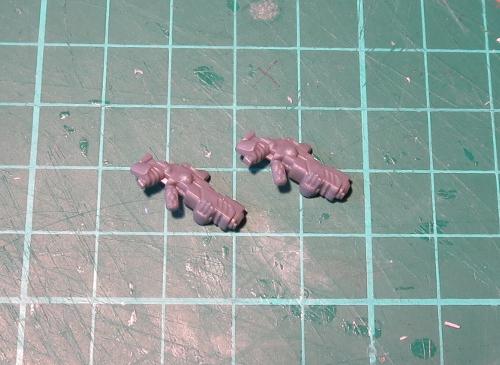
Start by cleaning off any mould lines, and then you will need to drill a 1mm hole into the barrel of one of the pulse carbines. Use a sharp knife to prick a guide hole into the centre of the barrel, and then drill in 3-5mm with a 1mm drill bit.
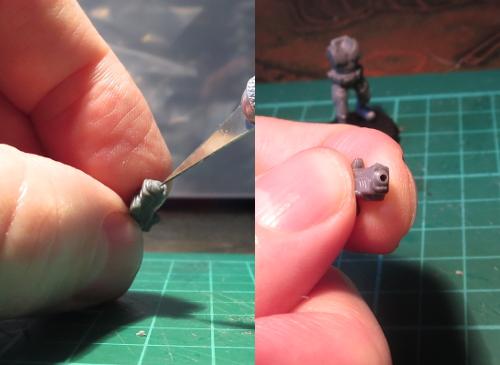
Then use a sharp knife or a file to remove the barrel completely, so the front of the weapon is flat. You do this after drilling, as it's easier to find the right position for the drill while the barrel is still there.
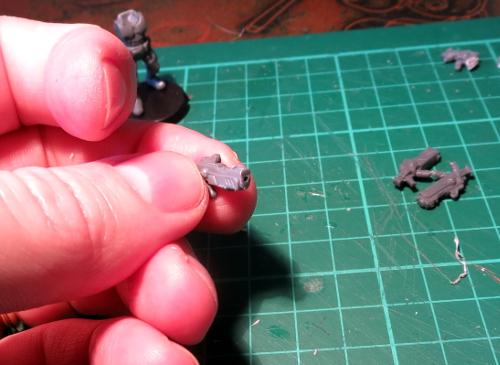
Take the other carbine and cut the front end off just behind the front sight, where there is a groove running across the top of the weapon.
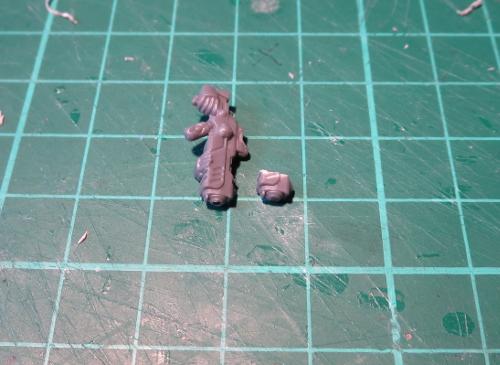
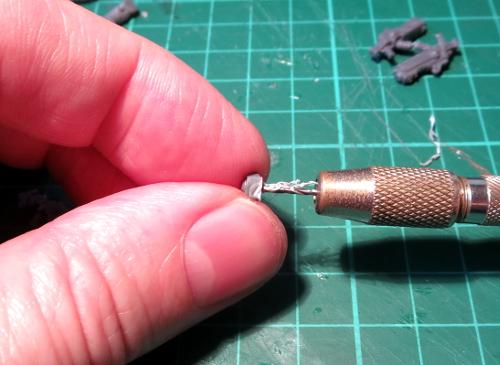
Drill a 1mm hole into the back of this piece, in line with the centre of the barrel. If you drill out your pulse weapon barrels, you can just drill all the way through.
Trim off the leftover pieces of stock around the bottom and sides.
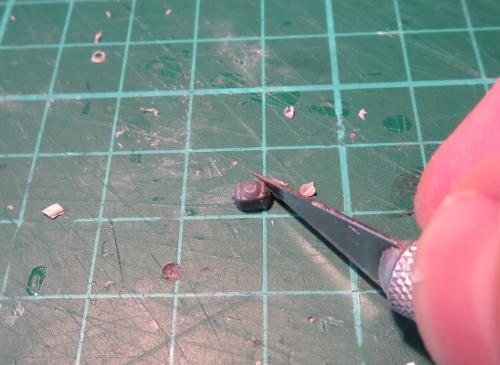
Cut a piece of the 2.5mm tubing around 7mm long - the exact length isn't important, so long as you're consistent with it on all of your lances. There are specialist tools out there for cutting plastic rod and tubing square, but here's the quick and easy method: Grab a cutting mat with a grid pattern on it. Lay the plastic tube along on of the grid lines. Line up where you want to cut with one of the perpendicular lines, and sit the knife blade on top, also lined up with the grid. Now, gently press down with the knife as you use your other hand to roll the tube forwards across the mat. Don't stress if the knife doesn't go through in one go, just roll the tube backwards and forwards a couple of times if necessary without lifting up the knife off the tube. The rolling motion causes the blade to scribe a neat ring around the tube, and when the knife makes it through to the centre your cut piece will pop off with a nice, square end.
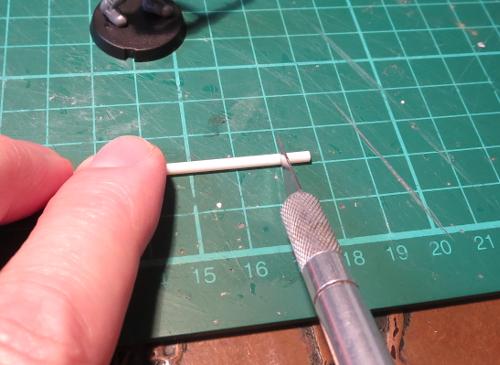
Cut a piece of the 1mm rod that is 3-4mm or so longer than your piece of tube. Glue this into the barrel hole you drilled in the first carbine.
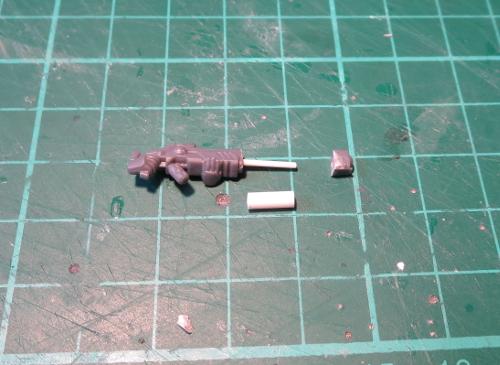
Check for length before gluing the rest in place - Slide the tubing over the 1mm rod, and then dry-fit the 2nd rifle barrel to make sure that it sits flush against the end of the tube. If necessary, either drill out the hole a little more or trim down the end of the rod so that everything sits snug, and then glue it all on place.
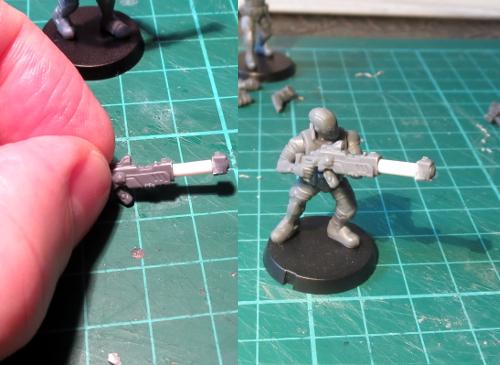
The finished unit, ready for painting:
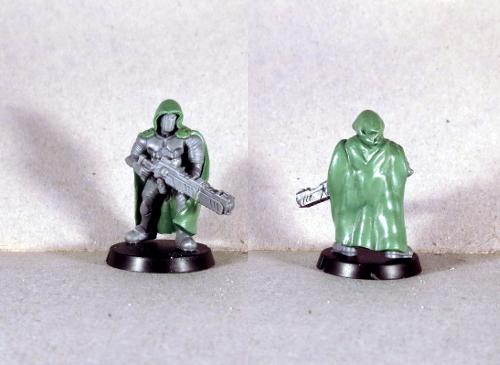
For an alternate take, I built the below version with a sculpted cloak and with a lance that uses one Pulse Carbine from the Trooper sprue, and a front half of a carbine from the Faction Expansion Sprue - that version of the carbine doesn't have hands modeled on, so is easier to use for this. This is a little less fiddly than the plastic tube version above, but doesn't stand out quite as much from the carbine.
If you would like to use the Reaper Cadre in your own games, you can download an unofficial rules card here, and you can pick up the Karist Trooper kit needed to build it from the Maelstrom's Edge webstore here
As always, feel free to share your creations on the Comm Guild Facebook page!
For other Maelstrom's Edge modeling articles, including tutorials and walkthroughs of a wide range of different building and miniature projects, check out the article roundup here.
Tags: conversion karists modeling rules tutorial
Background Fiction - The Kariman's Breath
Posted on Saturday Oct 22, 2016 at 05:00pm in Fiction
The origin of the Karist Enclave dates back to the eruption of the Maelstrom itself. When the disturbance first exploded into being near the galactic core, hundreds of worlds in the dense centre of the galaxy were quickly wiped out, before many knew what was happening. Few escaped that initial violent expansion, as cybel tunnels ruptured and sublight craft were overtaken by the Maelstrom’s first wave.
A fraction ahead of the event horizon, a small spacecraft named Kariman's Breath succeeded in escaping from the galactic core worlds. Carrying a few hundred people, the ship was in transit through one of the cybel tunnels at the edge of the core when the Maelstrom erupted. Although they were just outside the destroyed region, the tunnel they were in ruptured, throwing the ship into deep space between worlds. Their shields were overloaded by the energy storm, flooding the decks with a strange energy.
Exposure to the energy of the cybel tunnels ordinarily causes burns and ultimately death, but the Fourteen survivors of the Kariman’s Breath didn't die when this energy washed over them. Instead the surviving crew and passengers reported a religious, transcendent experience. Some say that there was a difference of opinion between the ship’s inhabitants, that the experience was just a hallucination and that the early Enclave members killed those who disagreed with their interpretation. Whatever occurred in that moment, upon the re-emergence of the Kariman’s Breath into civilisation, all aboard had converted to the idea that becoming one with the Maelstrom would lead to their ascension to a higher plane of existence.
Isolated and unable to contact the rest of humanity, and suffering from their exposure to the energy, the ship’s inhabitants struggled to keep the ship going. Determined to pass on their revelations to others, they kept the ship limping through the tattered remains of the near-core. Desperate for supplies, they happened upon a small planet far from the plane of the galaxy - Schar's World. Because of the vast quantities of precious metals in the star system, it had been settled despite its distance from the main cybel trade routes, but the scattered population of the mining world was poor and downtrodden, kept under the control of a corporate dictatorship terrified by the Maelstrom's destruction of their superiors.
A few hundred million souls lived on the planet, fearful of the future and grief stricken at leaving their old lives in the past. When they realised the source of the small spacecraft, all were eager to talk to the survivors about their experience in an attempt to calm their own fears. The fourteen survivors of the Kariman incident were unified by their experience, both in the moment the Kariman's Breath was tossed on the crest of the Maelstrom and their long months of isolation afterward. The Fourteen came out with a fervent belief that the Maelstrom was a tool for ascendance rather than destruction. They committed their lives to promoting their miraculous discovery, and showing people how they too could reach enlightenment. As their new religion spread on Schar's World, the Fourteen grew to become the revered leaders of the movement. As the believers shared their philosophy throughout the planet they gained a name - The Karist Enclave.