Entries tagged [secdef]
New Epirian STL Release - SecDef Boostpack Troops!
Posted on Thursday Jul 11, 2024 at 05:32am in The Epirian Foundation
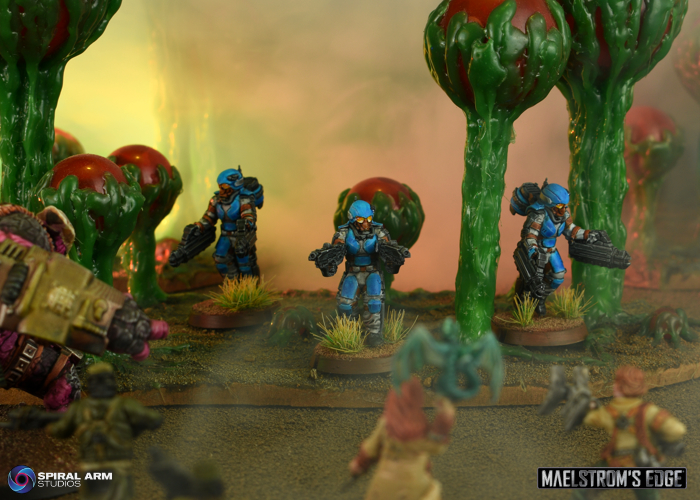
A SecDef Rapid Intervention Team from the Forthrast Reconnaissance Division assaults a patrol of Broken insurgents.
This digital model pack contains STL files for 5 Epirian SecDef Boostpack Troops, used in Epirian forces as Rapid Intervention Teams. Includes both supported and unsupported versions, and multiple equipment options.
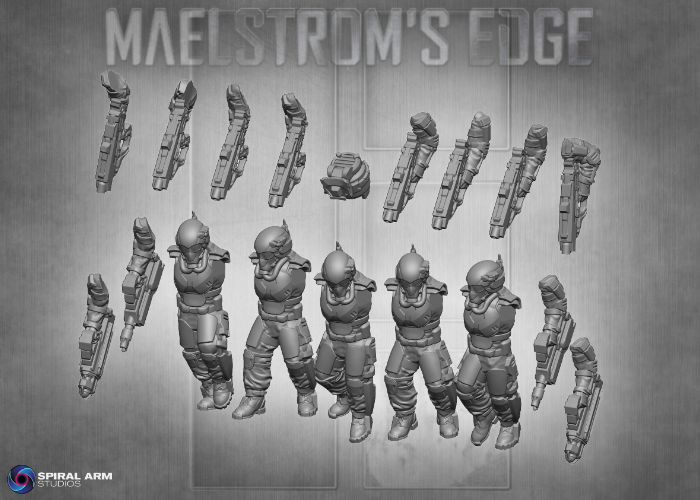
The included components.
You can find the rules for using SecDef Rapid Intervention Teams in your Epirian force in the downloads section of the Maelstrom's Edge website here.
Start building your elite army of defensively secure doom by grabbing your troopers from the webstore here!
New Release: Epirian SecDef Character Model STLs!
Posted on Thursday Dec 01, 2022 at 05:00pm in Models
SecDef Medics are combat veterans who have received additional training and equipment to administer first aid in the field. Known for being level-headed under fire, medics accompany SecDef tactical teams in the field, where they need to be equally competent at using their carbines or treating wounded squadmates.
Originally released in resin, these two SecDef character models are now available to purchase as STL files for 3D printing, from the Maelstrom's Edge store here!
This digital pack includes both supported and unsupported files, and two different weapon options for the Lieutenant.
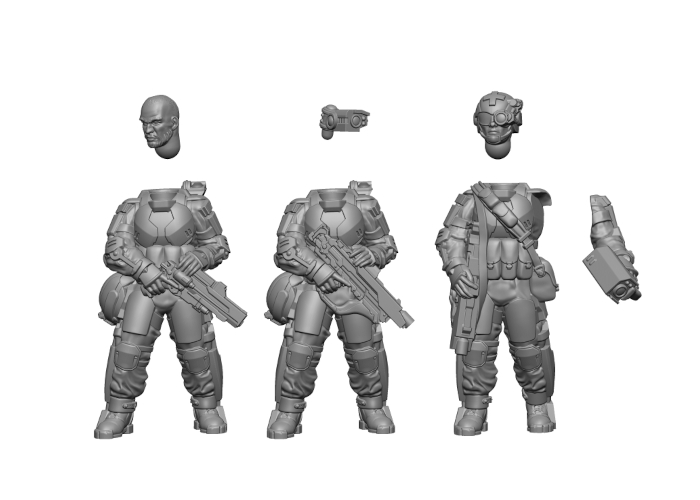
The included parts.
You can find the rules for fielding these models in the downloads section of the Maelstrom's Edge website here.
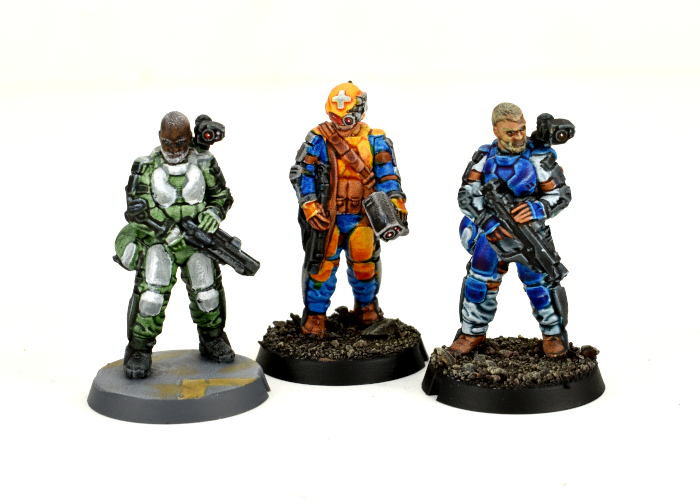
3D printed examples, painted to a tabletop-ready standard - printed on an Anycubic Photon using Siraya Tech Fast resin at 50μm using Lychee slicer.
Printing results will vary depending on your printer, resin and settings.
Start building your elite force of corporate doom by grabbing some SecDef models from the Maelstrom's Edge webstore here!
Tags: epirian lieutenant medic secdef stl
Faction Spotlight: The Epirian SecDef
Posted on Friday Oct 28, 2022 at 05:00pm in The Epirian Foundation
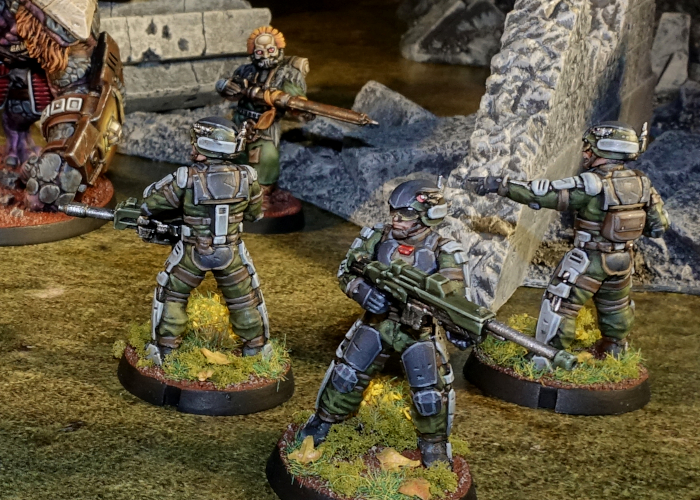
A SecDef unit moves in on a Broken battle line.
SecDef soldiers wear augmented power-assisted exoskeletons, with servo motors boosting the power of their arms and legs. As well as enabling antigrav aerial insertions from high altitude, the exoskeleton also allows them to wear thick ballistic armour without losing full mobility or movement. Their helmets are equipped with state-of-the art targeting and threat-identification heads-up displays, which when coupled with their years of advanced training and experience gives them an unparalleled instinct for tactical action on the battlefield. SecDef infantry sport the most advanced maglock weaponry produced by Araldyne Systems. The superior craftsmanship and state-of-the-art materials in an Araldyne AR60 assault rifle or G20 pistol makes it lighter to hold and more precise, with targeting optics linked into their helmets and a more expensive deadlier armour-piercing round made from rare earth metals. A squad can be supplemented with sniper or machine-gun armed specialists for specific combat roles, whilst the SecDef Annihilator team, armed with two Araldyne CG100 Chainguns, is capable of taking on even the most heavily emplaced fortifications. The combination of intense training, advanced exoskeletons and cutting-edge weaponry makes the SecDef the finest fighting forces in the Epirian Foundation - or for those with the resources to purchase their services.
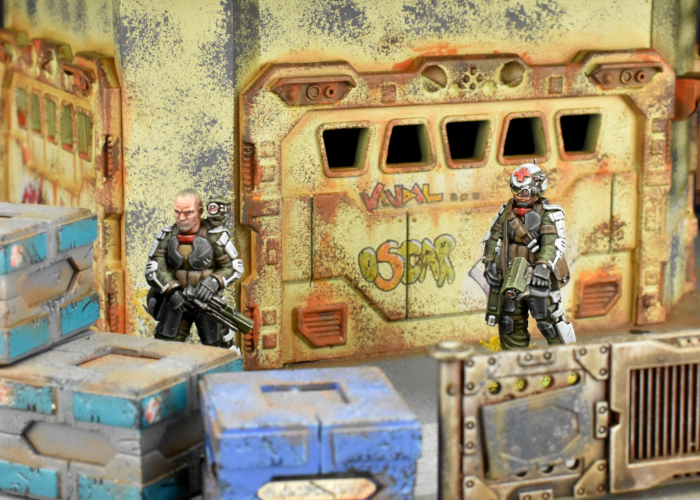
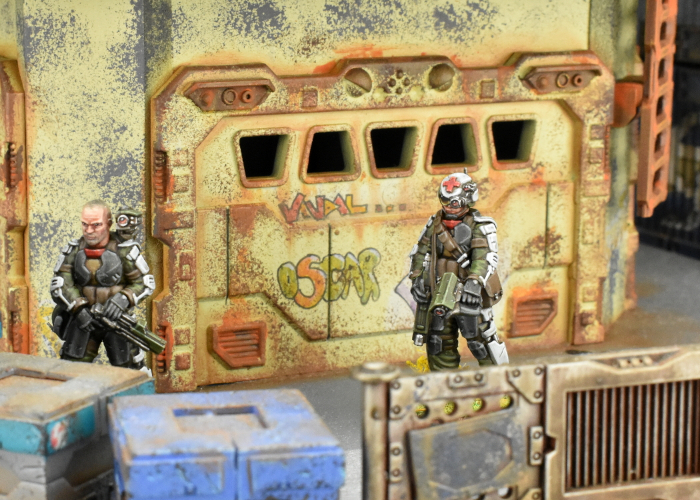
A SecDef Lieutenant (left) and Medic, holding a strategic location
Promoted from amongst the most capable veteran sergeants, SecDef lieutenants are level-headed combat experts on both a tactical and strategic level with extensive financial and material resources to hand. Often taking on the most difficult (and therefore highest paying) missions with their platoons, the aim of most lieutenants is to accrue enough backpay to purchase a field commander commission, and the heavy combat rig that goes with that position.
SecDef Medics are combat veterans who have received additional training and equipment to administer first aid in the field. Known for being level-headed under fire, medics accompany SecDef tactical teams in the field, where they need to be equally competent at using their carbines or treating wounded squadmates. Equipped with an advanced diagnostics and treatment device and requiring weeks of additional training, medics represent a not-insubstantial investment for SecDef Commanders. While most still attribute significant cost savings to a medic's ability to save the lives of expensive SecDef troopers, the return on investment tends to be carefully monitored by SecDef administration. It's not uncommon for units to be refused additional medics where higher-than-normal attrition rates suggest that high recruitment costs would not be sufficiently reduced by the presence of medical personnel.
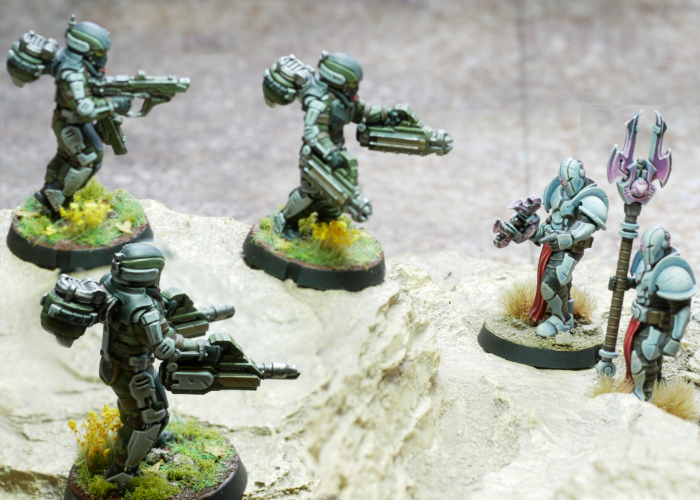
SecDef Rapid Intervention units are experts at speedy assaults.
SecDef forces excel at rapid insertions and mobile strikes against enemy positions. Sometimes though, even these elite troops run up against opposition that is too well entrenched for a normal assault. Against these targets, boostpack-equipped Rapid Intervention Teams are brought to bear. Selected from amongst the most skilled SecDef veterans and armed with twin Araldyne CB22 Assault Carbines, Rapid Intervention Teams use the greater mobility afforded by their boostpacks to outflank and surprise enemy defenses, quickly overwhelming them with a hail of deadly short-ranged firepower. Where an extra punch is required, Rapid Intervention Teams are equipped with Araldyne CF13 Clingfire Sprayers or FG19 Flakk Guns: more effective and streamlined versions of these ubiquitous weapons, typical of the improvements Araldyne is able to create.
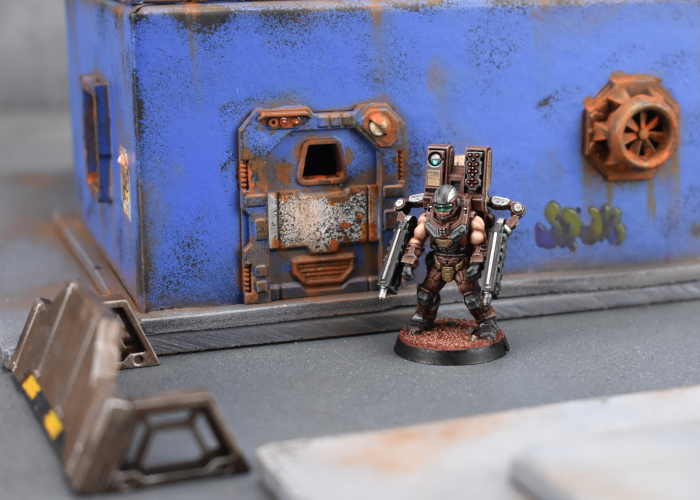
SecDef Field Commanders are a one-man army.
The SecDef value nothing more than completing the job they're assigned to in a timely manner, regardless of what it takes to do so. SecDef Field Commanders are the ultimate representation of that mantra. With prototype machine-assisted armor with the strength of several men, firepower equal to a whole squad and advanced targeting and comm systems allowing them to monitor several different feeds simultaneously in real-time, Force Commanders have all of the tools necessary to decimate the enemy.
As with all SecDef units, Field Commanders tend to carry high-end sophisticated Araldyne weaponry, but in their case, these weapons are mounted onto advanced machine-assisted arms, allowing multiple weapons to be fired simultaneously with ease. Each Field Commander is given complete leeway to choose their own weapons load-out to best support their particular fighting style: Hydraulic Fists to rip the enemy apart at close quarters, Araldyne FG19 Flakk Guns obliterate targets at short range, Araldyne LM14 Machine Guns to mow down foes by the dozen and Araldyne LS99 High-Intensity Lasers to melt through even the toughest armor. Not to mention the option to take either back-mounted cluster missile pods or advanced targeting systems.
Dominate the battlefield with your own SecDef force! You can pick up the SecDef model range from the Maelstrom's Edge webstore!
While you're there, you can download the V2 rules from the Trial Rules section of the Maelstrom's Edge website here. The Beta rules documents contain all of the rules for playing V2 games, but keep in mind that these are just 'preview' documents - some rules may be revised based on feedback, and the final layout including background material for the factions and the Maelstrom's Edge universe, artwork and other 'flavor' material is missing.
If you have any thoughts on the new rules, pop on over to the Comm Guild Facebook group, or start up a thread in the Maelstrom's Edge section on the Dakka Dakka forums. We welcome any feedback, and would love to hear how everyone's forces stack up in the new rules!
Modeling Spotlight: Speedpaint SecDef
Posted on Wednesday May 18, 2022 at 05:00pm in Tutorials
 - by Iain Wilson
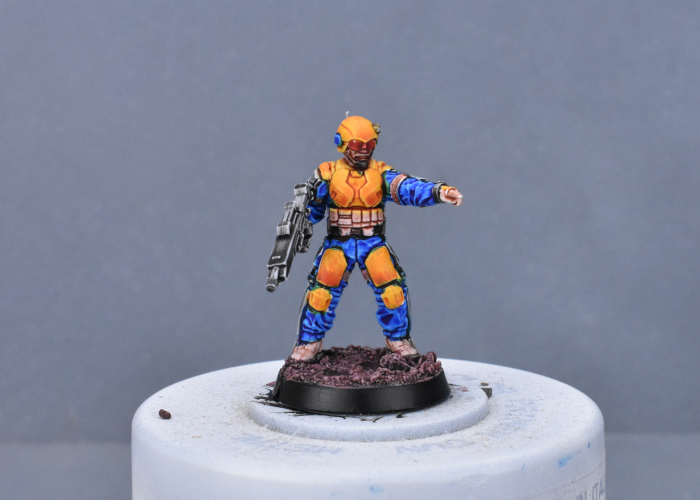
My long-awaited Army Painter Speedpaint Starter Set finally arrived last week, and I was impatient to give them a test run. I've had a bunch of plastic SecDef models assembled for a while, for a little side-project, and figured they would be perfect for the job. So I grabbed the first squad of models out of the hobby box and set to work!
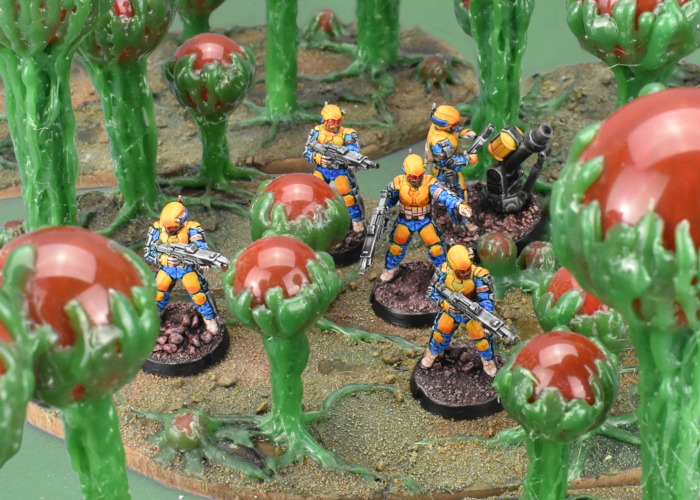
I started off with a basecoat of Army Painter Matt White spray. I did experiment on a couple of initial test models with a plain white basecoat and a zenithal base using white and purple, but decided that the zenithal basecoat didn't make enough of a difference to the end result to be worth the effort.
(A zenithal basecoat is where two layers of colour are used - a darker colour in the recesses/undersides of the mode, and a lighter layer sprayed down from above. This can be handy when combined with certain painting methods, particularly using thinner 'glazing' paints to accentuate shading and highlights.)
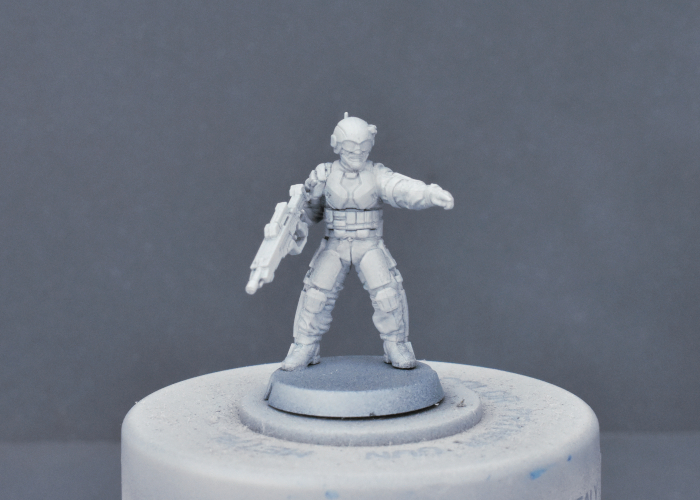
For the uniform, I went with Highlord Blue, applying to any visible cloth areas and trying to avoid too much spillover onto the armour plates. I also added the blue to the raised surround on the helmet.
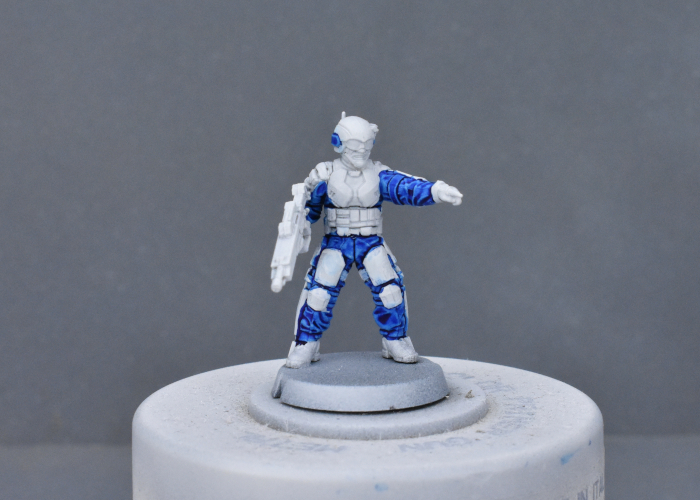
After a quick touchup where necessary with some Matt White, I painted a layer of Hardened Leather over pouches, straps, boots, gloves and face, and then went back over the face with Crusader Skin. The double layer on the skin was to give a darker skin colour - my initial test showed the Crusader Skin to be a bit more washed out than I wanted, but layering it over the Leather gave a nice, dark tone.
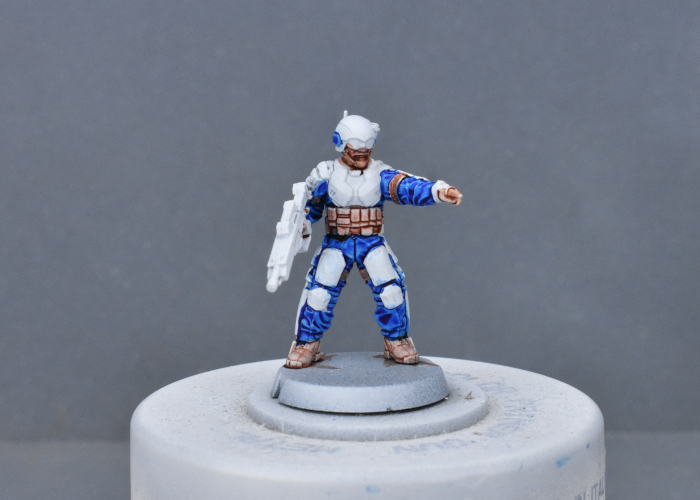
Next up, I painted over the weapon, belt, exoskeleton, and helmet commlink, targeter and chinstrap with Gravelord Grey.
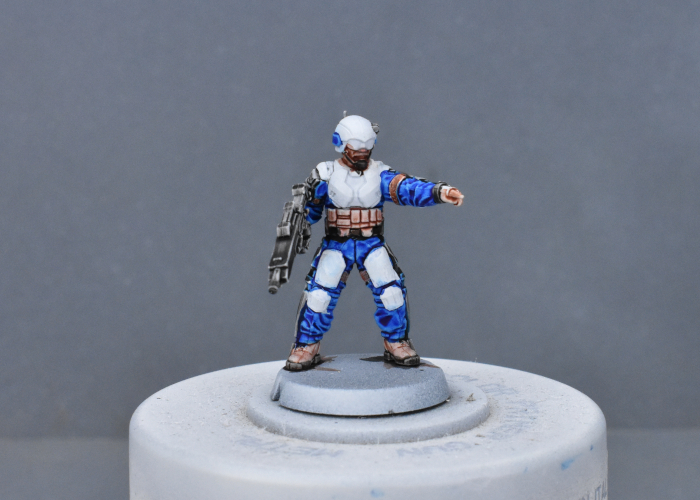
For the armour plates and helmet, I went with a coat of Zealot Yellow. This settled nicely on the lower areas of the plates, providing a lovely contrast against the blue uniform.
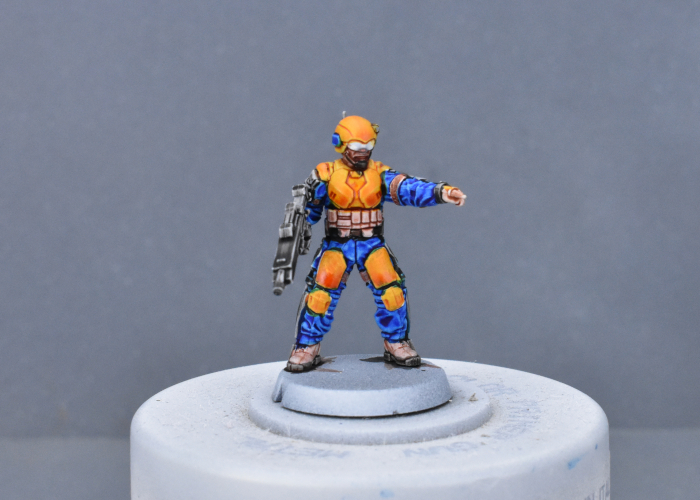
To finish up, I added some Blood Red over the goggles, and while that was drying added some gravel mix to the base. Without a dark brown in the starter set, I used a 1:1:1 mix of Hardened Leather, Blood Red and Hive Dweller Purple over the gravel, giving it a drybrush of Tanned Flesh and Ash Grey (regular acrylic paints) when it dried. With a quick run of Matt Black around the base rim and some white specular highlights on the goggles, he was ready for the table.
The unit assembled - regular SecDef models, with a custom made energy mortar using some plastic tubing and parts from the 2nd Maelstrom's Edge terrain sprue.
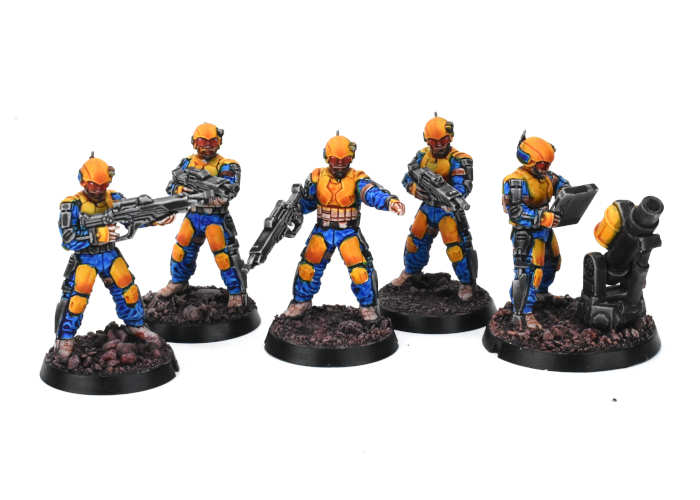
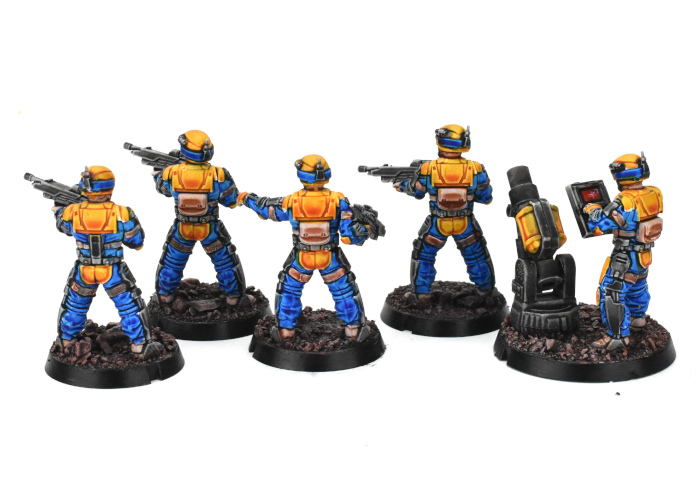
They're not perfectly neat, but for a quick, table-ready paintjob these paints are fantastic, giving some perfectly acceptable shading and highlights with a single coat. I'm looking forward to getting the rest of this force painted up!
To have a go yourself, pick up the plastic, multi-part SecDef kit from the Maelstrom's Edge webstore!
While you're there, you can download the V2 rules from the Trial Rules section of the Maelstrom's Edge website here. The Beta rules documents contain all of the rules for playing V2 games, but keep in mind that these are just 'preview' documents - some rules may be revised based on feedback, and the final layout including background material for the factions and the Maelstrom's Edge universe, artwork and other 'flavor' material is missing.
For other modeling ideas, tutorials, army spotlights and conversion walkthroughs, check out the Hobby section of the Maelstrom's Edge website here.
What are you working on? We would love to see your models and terrain in the Comm Guild Facebook group!
Model Spotlight: SecDef Lieutenant
Posted on Monday May 10, 2021 at 05:00pm in Models
You can find this fantastic resin miniature in the Maelstrom's Edge webstore here.
New resin release: Epirian SecDef Medic!
Posted on Monday Jul 01, 2019 at 05:00pm in The Epirian Foundation
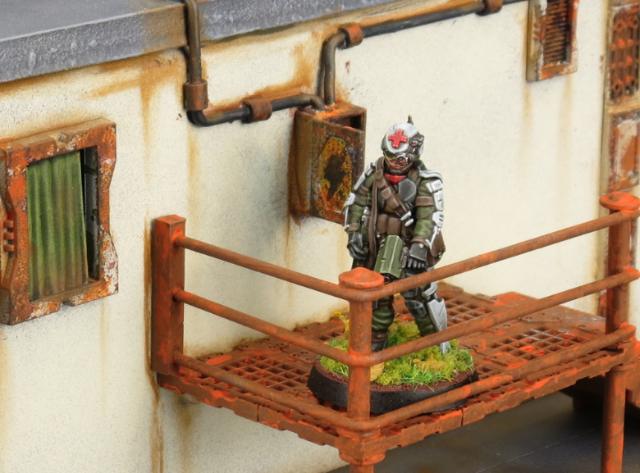
SecDef Medics are combat veterans who have received additional training and equipment to administer first aid in the field. Known for being level-headed under fire, medics accompany SecDef tactical teams in the field, where they need to be equally competent at using their carbines or treating wounded squadmates.
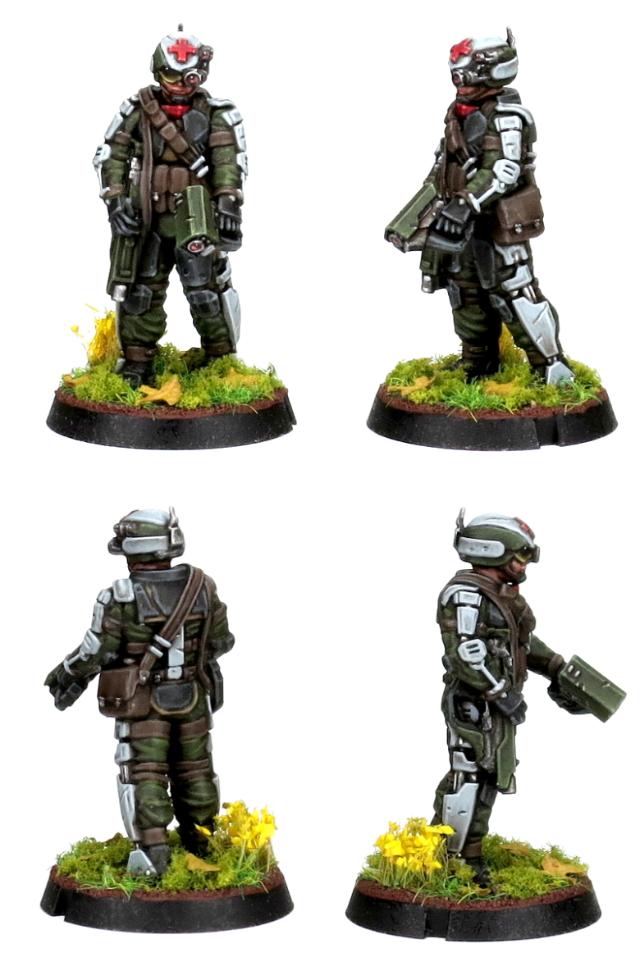
Equipped with an advanced diagnostics and treatment device and requiring weeks of additional training, medics represent a not-insubstantial investment for SecDef Commanders. While most still attribute significant cost savings to a medic's ability to save the lives of expensive SecDef troopers, the return on investment tends to be carefully monitored by SecDef administration. It's not uncommon for units to be refused additional medics where higher-than-normal attrition rates suggest that high recruitment costs would not be sufficiently reduced by the presence of medical personnel.
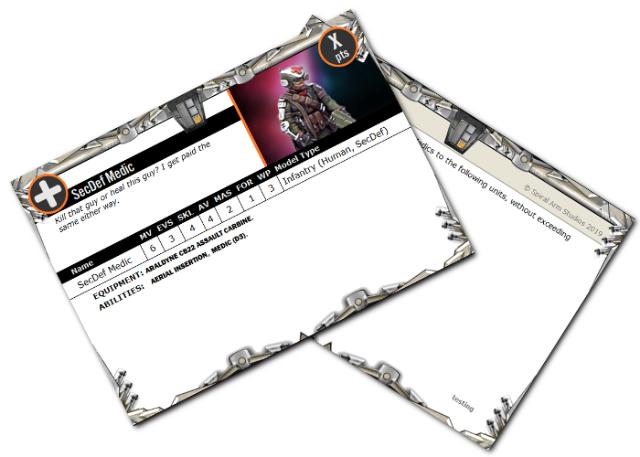
SecDef Medic Rules Card
Painting Tutorial: Quick-Painting a SecDef Lieutenant
Posted on Monday Jun 17, 2019 at 05:00pm in Tutorials
I've been playing around with speed painting a lot lately (so much to paint, so little time!) and have been having a lot of fun experimenting with inks to achieve quick and easy shaded, table-top level results. This week I decided to see what I could do with some Army Painter Quickshades and the new SecDef Lieutenant model.
To start out, I basecoated the model with a flat, cream coloured spray.
I then gave everything except his head a coat of Military Shader.
Once that first layer of ink had dried, I went over the armour plates with a second coat of Military Shader, and boots, pouches and gloves with two generous coats of Mid Brown. On the pistol and the exo-skeleton on the arms and legs, I used Purple Tone, which over the green resulted in a nice, slightly bluish-tinged grey.
I decided that there wasn't quite enough contrast on the plates and exo-skeleton, so went over them with a coat of Dark Tone.
For his head, I painted on a generous coat of Flesh Wash.
To finish up, I painted in his eyes with fine, white horizontal lines, and small dots of black in the middle. For his beard and some characterful head-stubble, I added a thin coat of Dark Tone. I also went over the lens in the targeter and the helmet lenses with white, then a layer of Red Tone, and then a highlight dot of white. Finally, I added some fine gravel to the base, and painted it with Army Green, a coat of Strong Tone, and then a light drybrush of Ash Grey, with a couple of grass tufts added for colour.
To take the paint job that little bit further, he could use a light edge highlight on the armour plates and exoskeleton, but for a quick, rough and ready job he's all set for the tabletop.
To start your own SecDef muster, you can pick up the SecDef Lieutenant, along with the rest of the Maelstrom's Edge model range in the webstore here.
As always, feel free to pop along and share your creations, or ask any Maelstrom's Edge- or hobby-related questions on the Comm Guild Facebook page!
For other Maelstrom's Edge modeling articles, including tutorials and walkthroughs of a wide range of different building and miniature projects, check out the Hobby section of the Maelstrom's Edge website here.
Modeling Spotlight: Epirian SecDef Lieutenant
Posted on Monday Jun 10, 2019 at 05:00pm in Tutorials
The Epirian SecDef received a boost right in the Command slot last month with the release of a resin Lieutenant model. This fleshes the SecDef out into a fieldable Epirian sub-faction in their own right, as you can now build a detachment solely from SecDef units. This week, I'm taking a closer look at this fantastic model, and some of the modeling options available to it.
The SecDef Lieutenant comes in five pieces (ok, six, if you count the base!) - body, head, targeter, and two different hand options equipped with maglock pistol or carbine.
The head and targeter both have ball joints for full movement range, so you can position the targeter lined up with whichever way the Lieutenant is facing.
The head is also compatible with the SecDef plastics, so you can use a regular helmeted head for a slightly more safety-conscious leader. On the below model, I've used a regular SecDef Tactical head, and also clipped the helmet off his belt and glued on a plastic pouch from the Epirian Handler sprue to cover over the clipped detail.
You can also easily swap in alternate heads from elsewhere in the range. Here's a commander with a little more facial hair, for example, with a head lifted from the Broken Infantry sprue.
Carefully sawing through the waist with a razor saw allows you to swap in alternate legs to switch up the posing. Here, I've used a set of legs removed from a SecDef Boostpack Infantry model, and also given him a capped head from the Epirian Contractor sprue.
Of course, the compatible heads work both ways, so you can also swap in the Lieutenant's venerable pate for a regular SecDef Sergeant.
To get some of your own super-soldier action happening, you can pick up the SecDef Lieutenant, along with the rest of the Maelstrom's Edge model range in the webstore here.
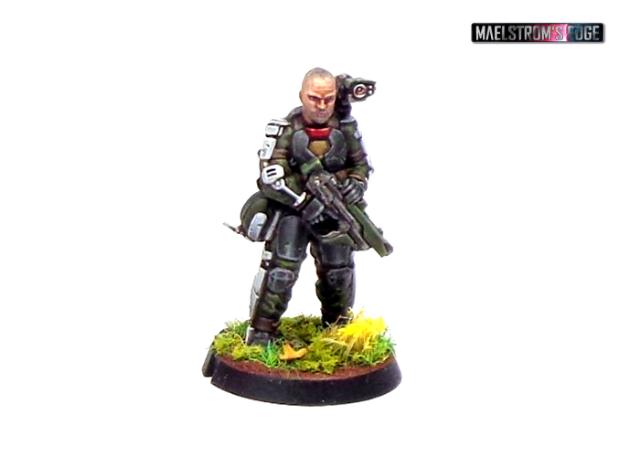
As always, feel free to pop along and share your creations, or ask any Maelstrom's Edge- or hobby-related questions on the Comm Guild Facebook page!
For other Maelstrom's Edge modeling articles, including tutorials and walkthroughs of a wide range of different building and miniature projects, check out the Hobby section of the Maelstrom's Edge website here.
Tags: conversion epirian modeling secdef spotlight
New resin release: Epirian SecDef Lieutenant
Posted on Friday May 24, 2019 at 05:00pm in The Epirian Foundation

Anyone underestimating a SecDef lieutenant is about to pay dearly for his mistake. Promoted from amongst the most capable veteran sergeants, SecDef lieutenants are level-headed combat experts on both a tactical and strategic level with extensive financial and material resources to hand. Often taking on the most difficult (and therefore highest paying) missions with their platoons, the aim of most lieutenants is to accrue enough backpay to purchase a field commander commission, and the heavy combat rig that goes with that position.
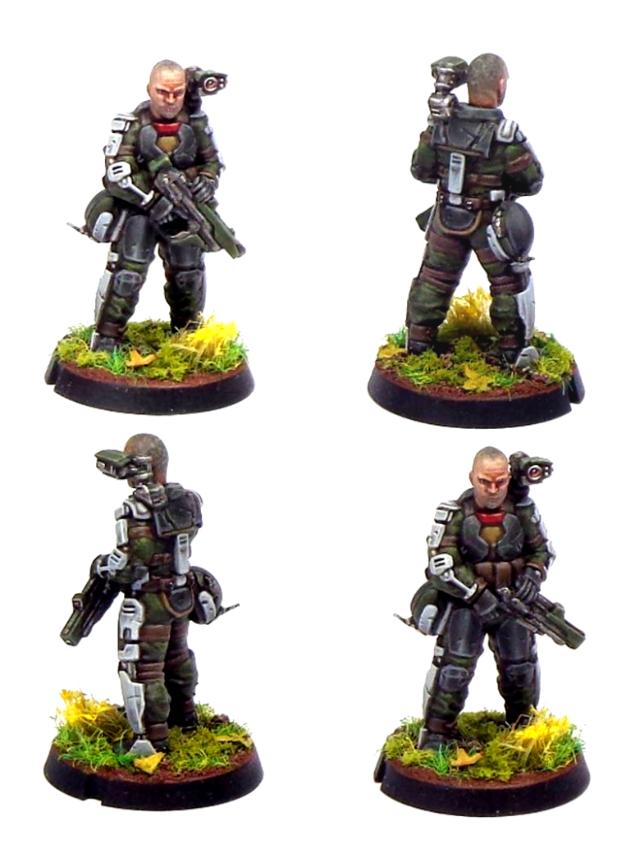
While technically tasked with safeguarding the same corporate goals as every other Epirian division, issues can arise when SecDef units are forced to cooperate with Bot Handler commanders in the field. Their philosophy, character and approach are almost diametrically opposed to that of the average Handler. The SecDef's innate distaste for bots results in them having little faith in the abilities of their robotic allies, having seen them fail once too many in their long careers where they believe proper SecDef infantry would have got the job done. Nevertheless, they are professional enough to let the deadly Hunter Warmechs profit from their shoulder-mounted target designator. Many a foe has perished under a hail of strike missiles shortly after a SecDef lieutenant is inserted into enemy lines, quickly identifying and painting the largest threat.
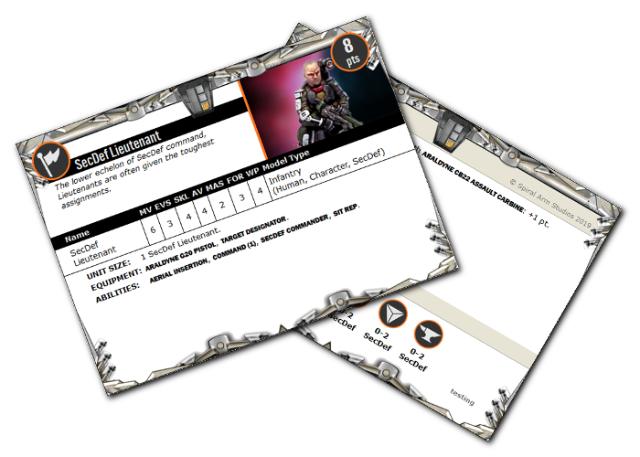
SecDef Lieutenant Rules Card
New resin release: Epirian SecDef Boostpack Specialists!
Posted on Wednesday Mar 06, 2019 at 05:00pm in The Epirian Foundation
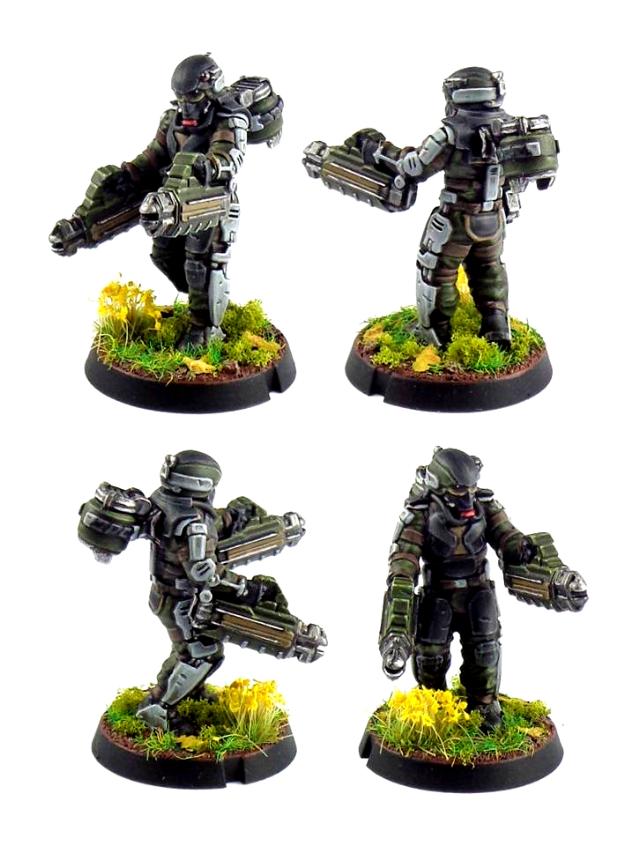
This week sees the addition of some heavier firepower to SecDef Rapid Intervention Teams, with the release of SecDef Boostpack Specialists!
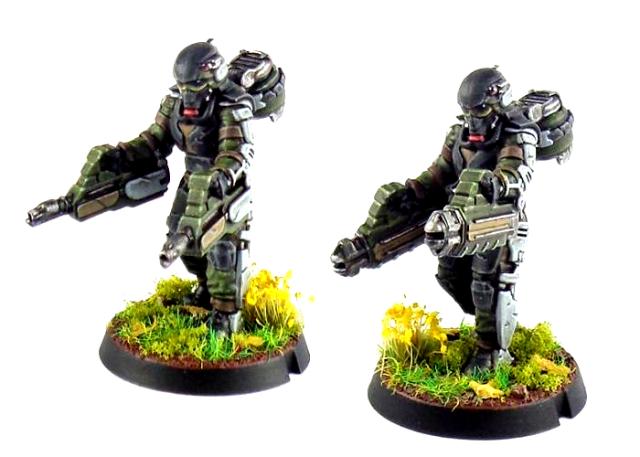
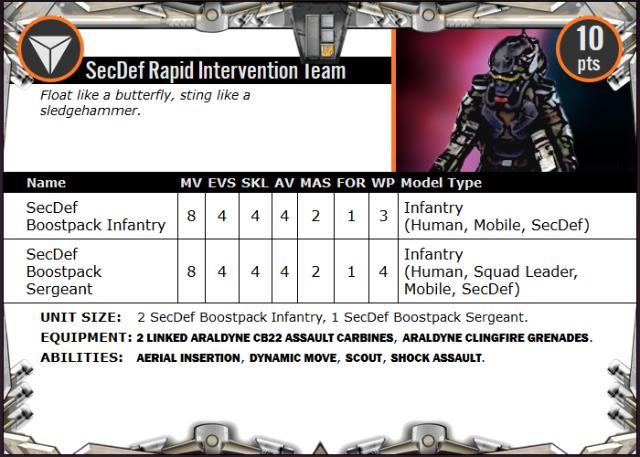
-Click here for the full rules card-
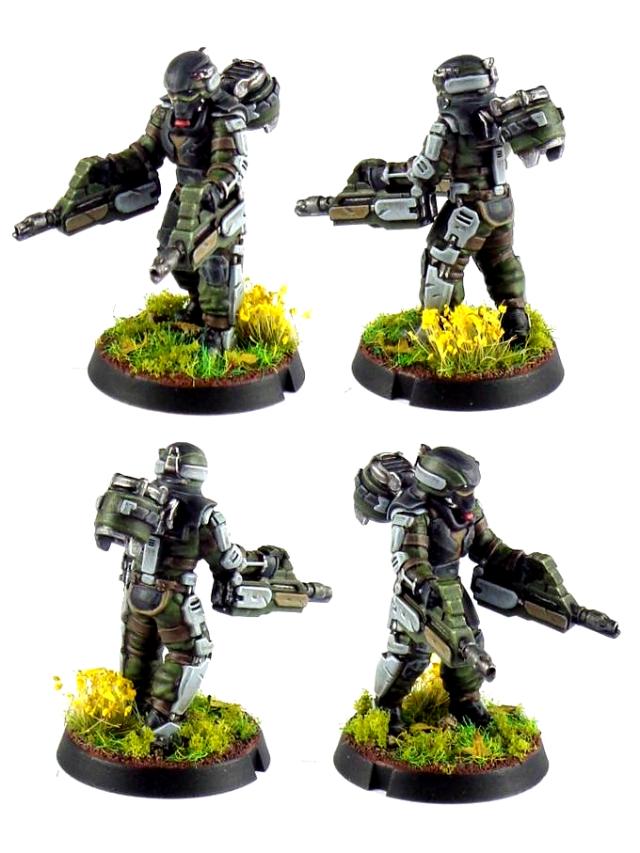
Modeling Spotlight: Epirian Boostpack Infantry
Posted on Monday Jan 14, 2019 at 05:00pm in Models
- by Iain Wilson
Following on from my improbably-mobile Pa'ku conversion, I'm continuing the jetpack theme this week with a bit of a closer look at the Epirian SecDef Boostpack Infantry models released last month.
Released in a pack of three models, Boostpack Infantry take to the table as a SecDef Rapid Intervention Team, where their boostpacks and twin carbines allow them to get in close to the enemy and lay down a withering hail of fire.
The high quality resin kit comes with the body and head as a single piece, with separate weapon arms, boostpacks and grenades. The unit's rules card also gives them access to a couple of special weapon options - these will be coming in a separate release very soon!
Assembly is really straightforward - the boostpack goes on the back, with a handy locator pin slotting into the model's backplate, and the arms go where you would expect, and are fully interchangeable between the three models.
There is no specific mounting point for the clingfire grenades - you can glue them to the belt, chestplate, thighs, or wherever else seems appropriate.
While the armour is the same as the regular plastic SecDef models (aside from the head!), the shoulders are slightly different to allow for the boostpack mounting plate extending up over them. You can sub in arms from the plastic sprue though by removing the small shoulder pad piece shown below in red.
With a little more work, you can create gasmask-equipped SecDef Tactical Teams, by using the plastic arms and filling in the boostpack mounting point with a little green stuff putty.
For a little more leg variety, you can use a sharp hobby knife or razor saw to cut through the bodies just below the belt. This allows you to glue on legs from the plastic SecDef to mix up your boostpack models, or use the resin legs on your regular SecDef teams to add some running models.
SecDef Sergeants have, from time to time, been known to requisition the best gear for themselves. This sergeant has given himself a bit of a boost with a twin-turbine boostpack, made by trimming off the locator pin on the pack and gluing two boostpacks side by side to the model's back.
Finally, why should SecDef have all of the fun? While boostpacks are notoriously unreliable and difficult to keep operational, it seems likely that some Broken chieftains or techs with the right technical knowledge would be unable to resist the lure of the extra speed afforded by a scavenged unit!
To add a Rapid Intervention Team to your Epirian force, you can pick them up along with the rest of the Maelstrom's Edge model range from the webstore here.
As always, feel free to pop along and share your work, or ask any Maelstrom's Edge- or hobby-related questions on the Comm Guild Facebook page!
For other Maelstrom's Edge modeling articles, including tutorials and walkthroughs of a wide range of different building and miniature projects, check out the article roundup here.
Tags: conversion epirian modeling secdef spotlight
New resin Epirian unit: SecDef Rapid Intervention Team
Posted on Thursday Dec 13, 2018 at 06:00pm in The Epirian Foundation
This week sees the release of some new, fast-moving reinforcements for the Epirian SecDef - the Rapid Intervention Team!
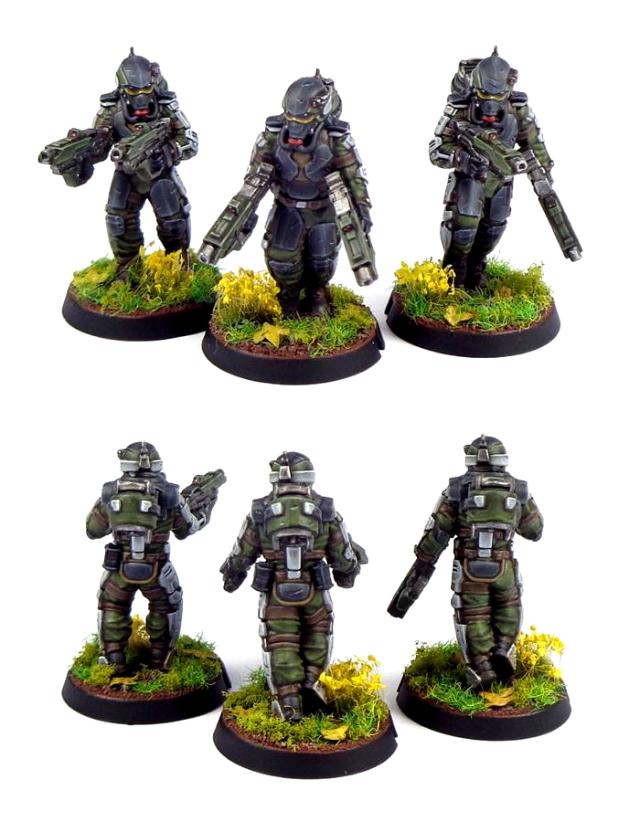

-Click here for the full rules card-
Modeling Spotlight: Epirian SecDef Heavy Weapons Team conversion & rules!
Posted on Monday Sep 17, 2018 at 06:00pm in Tutorials
- by Iain Wilson
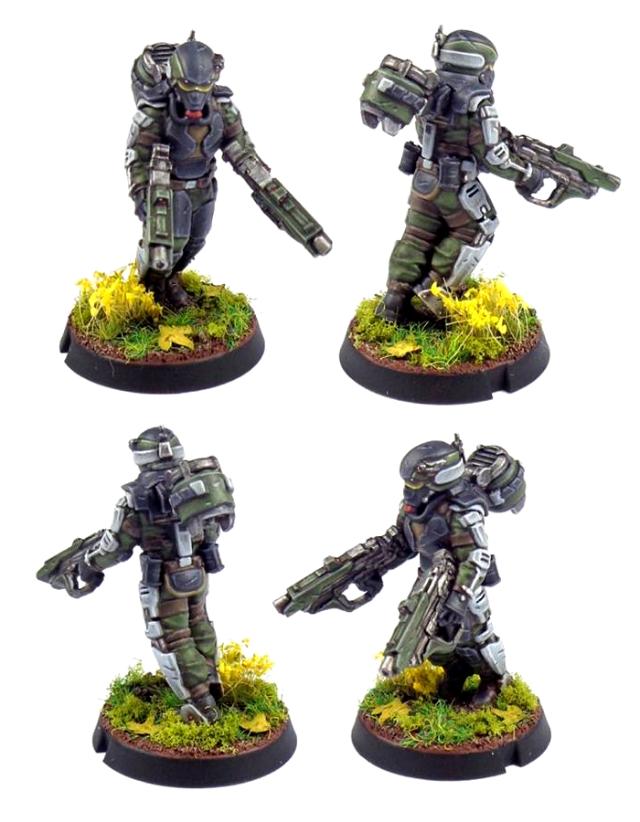
The addition of the SecDef to the Epirian lineup adds a much more 'military' feel to the faction, and I've been having a lot of fun exploring that with the models. I previously added my own homebrew SecDef Lieutenant and Scout Walker unit cards to the force builder (and if you missed the article, you can see how they were built here), and this week, I'm fleshing them out a little more with the addition of a dedicated heavy weapons team, based on the Master Bot Handler exo-suit.
My idea was for a slower-moving, but more heavily-armed team variant, for those situations that call for a little more firepower. With that goal in mind, I grabbed some parts from the SecDef and Master Handler sprues, and went to work!
From the Master Handler sprue, I took a torso and backpack, the weapon support arms and two weapons (I used the flakk guns, but it doesn't really matter which you use as you only want the mounting ring on the back of them). From the SecDef sprue, I took a head, two arms, two legs and a pair of machine guns.
I didn't want these guys to be quite as heavily armed as the Master Handler, so the first step was to remove the missile racks from the top of the backpack. I sliced them off using a razor saw, and cleaned up with a hobby knife to get rid of any rough cut marks.
As the SecDef arms have small shoulder pads on them, I removed the ridges that sit directly over the Master Handler's shoulders on each side of the torso. Otherwise, the arms would wind up sitting too low.
For the weapons, I cut the mounting ring from the back of the Master Handler's guns, and the grip and trigger assembly from the top of the SecDef gun, and then glued the mounting ring to the back of the machine gun's butt.
From there, the body was assembled pretty much as you would expect...
And finally, the weapons were glued onto the outside of the forearms - I didn't bother adding any specific mounting for them, as I figure they would magnetically lock to the SecDef exoskeleton's wristbands. Then I glued the support arms in place, and the model was ready for painting!
The same process works with the chainguns on the SecDef sprue, although in that case I also removed the weapon butt before attaching the mounting rings, to avoid the weapon looking too long against the model's arms.
For the team sergeant, I used a pointing arm, and for something different I put the gun for that arm in a 'standby' position. When he needs it, the support arm would drop it down and it would maglock to his wrist, ready for action.
Of course, pretty models are only half of the story! I have also generated an unofficial rules card for the heavy weapons team, which you can find in the Force Builder section of the Maelstrom's Edge website here.
To build your own heavy weapons team, you can pick up the Master Handler and SecDef sprues along with the rest of the Maelstrom's Edge model range from the webstore here.
As always, feel free to pop along and share your work, or ask any Maelstrom's Edge- or hobby-related questions on the Comm Guild Facebook page!
For other Maelstrom's Edge modeling articles, including tutorials and walkthroughs of a wide range of different building and miniature projects, check out the article roundup here.
Painting Spotlight: 120-point Epirian SecDef Force
Posted on Tuesday Jul 24, 2018 at 12:49pm in Models
- by Iain Wilson
Last week, I built a 120-point force using the fantastic new Epirian SecDef models. If you missed it, you can find the article here: http://www.thecommguild.com/roller/thecommguild/entry/modeling-spotlight-120-point-epirian.
This week, my aim was to get this force painted up to a basic tabletop standard. This can be helpful for getting past the 'sea of grey' stage and allowing you to field a painted army faster than might happen if you're painting each unit up to a fully detailed level, or if you just want a quick and easy paintjob on your army and aren't interested in getting bogged down in detail work. The end result isn't going to win any painting awards, but looks fine on the table and can be updated later.
So, the painted force:
For painting up armies quickly I tend to rely heavily on ink washes, as they are so handy for adding shading quickly (if sometimes a little messier than doing it by a more manual and time-consuming method would allow for). This force was no exception to that. I started with a basecoat of Army Painter Army Green spray, and when that was dry added a wash of Army Painter Military Shader.
When the wash was dry, I went over the armour plates with Army Painter Ash Grey, the exo-skeleton sections in Vallejo Basalt Grey and the weapons on Vallejo Heavy Charcoal, before adding a layer of Army Painter Dark Tone over these areas with a detail brush. Any slight spillover onto the green is fairly unnoticeable, but excess wash was quickly removed with a wet brush where necessary.
On the Ash Grey armour plates, rather than covering them completely with the wash, I just painted a thin coat of the wash onto the lower surfaces of the plates, or on the innermost half of the thigh plates.
I then painted the face and neck with Citadel Tallarn Flesh, chosen by virtue of being the first flesh tone I came across in my paint box. I also painted the flesh tone over the goggles, to provide a nice base layer for the red that would come later. The pouches, straps, rifle stocks and boots were painted with Vallejo Heavy Brown and then the flesh and brown parts were washed with Army Painter Strong Tone.
Finally (for now) I painted the base with Vallejo Neutral Grey and the goggle lenses with Army Painter Pure Red. The helmet chinstrap had originally been painted in the Heavy Brown, but after the wash I found that the tone was too similar to the flesh colour, so I went over the brown with black, and also used a black fineliner pen to darken the lower frame of the goggles, around the bottom of the lenses and up the nose. I also used the Neutral Grey to add a quick drybrush over the black on the weapons to pick out the detail - I wanted them dark, but to still be recogniseable on the table.
At this point, all of the main colours are in place and they're ready for the table. To finish them off later, I can add a highlight to the green with some light green, some light brown or bone on the brown parts, and add some shading and a reflective spot on the goggle lenses, which gets something that looks more like this:
I will also need to go through and drybrush the bases and add some detail so that they match my other urban bases.
So, the 'finished' units:
Lieutenant
Tactical Teams
Snipers
Annihilator Teams
Recon Walker
The gang all together:
To start assembling your own SecDef force, you can pick up the Secdef sprue, or any of the rest of the Maelstrom's Edge model range, from the webstore here.
As always, feel free to pop along and share your work, or ask any Maelstrom's Edge- or hobby-related questions on the Comm Guild Facebook page!
For other Maelstrom's Edge modeling articles, including tutorials and walkthroughs of a wide range of different building and miniature projects, check out the article roundup here.
